POS - Table Booking User Guide
1. Overview
This document provides comprehensive instructions for managing table reservations in the POS system. It includes step-by-step guides for making, editing, canceling, and handling walk-in reservations, as well as outlining policies to ensure efficient restaurant operations. Each section is designed to help staff understand and operate the table booking function smoothly and professionally.
2. Make Reservation
This function enables staff to create new reservations for customers based on table availability, time slot, and guest preferences. Available under POS > Table Booking > Make Reservation, this function allows users to enter reservation details, assign tables, and confirm the booking.
To perform the task:
- Access New Booking Screen: Click " Make Reservation" from the Table Booking menu.
- Fill Customer Details: Enter the customer’s name, contact information, and party size.
- Choose Date and Time: Select the appropriate date and time slot for the reservation.
- Assign Table: Choose an available table based on the selected time.
- Confirm Reservation: Review the details and confirm the booking.
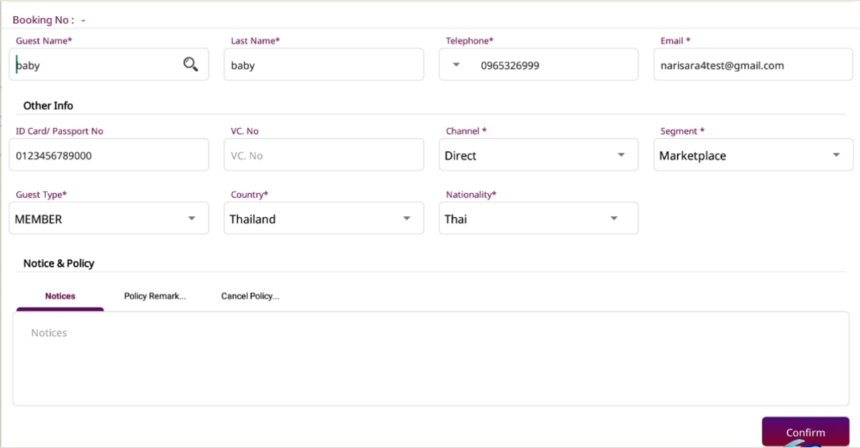
Note: Ensure that the booking does not overlap with existing reservations.
3. Edit Reservation
This feature allows users to modify existing reservation details in case of changes requested by the customer. Available under POS > Table Booking > Edit Reservation, this function helps users locate an existing booking and make necessary adjustments.
To perform the task:
- Locate Existing Reservation: Browse or search for the desired reservation from the Reservation List.
- Click Edit: Select the reservation and click the "Edit" button.
- Update Details: Make necessary changes such as customer info, date/time, or assigned table.
- Save Changes: Confirm and save the updated reservation.
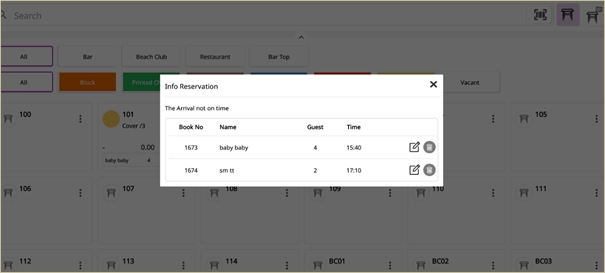
Note: Edits should be made promptly to avoid table conflicts.
4. Cancel Reservation
This function is used to cancel confirmed reservations upon customer request or no-show. Available under POS > Table Booking > Cancel Reservation, this feature lets users manage table availability by removing unused bookings.
To perform the task:
- Select Reservation to Cancel: Identify the reservation from the list.
- Initiate Cancellation: Click the "Cancel Reservation" button.
- Confirm Action: Accept the confirmation prompt to finalize cancellation.
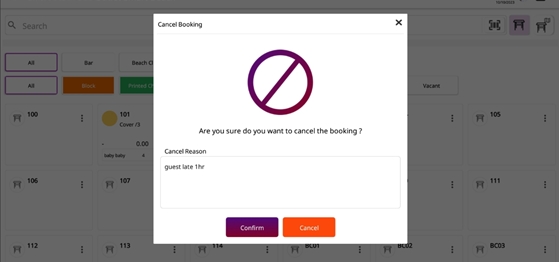
Note: Mark reasons for cancellation when applicable for future reference.
5. Open Booking
Open Booking is used to register customers who arrive without prior reservation and require a table immediately. Available under POS > Table Booking > Open Table, this function helps assign walk-in guests to available tables efficiently.
To perform the task:
- Navigate to Open Table: Select the Open Table option from the Table Booking menu.
- Choose Available Table: Identify and select an unoccupied table.
- Input Guest Information: Enter guest details for record-keeping.
- Confirm Seating: Complete the process by confirming the guest is seated.
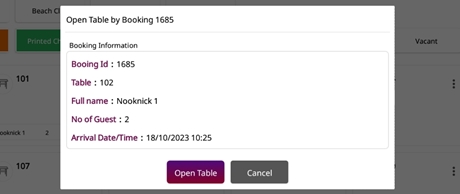
Note: Open Bookings do not appear in the advance reservation list.
6. Table Booking Policy
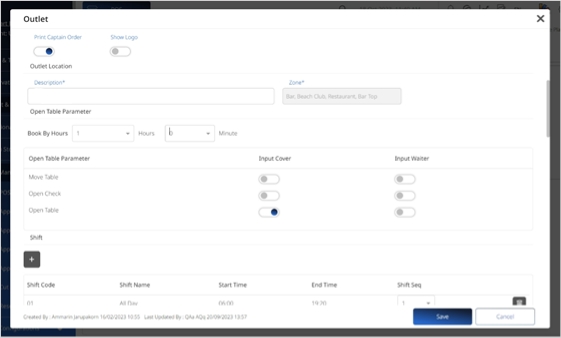
This section outlines policies and best practices for handling table bookings to ensure smooth operations. Available under POS > POS Manager > POS Configuration or via internal SOP, this provides guidelines for staff on managing reservations properly.
To perform the task:
- Review Booking Policy: Refer to internal policy documents or POS Settings.
- Apply Guidelines: Follow protocols regarding booking durations, allowed lead times, cancellations, and prioritization.
Note: Policies may vary by location and must be regularly updated by management.