POS - Operation User Guide
1. Overview
This user manual provides a comprehensive guide for operating the POS (Point of Sale) system used in restaurants and retail outlets. It covers core functions including table and order management, payment processing, shift/day closing, and cross-property transactions. The manual ensures accurate and efficient operations through step-by-step instructions with visual aids, supporting both front-line staff and supervisors.
2. Log in to the POS
This function allows users to securely access the POS system by entering login credentials and selecting the appropriate property and outlet before starting operations.
To perform the task:
- Open the POS login screen.
- Enter your Username (e.g., staff@smartfinder.asia).
- Enter your 6-digit Passcode (e.g., 123456).
- Select the Property from the list.
- Select the Outlet you are assigned to.
- The system will redirect to the POS main screen upon successful login.
Note : Only users with valid credentials and assigned outlet access can log in. If your outlet or property does not appear, contact your system administrator.
3. Change Languages
This function allows users to switch the POS system interface between supported languages for better usability and accessibility.
To perform the task:
- On the POS main screen, click the Change Languages icon.
- Select your preferred language from the list.
- Click Confirm to apply or Cancel to discard the change.
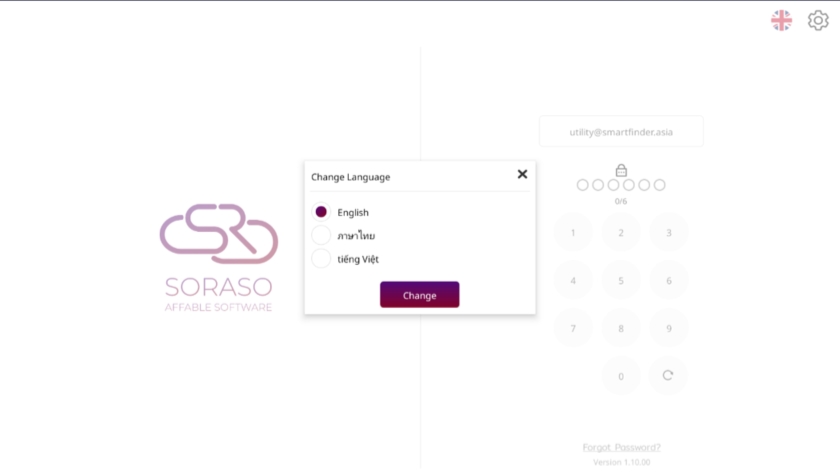
Note : The system will immediately update the interface based on the selected language. If your preferred language is not listed, contact the system administrator for support.
4. Forget Passcode
This function allows users to recover their POS passcode by submitting their registered email to receive a new code.
To perform the task:
- On the login screen, click “Forget Passcode”.
- Enter your User Email that is registered in the system.
- Click Submit to request a new passcode.
- A temporary passcode will be sent to your email.
- Use the new passcode to log in and proceed to change it.
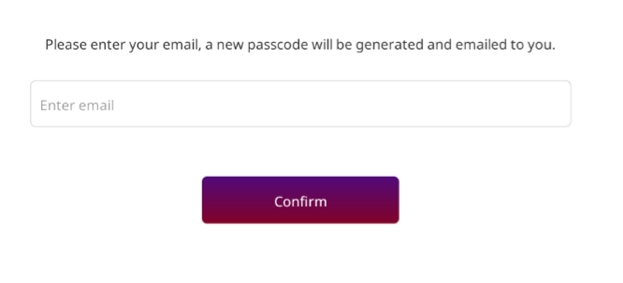
Note : Ensure the email entered is correct and already registered. If you do not receive the email, check your spam folder or contact your administrator.
5. Change Passcode
This function allows users to update their POS login passcode for enhanced security and personal access control.
To perform the task:
- Click the Profile icon on the top bar of the POS main screen.
- Select the “Change Passcode” option.
- Enter your Old Passcode.
- Enter a New Passcode (6 digits).
- Confirm the New Passcode by entering it again.
- Click Confirm to complete the change.
- Wait for the confirmation message: “Your passcode has been changed.”
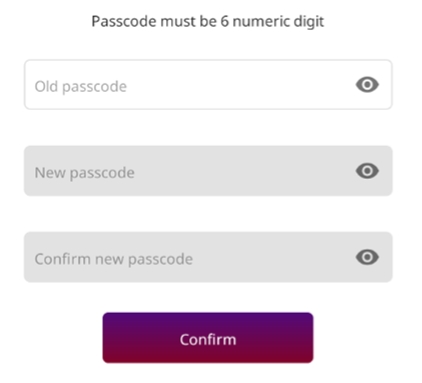
Note : New passcode must be exactly 6 digits. If the new passcode does not match the confirmation, the change will be rejected. Use a unique passcode not easily guessed to improve security.
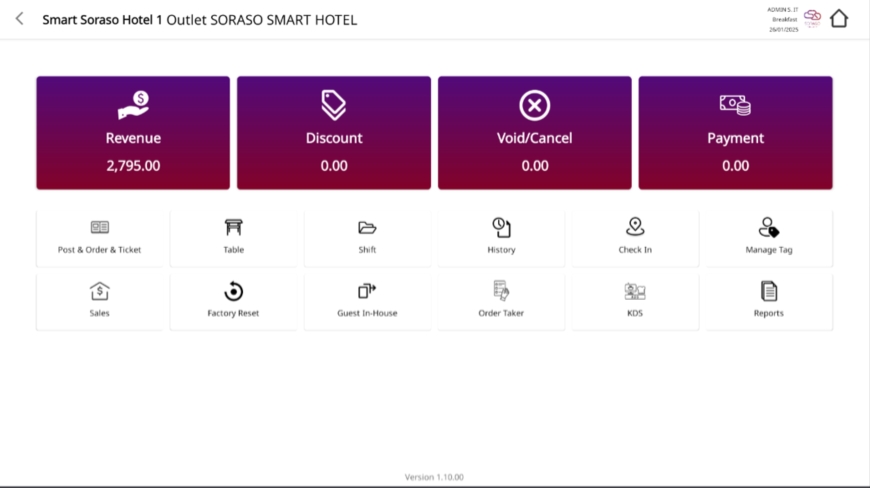
6. Menu & Sub Menu
This section introduces the main interface of the POS system, including key menus such as Table, Order, Shift, History, Report, and Settings, each with its own sub-menu functions.
To perform the task:
- After logging in, the system will display the Main Page.
- The top-level menus include Table, Order, Shift, History, Report, and Settings.
- Select any menu to display its available sub-functions for operation.
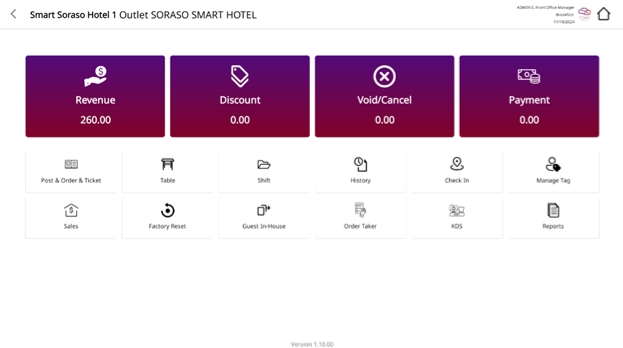
Note : Menu access may vary depending on user role and permission level. Ensure users are trained on each menu’s function to avoid errors during operation.
7. Table Management
The Table Management module allows users to manage table-related operations such as opening, blocking, merging, moving, and reserving tables. It provides a real-time overview of table statuses to support efficient guest service and seating control.
7.1 Open Table
This function allows staff to open a table by assigning guest information and marking the table status as “Occupied” to begin service.
To perform the task:
- Go to the Table menu on the POS main screen.
- Select an Available Table.
- The Guest Information screen will appear.
- Fill in the following details: Type of Guest, Name, Contact, Number of Guests, Waiter’s Name.
- Click Confirm to open the table or Cancel to abort.
- The table icon status will change to Occupied.
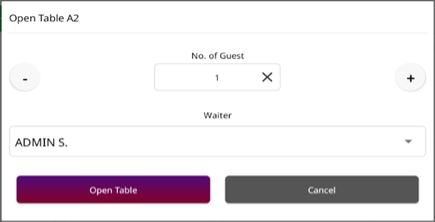
Note : All required guest information should be filled accurately. The table cannot be used for other operations until it is closed or transferred.
7.2 Block Table
Temporarily reserve or hold a table by changing its status to “Block Table,” preventing walk-in use.
To perform the task:
- Go to the Table menu and select an Available Table.
- Click the Block Table button.
- Fill in Arrival Time, Number of Guests, Guest Name, Mobile Number.
- Click Block Table to confirm or Cancel to abort.
- The table status icon will update to Block Table.
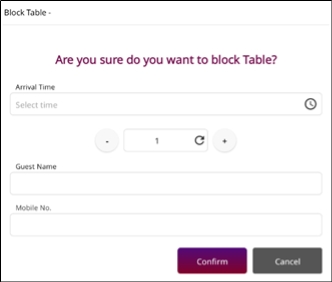
Note : Use this function to hold tables for reservations or internal purposes. Blocked tables cannot be opened or merged until unblocked.
7.3 Merge Table
Combine two or more occupied tables into one for shared seating and a unified bill.
To perform the task:
- Go to the Table menu.
- Select the Main Table (base table).
- Click Merge Table.
- Select the Other Table(s) to merge.
- Click Confirm to complete the merge.
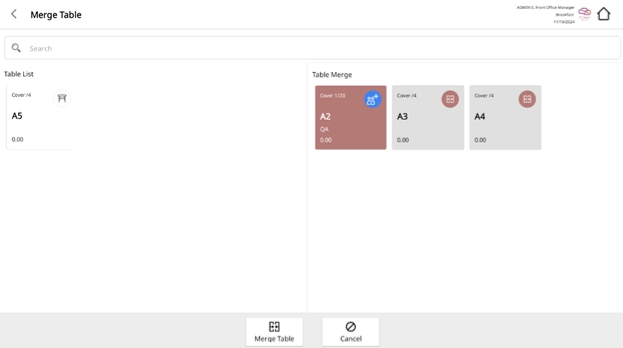
Note : Only occupied tables can be merged. The merged tables will share the same bill and cannot be separated unless split manually.
7.4 Move Table
This function allows users to transfer a guest’s order from one table to another, maintaining all current items and check details.
To perform the task:
- Go to the Table menu on the main screen.
- Select the Table currently in use.
- Click the Move Table button.
- Choose the Target Table to move to (must be available).
- Click Confirm to complete the move.
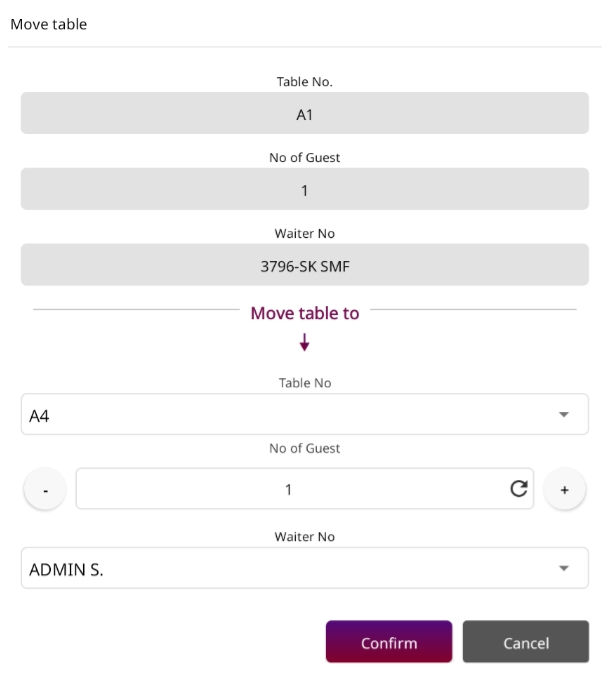
Note : The target table must not be occupied or blocked. Use this when guests request to relocate without splitting their bill.
7. 5 Reserve Table
Create a reservation in advance for a specific table, recording guest details and expected arrival time.
To perform the task:
- Go to the Table menu.
- Select the desired table and click Reserve Table.
- Enter Guest Name, Mobile Number, Number of Guests, Reservation Date & Time, Special Requests.
- Click Confirm to save the reservation.
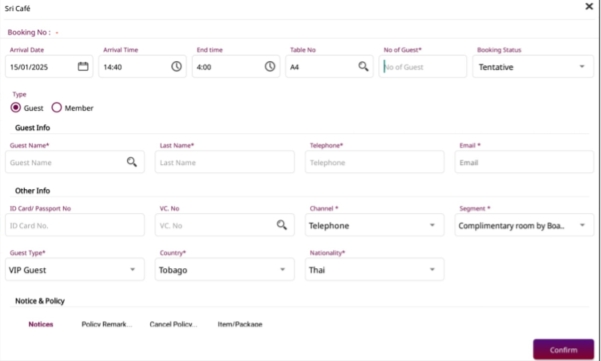
Note : Reserved tables will show a special icon until fulfilled or canceled. Helps optimize seating during peak hours.
8. Order Management
The Order module manages all food and beverage ordering activities within the POS. It supports creating new orders, editing, combining, and applying special requests or discounts. This ensures efficient service and accurate billing for each table or check.
8.1 Default Order Screen
This function displays the default ordering interface on the POS system, showing menu groups, item buttons, and the current order list.
To perform the task:
- After selecting a table, the system displays the Default Order Screen automatically.
- The screen includes:
- Menu Item Area: categorized by group and subgroup.
- Item Buttons: tap to select and add items to the order.
- Order List Panel: displays selected items and quantity.
- If item images are configured, they will be shown on the button; otherwise, only text appears.
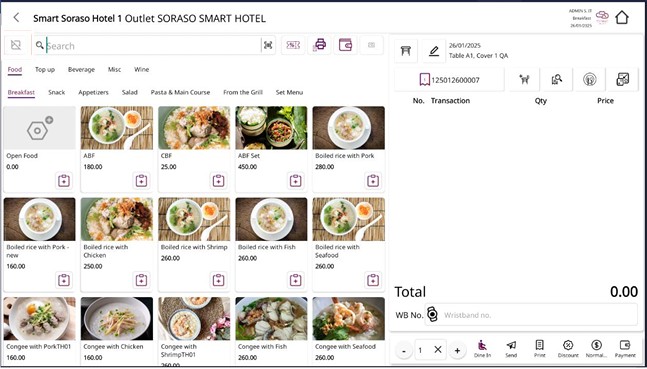
Note : If item pictures do not appear, it may be due to unconfigured image paths or template limitations. This is the primary screen for all order operations such as adding, editing, or voiding items.
8.2 Order Items
This function allows users to select and place menu items into the current order by browsing categories, adjusting quantities, and viewing the check in real-time.
To perform the task:
- On the Order Screen, select a Menu Group and Subgroup to display items.
- Tap an item to add it to the order list.
- Adjust Quantity by tapping the item again and modifying the number.
- The selected items will appear in the Order List Panel.
- Tap the View Check icon to review all items currently added.

Note: Menu items are grouped by categories for easier navigation. Ensure item prices and availability are properly set in the backend system to avoid missing entries.
8.3 Open Item
This function allows staff to manually enter a custom item that is not listed in the standard menu, including item name, price, and optional remark.
To perform the task:
- On the Order Screen, tap the Open Item button.
- A new window will appear titled Open Item.
- Fill in the following details:
- Item Name (e.g., “Custom Drink”)
- Price (numeric value)
- Remark (e.g., special instructions)
- Click Confirm to add the item to the check.
- The item will appear in the order list as a custom entry.

Note: Open Item should be used only when authorized or when adding temporary/special items. These items may not link to the inventory or recipe system and are for manual control only.
8.4 Additional and Condiments
This function allows staff to add predefined additional items (e.g., extra cheese) or condiments (e.g., sauces) to a selected menu item as part of a customized order.
To perform the task:
- On the Order Screen, tap the desired Menu Item.
- A pop-up will appear with a list of Available Additions and Condiments.
- Select one or more options as needed (e.g., Extra Spicy, No Ice, Sauce on Side).
- Click Confirm to save and return to the main order screen.
- The selected item will now show the applied additions/condiments below its name.
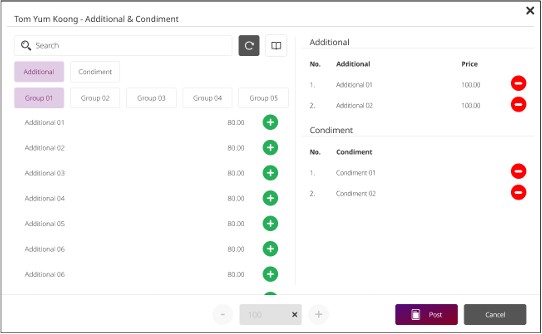
Note: Additional charges may apply based on system configuration. Make sure the correct options are selected, especially for allergen-sensitive requests.
8.5 Open Additional & Condiment
This function enables users to manually enter non-predefined additional items or condiments with custom names and optional charges for special guest requests.
To perform the task:
- On the Order Screen, tap the desired Menu Item.
- In the popup window, tap Open Additional or Open Condiment.
- Enter the Custom Name (e.g., “Light Soy Sauce” or “Extra Garlic”).
- (Optional) Enter a Price if the addition/condiment has a charge.
- Tap Confirm to apply to the item.
Note: This feature provides flexibility for personalized guest requests not covered in the predefined list. Ensure pricing is approved by management if manual charges are applied.
8.6 Upsize
This function allows users to modify the size of an ordered item, such as changing a drink from medium to large, with price adjustments as configured.
To perform the task:
- On the Order Screen, tap the Menu Item you wish to upsize.
- In the popup window, locate and tap the Upsize button.
- Select the new size option (e.g., “Large” or “Extra Large”).
- The system will recalculate the price automatically if price tiers are configured.
- Tap Confirm to apply the new size.
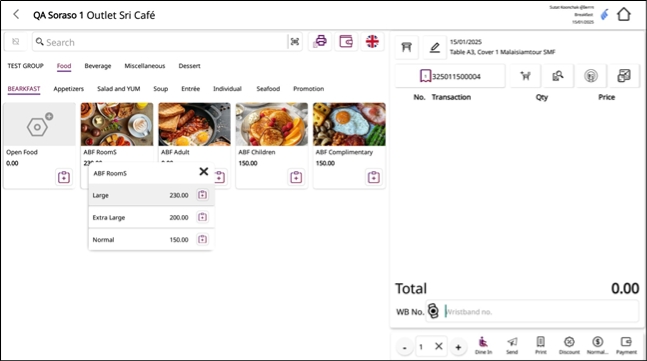
Note: Only items with size options defined in the backend system can be upsized. Price adjustments depend on the configuration set in the POS item settings.
8.7 Void Items
This function is used to remove a specific item from an order due to cancellation, input errors, or guest changes, with proper void reasons.
To perform the task:
- On the Order Screen, tap the item to be voided.
- Select the Void option from the pop-up menu.
- The system will prompt for a Void Reason (e.g., “Guest Changed Mind” or “Wrong Entry”).
- Enter or select the reason and tap Confirm.
- The item will be removed from the order list or marked as voided depending on system settings.
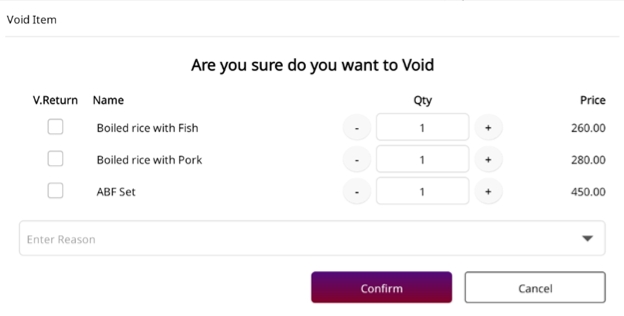
Note: Voided items are recorded in the audit log. Some systems may require manager approval or password for voiding high-value items.
8.8 Edit Items
This function allows staff to adjust item details in an existing order such as quantity, remarks, or special instructions before the order is finalized or sent.
To perform the task:
- On the Order Screen, tap the item to be edited.
- A pop-up window will appear with editable fields.
- You may:
- Change Quantity
- Add or modify Remarks
- Update Additions or Condiments
- Tap Confirm to save the changes.
- The order list will reflect the updated item immediately.
Note: Editing should be done before the item is sent to the kitchen to avoid confusion. For items already sent, editing may require manager approval or voiding and reordering.
8.9 Cancel Check
This function is used to void an entire order (check) for a table before payment, typically when guests cancel their order or are reassigned to a new table.
To perform the task:
- On the Order Screen, go to the table or check you want to cancel.
- Tap the Cancel Check button.
- The system will prompt for a Reason for Cancellation.
- Enter or select the appropriate reason.
- Tap Confirm to complete the cancellation.
- The check will be voided and the table will return to available status.
Note: Canceled checks are logged for audit purposes. Some configurations may require manager or supervisor approval to cancel a check.
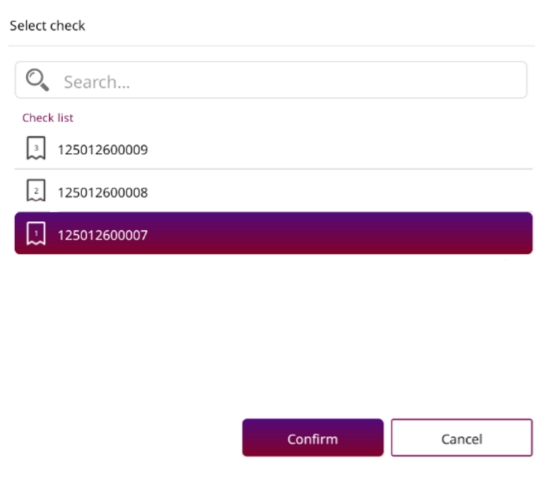
8.10 Transfer Check
This function allows staff to move an entire order (check) from one table to another, typically when guests change tables during service.
To perform the task:
- On the Order Screen, select the table with the active check.
- Tap the Transfer Check button.
- A list of available tables will appear.
- Select the Target Table to receive the check.
- Tap Confirm to complete the transfer.
- The check and all order items will move to the new table.
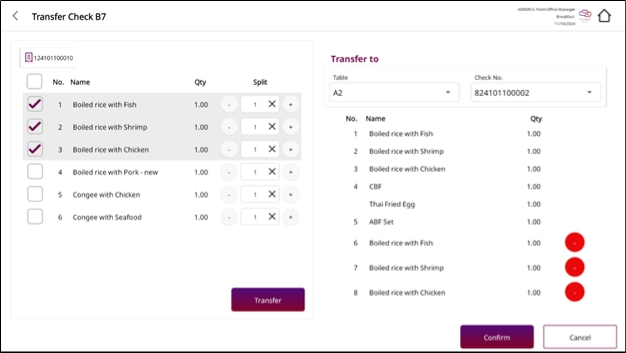
Note: The target table must be available (not occupied or blocked). The system may require user permissions or manager approval to perform transfers.
8.11 Split Check
This function allows staff to divide an order into multiple checks, typically used when guests wish to pay separately or share a bill in groups.
To perform the task:
- On the Order Screen, tap the Split Check button.
- A new window will open showing the original check on one side and new empty checks on the other.
- Drag and drop or tap to assign items to different checks.
- Review each split to ensure correctness.
- Tap Confirm to complete the split.
- Each check can now be settled individually.
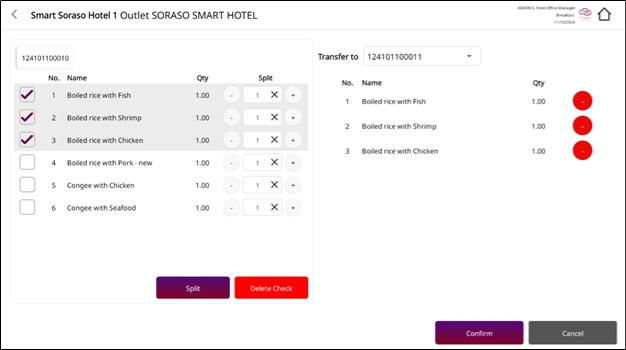
Note: Some promotions or discounts may not apply to split checks. Always verify totals and assigned items with guests before proceeding to payment.
8.12 Send Order
This function sends the finalized order to the kitchen or bar printer for preparation. It confirms that all selected items are ready for production.
To perform the task:
- After adding all desired items to the order list, tap the Send Order button.
- The system will print order slips to designated printers based on item category (e.g., kitchen, bar).
- A confirmation message will appear once successfully sent.
- Items will be marked as "sent" and locked from basic edits.
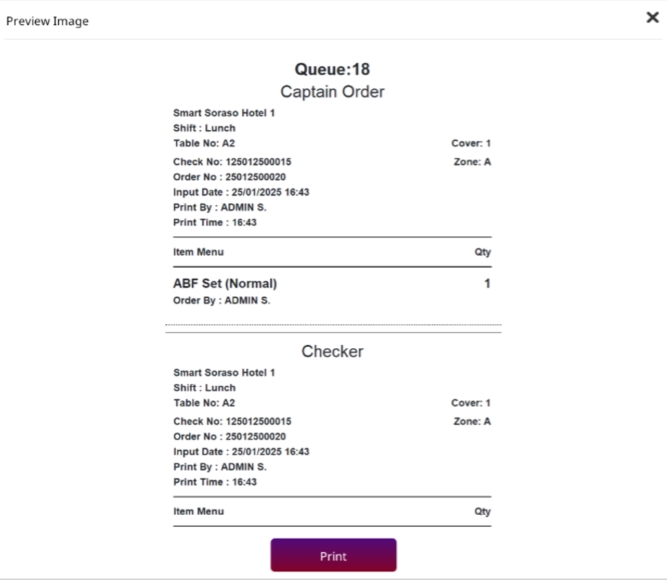
Note: Any changes after sending require voiding and reordering or manager approval. Ensure the correct printer configuration is in place to avoid delays or miscommunication.
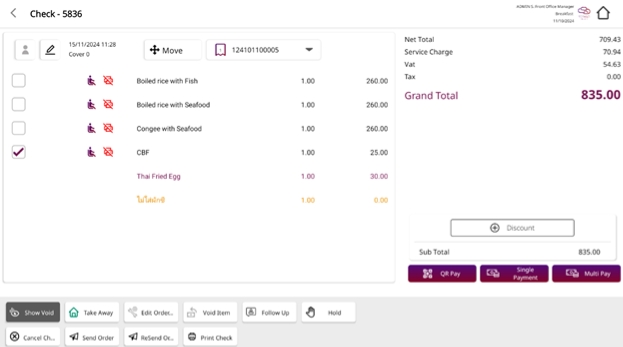
8.13 Print Check
This function prints a summary of the customer's order (check), typically used to review charges before payment or for guest verification.
To perform the task:
- Go to the Order Screen of the active table.
- Tap the Print Check button.
- The system will generate a printed copy of the current order including:
- Item names and quantities
- Prices and totals
- Discounts (if any)
- The check will be printed to the assigned check printer.
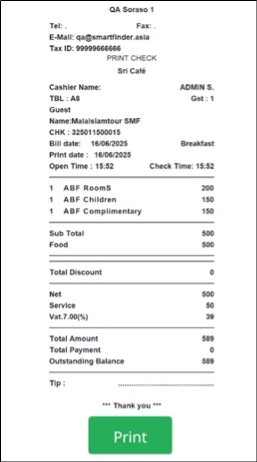
Note: Printed checks are non-fiscal and are typically used for review, not accounting. Ensure all items are correct and no changes are pending before printing.
8.14 Payment
This function processes the guest’s bill settlement, supporting various payment methods such as cash, credit card, e-wallets, or mixed payments.
To perform the task:
- On the Order Screen, tap the Payment button for the active check.
- The Payment Window will appear showing the total due.
- Select the Payment Method (e.g., Cash, Credit Card, QR Code).
- Enter the Received Amount (if applicable) and tap Confirm.
- The system will calculate any Change and complete the transaction.
- A Receipt will be printed automatically (if configured).
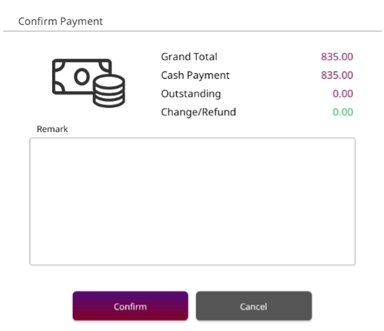
Note: Mixed payment is supported (e.g., part cash, part card). Ensure all discounts, service charges, and taxes are applied before finalizing payment.
9. Money in / Money out / Money history
This module records and tracks non-sales cash transactions such as petty cash inflow and outflow. It allows staff to log reasons for each transaction and provides a complete money history log for review and audit. The function ensures accurate cash drawer control and accountability during cashier shifts.
9.1 Money in
This function is used to record incoming cash transactions into the POS system, such as petty cash or manual income.
To perform the task:
- Go to the Cashier menu and select 'Money In'.
- Enter the amount to be recorded.
- Fill in the reason or description for the transaction.
- Click Confirm to save the entry.
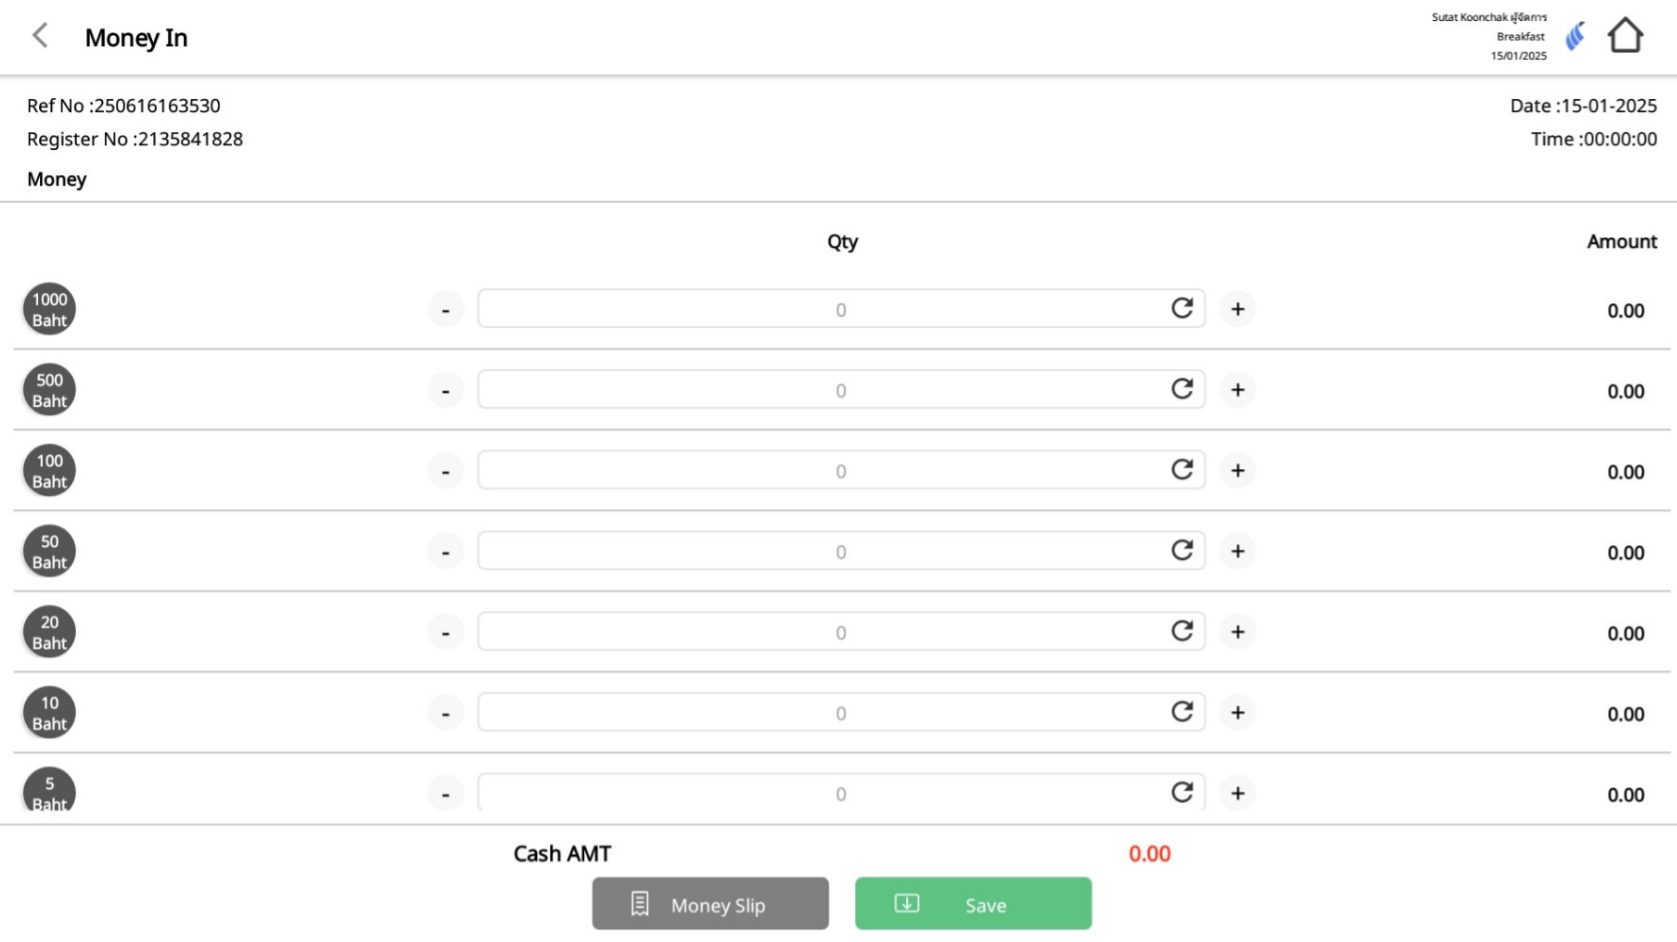
Note: Ensure that all money-in transactions are justified and approved by supervisor. Use this function only for non-sales-related cash inflows.
9.2 Money out
This function records outgoing cash from the POS drawer for non-sale purposes such as staff expenses or petty cash.
To perform the task:
- Go to the Cashier menu and select 'Money Out'.
- Enter the amount to be withdrawn.
- Provide a reason or description for the transaction.
- Click Confirm to process the money-out entry.
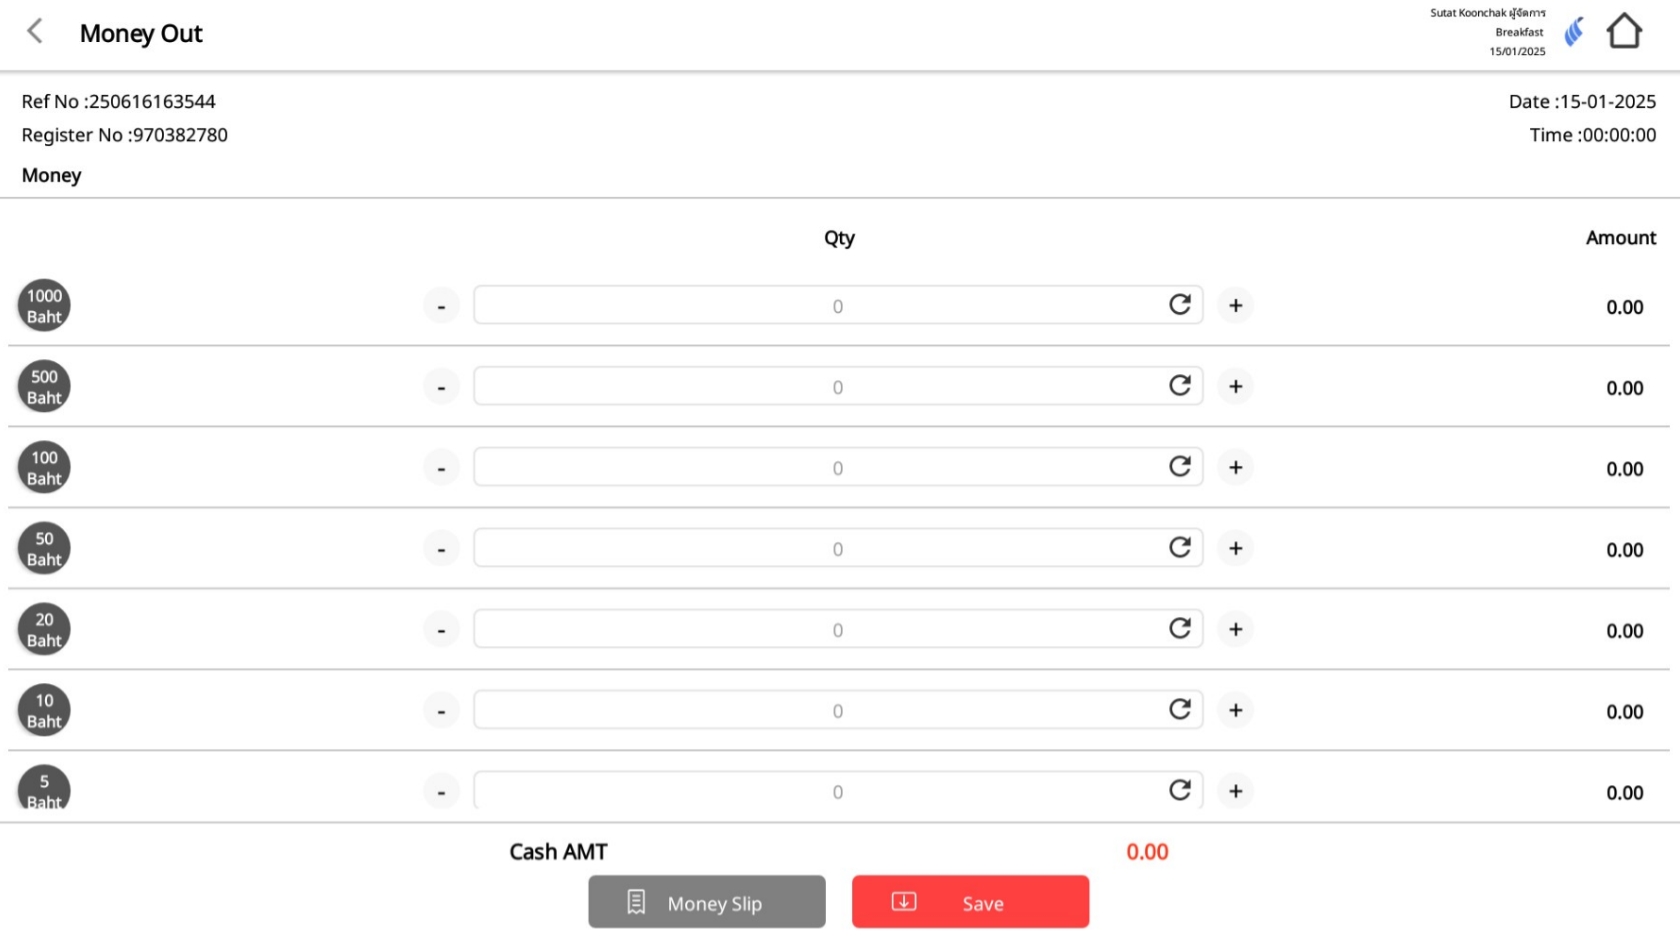
Note: Money out should be accompanied by receipts or written approval. These entries affect daily cash balancing.
9.3 Money history
This screen displays a complete log of all Money In and Money Out transactions for tracking and reconciliation.
To perform the task:
- Navigate to the Cashier menu and select 'Money History'.
- Use filters to search by date, user, or transaction type.
- Click on each entry to view full details.
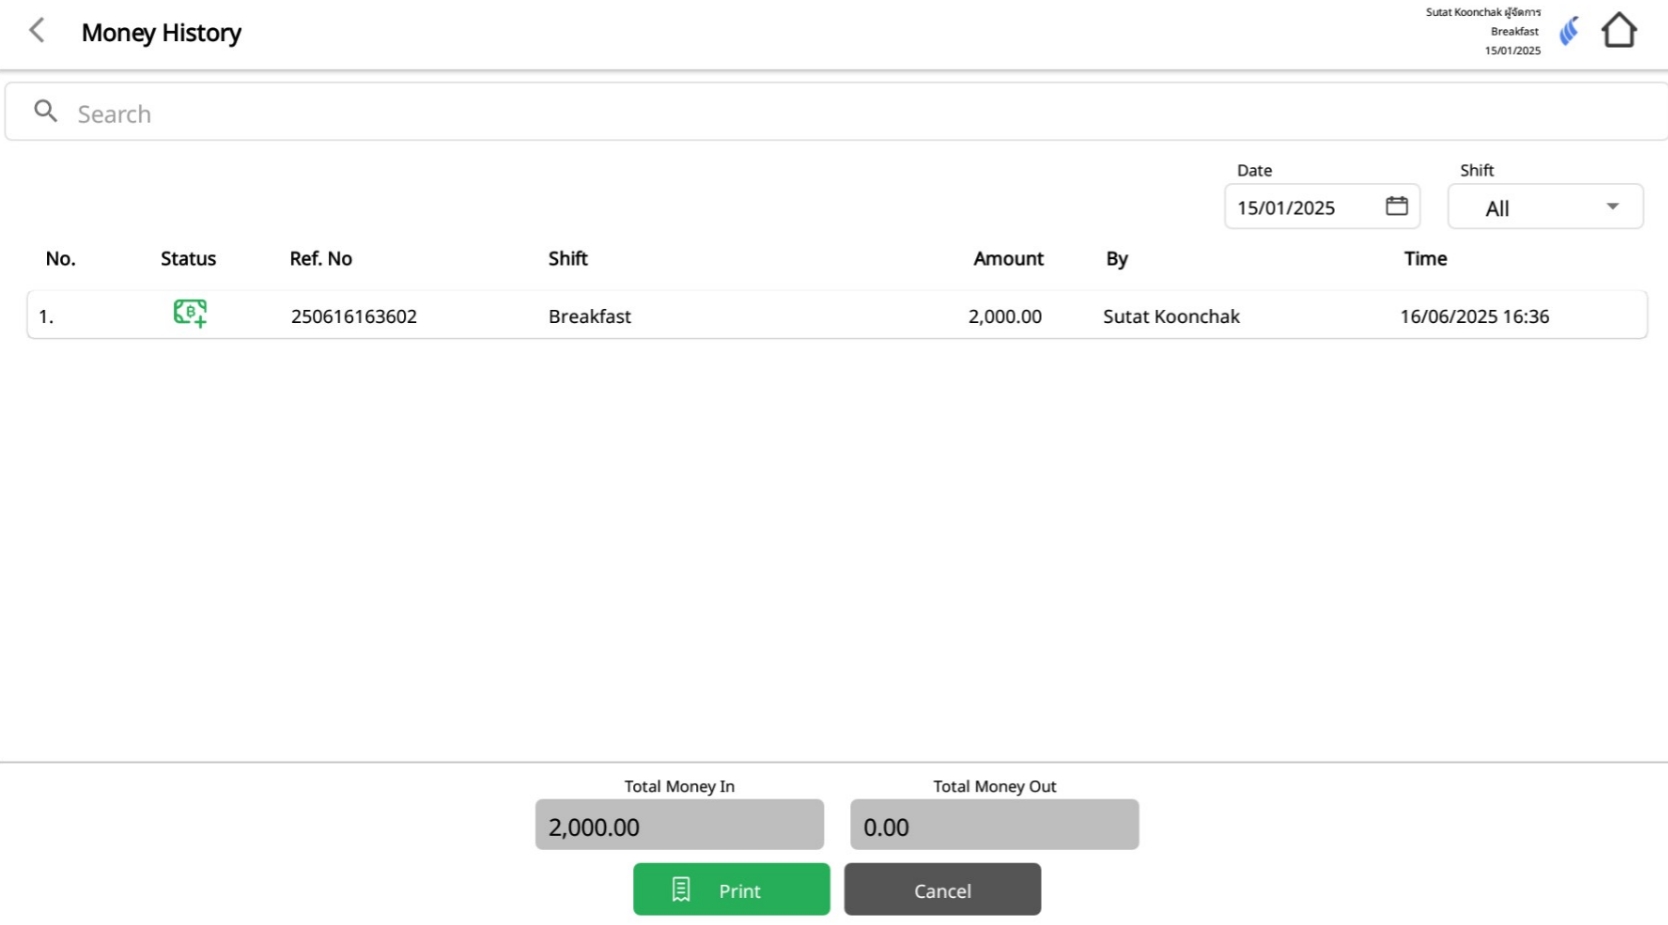
Note: This helps auditors and managers ensure cash control integrity. Ensure filters are set correctly when generating reports.
10. Imported menu item
This function allows users to export a menu template, fill it with item data, and import it back into the system for bulk updates. It simplifies large-scale menu creation and ensures data consistency across outlets.
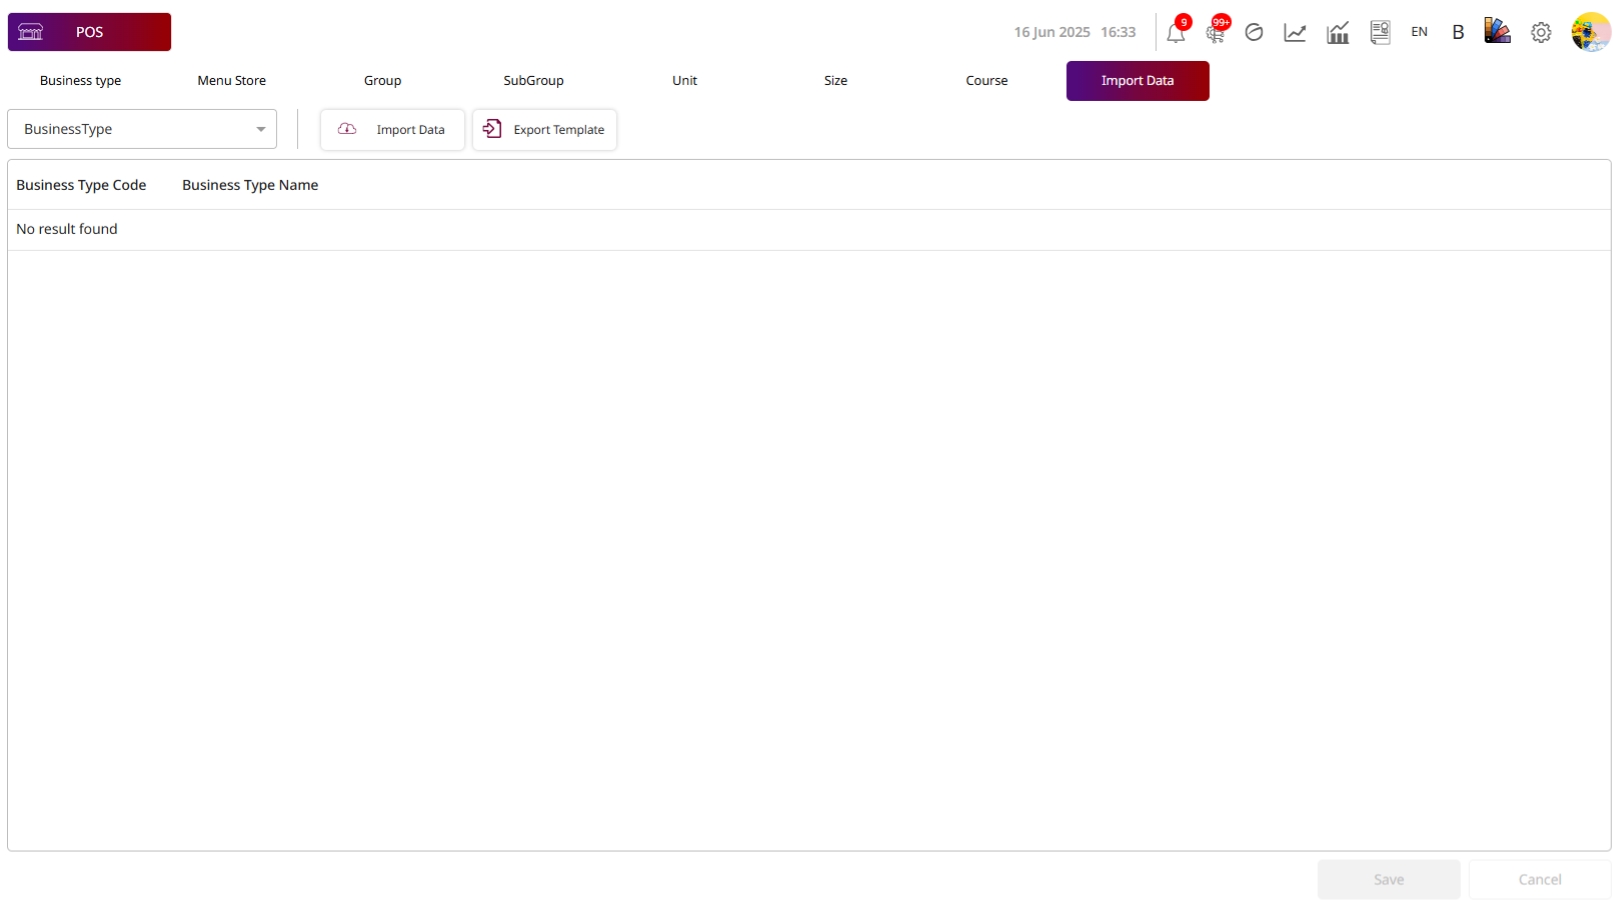
10.1 Export template: click the button Export template
This function allows users to download a CSV or Excel template for bulk menu item import.
To perform the task:
- Go to the Menu Management module.
- Click 'Export Template'.
- A file will be downloaded for editing offline.
- Fill out the template with correct item codes, names, and prices.
Note: Do not modify header rows or format. Use the correct item group and unit values to prevent upload errors.
10.2 Import menu
Upload the completed template to import new menu items into the POS database in bulk.
To perform the task:
- Go to the Menu Management module.
- Click 'Import Menu'.
- Browse and select the completed import template file.
- Click Confirm to upload and verify the result.
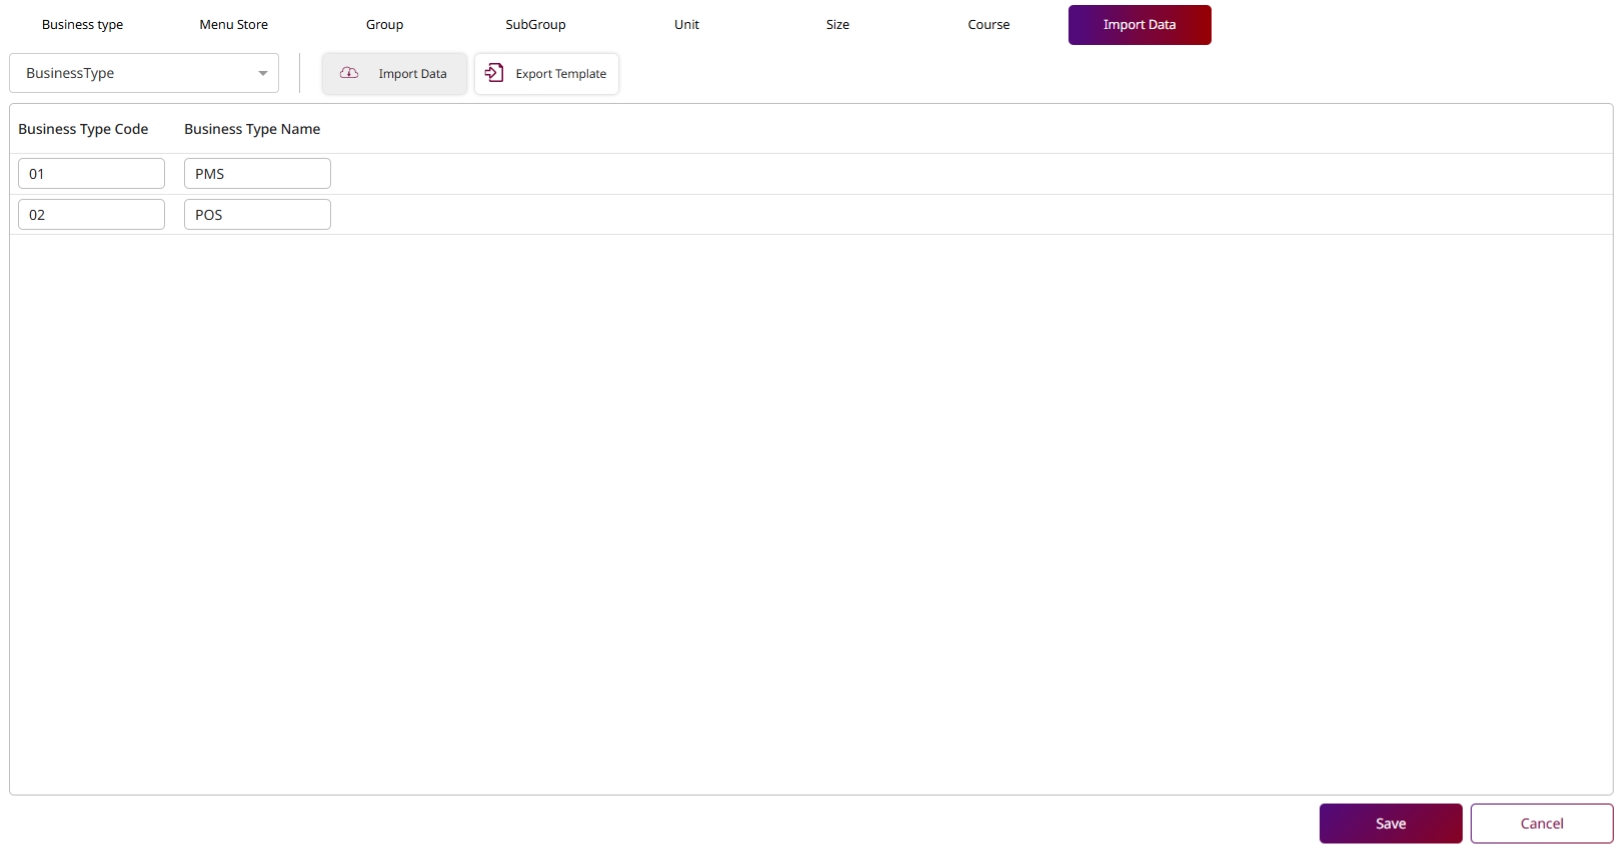
Note: Check for duplicate item codes before importing. System may reject invalid entries and show error log.
11. E-Tax
The E-Tax module enables businesses to configure and send electronic tax invoices directly to tax authorities. It supports secure digital signatures and ensures compliance with local tax regulations.
11.1 Set the setting
Configure E-Tax settings such as tax ID, company name, and digital certificate to enable electronic tax processing.
To perform the task:
- Go to Settings > E-Tax.
- Enter tax-related company details and upload required certificate.
- Save the configuration.
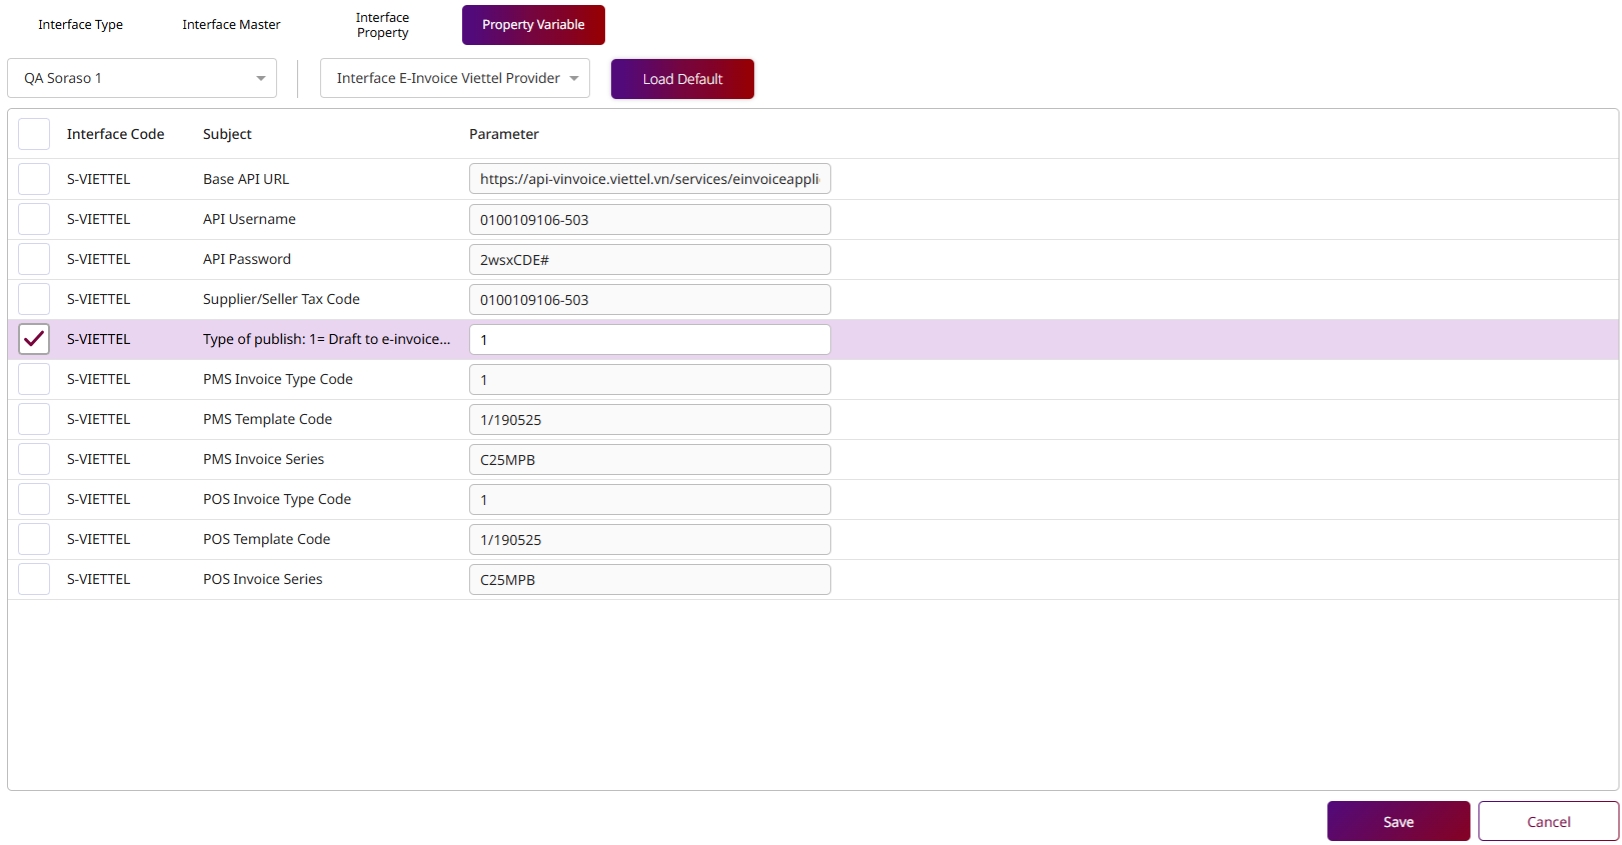
Note: Make sure the digital certificate is valid and unexpired. This is required before sending any E-Tax documents.
11.2 Send E-tax
Send approved sales documents in electronic format to the tax authority through the integrated E-Tax system.
To perform the task:
- Go to Sales Report > E-Tax.
- Select the invoice(s) to send.
- Click 'Send' and wait for confirmation status.
- Download receipt or acknowledgment if needed.
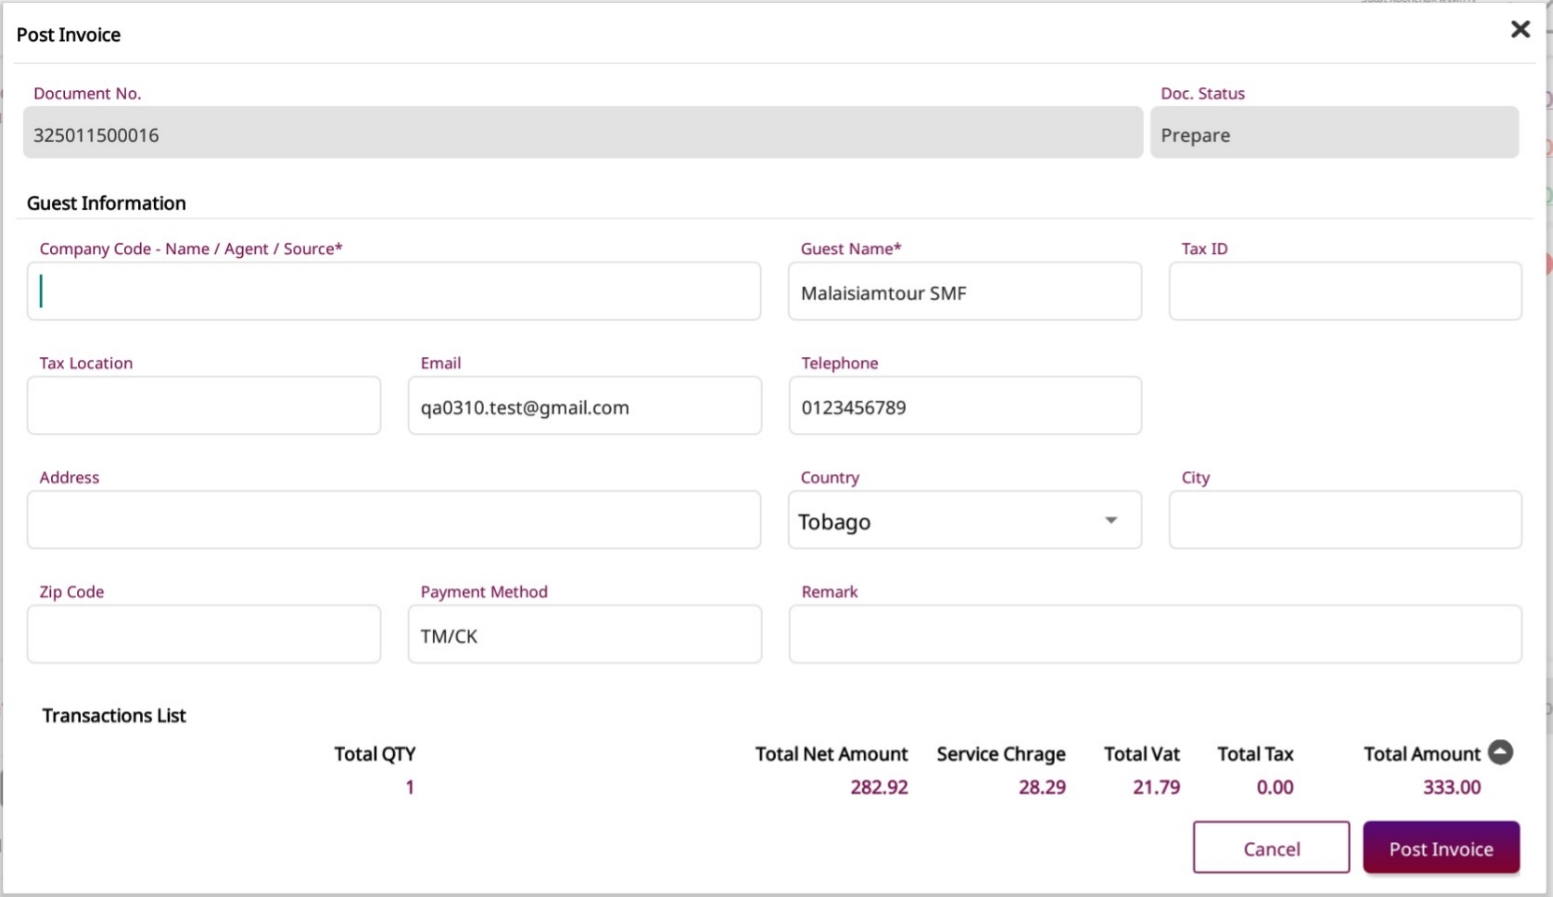
Note: Ensure invoice data is correct before submission. Check transmission logs for success/failure results.
12. Cross Hotel
This feature supports cross-property order transfers and billing for hotel groups. It allows guest charges to be moved between hotels in the same network, enhancing service continuity and centralized control.
12.1 Set Cross Hotel
This function configures the system to allow cross-property billing and order transfer between linked hotels.
To perform the task:
- Go to Settings > Cross Hotel.
- Define the linked properties and set communication credentials.
- Enable cross-hotel sync and save.
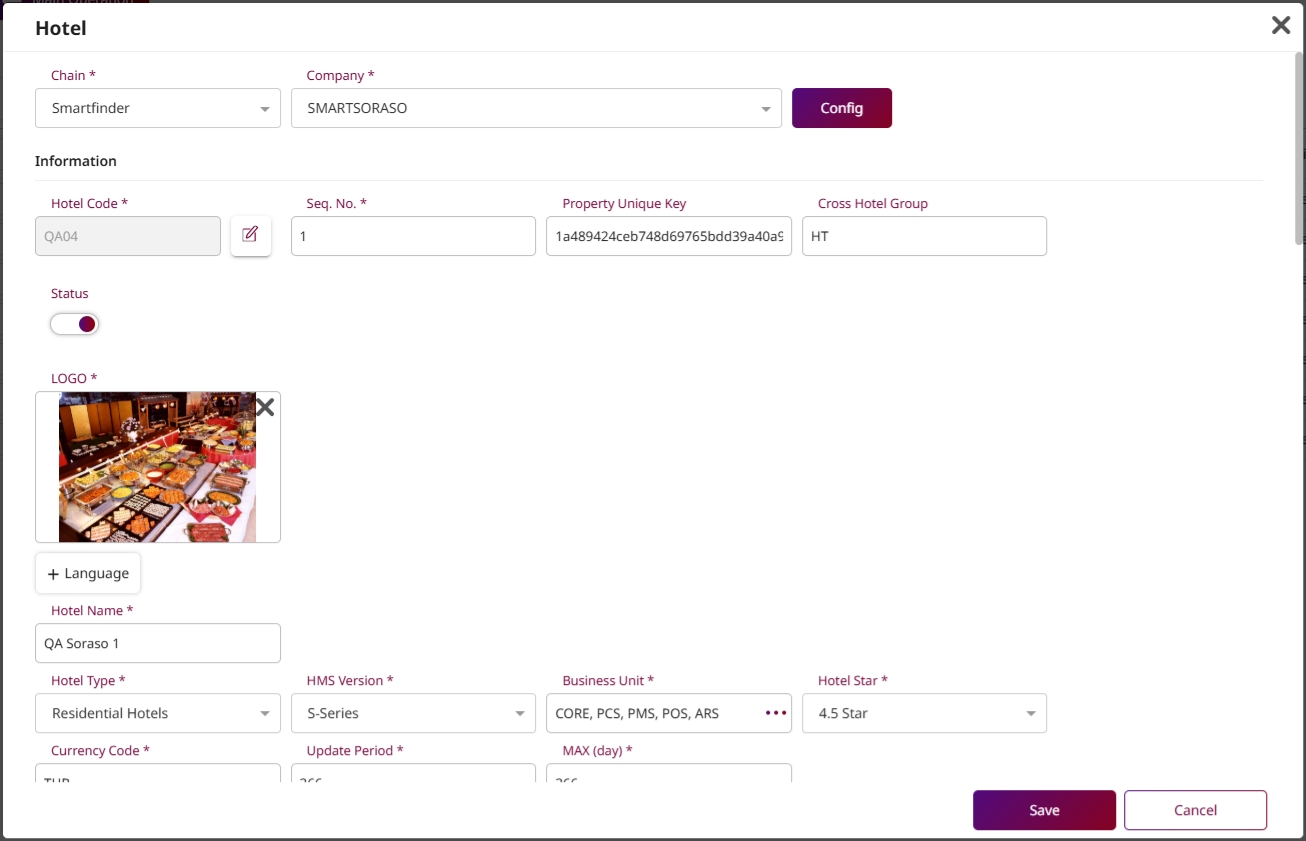
Note: Both properties must be online and authorized. Verify credentials carefully to ensure secure sync.
12.2 How to use the HG Cross Hotel
Allows transferring guest orders, charges, or billing data between hotels under the same group (HG network).
To perform the task:
- Open a guest check in the current property.
- Select 'Transfer to Cross Hotel' option.
- Choose the target hotel and confirm the transfer.
- The transaction will reflect in the selected property.
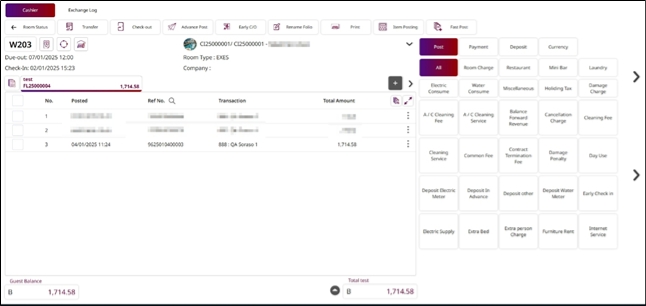
Note: Cross-property transfers should be tracked and reconciled daily. Use only when guests are verified and approved for HG cross-hotel transactions.