BOS - AP User Guide
1. Overview
The Accounts Payable (AP) module is designed to manage supplier liabilities, including data entry for invoices, payment processing, and withholding tax calculation. It integrates with other financial modules such as GL (General Ledger) and PO (Purchase Order), ensuring consistency and efficiency in the company's procurement and financial processes.
2. Configuring Initial System Settings
Before recording payable transactions, users must define essential configurations including creditors, bank details, payment methods, and accounting formats. These configurations form the basis for accurate and consistent AP processing.
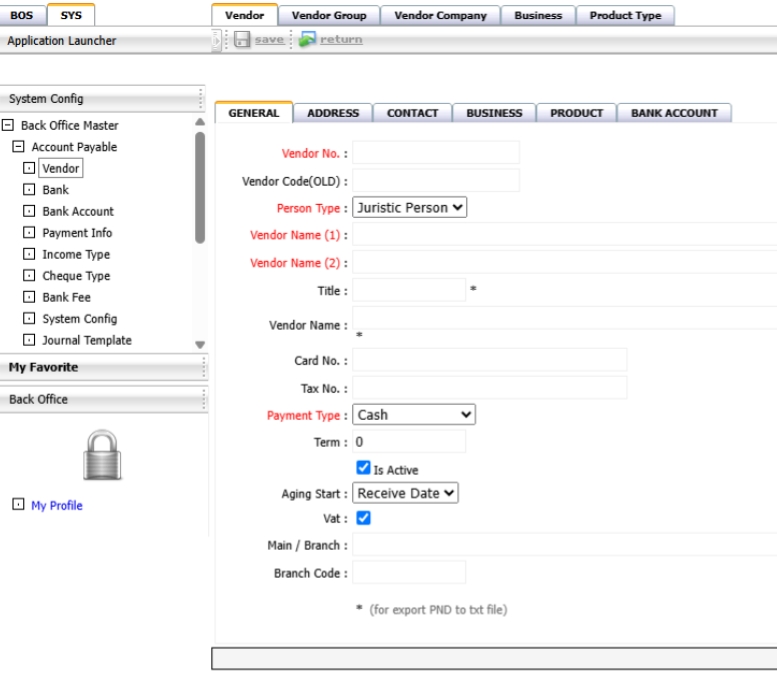
2.1 Payables Information
This menu stores creditor information used for managing debts, payments, and tax withholding. The information ensures seamless integration with payment transactions and accounting records.
To perform the task:
- Go to SYS > Back Office Master > Account Payable > Payables Information.
- Click 'New' to add a new creditor.
- Fill in details all tab including General, Address, Contact, Business, Product, Bank Account.
- Define payment terms, credit limit, and applicable tax category.
- Click 'Save' to complete the creditor registration.
Note: Ensure creditor details are accurate to prevent issues during payment and tax calculation processes.
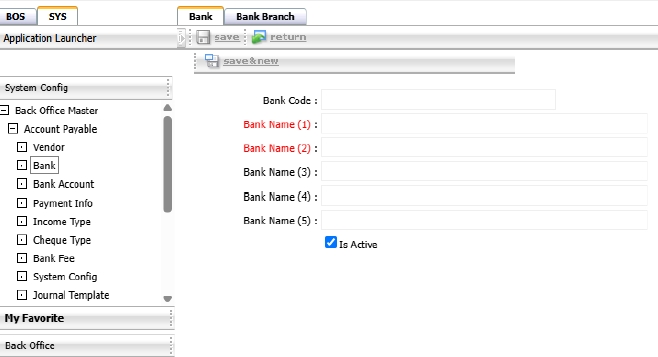
2.2 Bank Information
This section allows users to register and manage bank names and branch information, which are required for payment processing in the AP system.
To perform the task:
- Go to SYS > Back Office Master > Account Payable > Bank
- Click 'New' to create a new bank record.
- Enter the bank name, short name, and optional code.
- Define branch details, including address and code.
- Save the information for later use in bank account setup.
Note: Bank and branch information must be set before linking to bank accounts and payment formats.
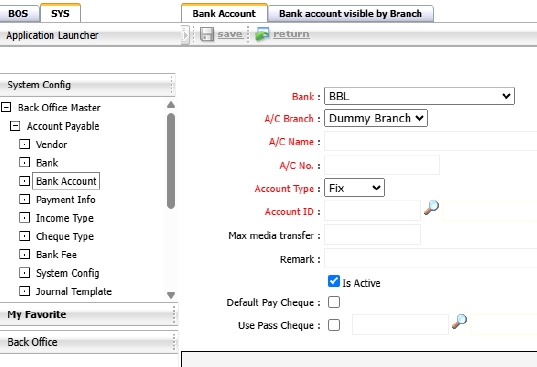
2.3 Bank Account
This menu is used to define bank accounts used in the payment process. It supports multiple payment channels including cheque, money transfer, or direct debit.
To perform the task:
- Go to SYS > Back Office Master > Account Payable > Bank Account.
- Click 'New' to add a bank account.
- Select the related bank and branch.
- Enter account number, account name, and select usage type (e.g., Cheque, Transfer, Direct Debit).
- Click 'Save' to register the account.
Note: Ensure bank accounts are created after setting up banks and branches.
2.4 Bank Account Visible by Branch
This function allows users to assign specific bank accounts to each branch. Once assigned, only the selected accounts will be visible and usable by that branch.
To perform the task:
- Navigate to: SYS > Back Office Master > Account Payable > Bank Account
- Select the tab “Bank account visible by branch.”

- The page will display a list of all bank accounts configured in the system.
- Each checkbox in front of a record represents whether the account is active for the selected branch.
- The current branch being configured is shown in the red-highlighted area on the page.
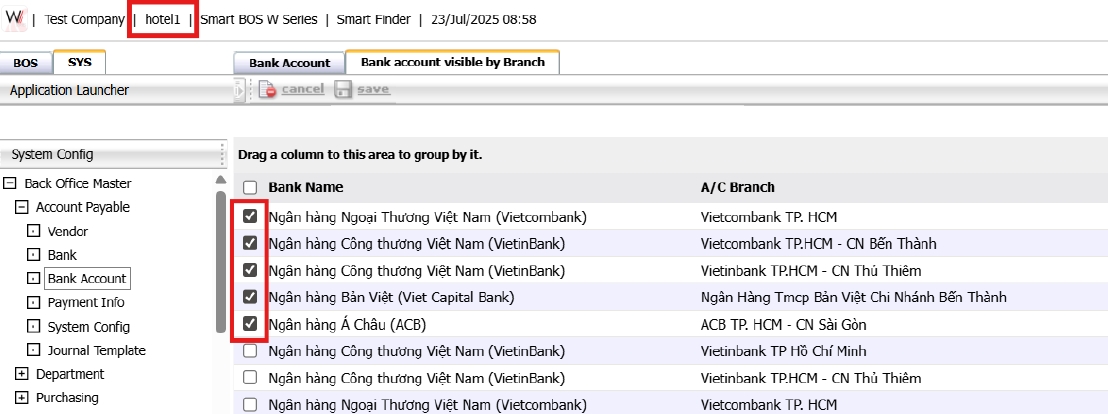
- To assign bank accounts to the branch:
- Tick the checkboxes next to the desired bank accounts.
- Click Save at the top of the page.
- Once saved, the selected bank accounts will be activated for the corresponding branch only.
Note: Ensure the correct branch is selected; unassigned branches will not see any bank accounts.
2.5 Payment Information
This menu is used to define various payment methods that will be used in the AP system.
To perform the task:
- Go to SYS > Back Office Master > Account Payable > Payment Information.
- Click 'New' to create a new payment method.
- Enter payment method name and short code.
- Specify if the method uses cheque, transfer, or cash.
- Save the configuration.
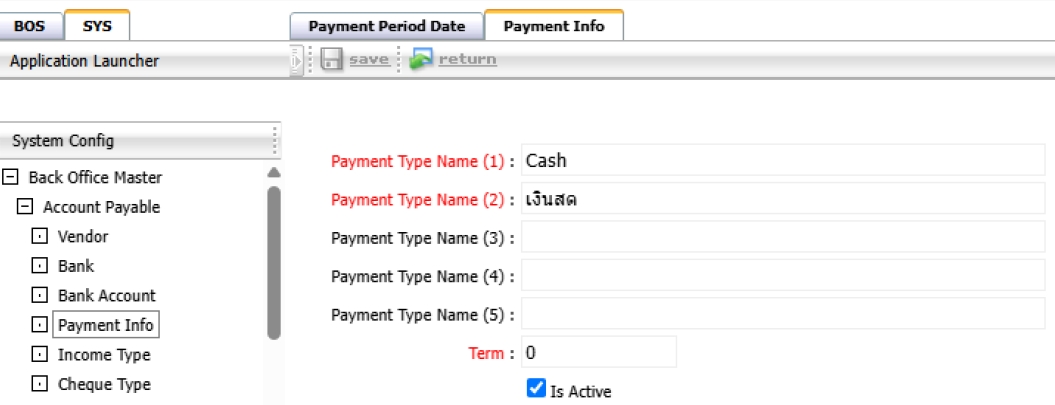
Note: Payment methods must align with the actual disbursement processes used by the organization.
2.6 Income Type
Income types are used for classifying types of income, primarily for the purpose of withholding tax reporting.
To perform the task:
- Go to SYS > Back Office Master > Account Payable > Income Type.
- Click 'New' to define a new type.
- Input income type name, applicable withholding rate, and tax form category.
- Save the income type.
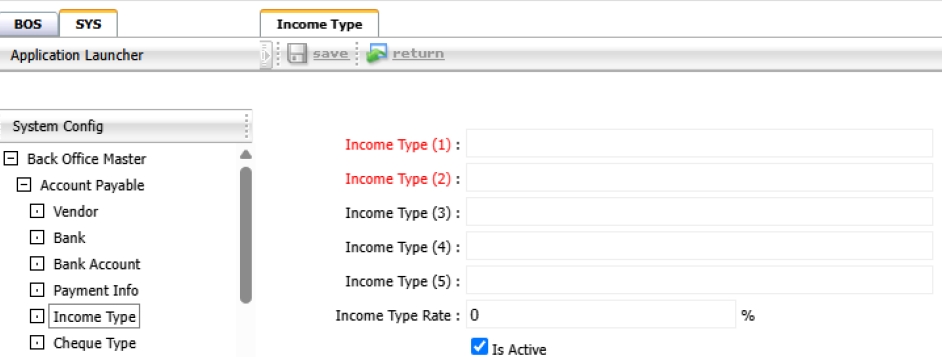
Note: Ensure income types reflect current tax policies to comply with legal requirements.
2.7 Check Type
Check types define different categories of cheques issued in the system, such as open cheques or crossed cheques.
To perform the task:
- Go to SYS > Back Office Master > Account Payable > Check Type.
- Click 'New' to add a check type.
- Input name, code, and characteristics of the cheque.
- Save the entry.
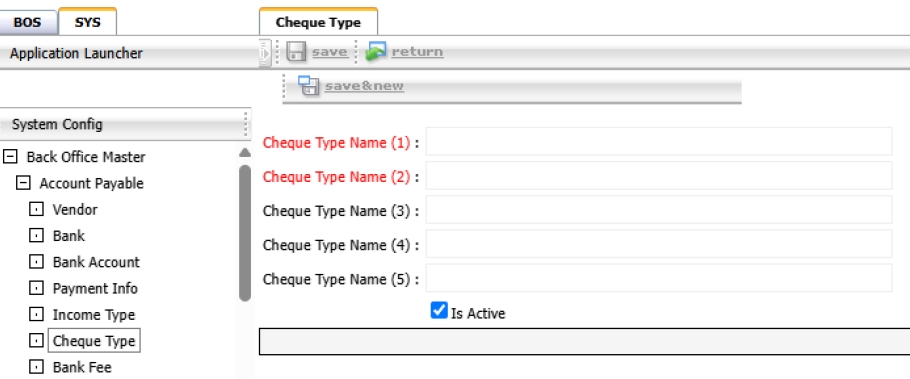
Note: Use consistent naming conventions to avoid confusion in cheque issuance.
2.8 Bank Fees
This menu allows users to define fee structures related to banking transactions for use in payment processing.
To perform the task:
- Go to SYS > Back Office Master > Account Payable > Bank Fees.
- Click 'New' to define a bank fee.
- Select bank account, fee name, and fee amount.
- Specify if the fee is fixed or percentage-based.
- Save the entry.
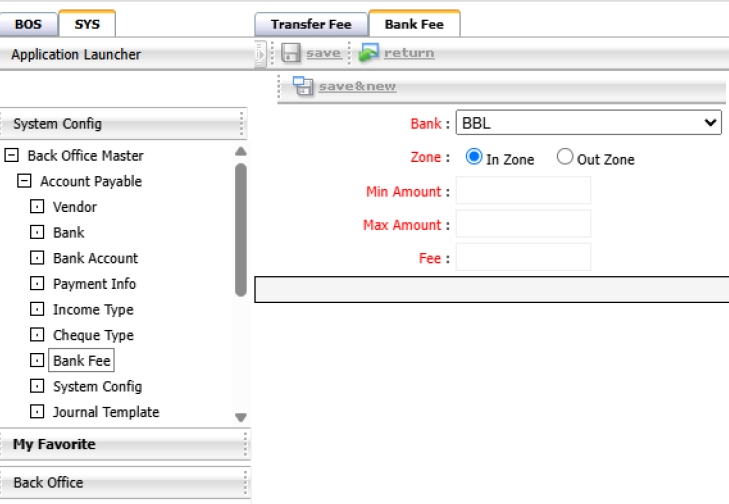
Note: Accurate setup of bank fees ensures proper accounting during payment processing.
2.9 Accounting Format
This menu sets the template for how transactions from AP are posted to the General Ledger.
To perform the task:
- Go to SYS > Back office Master > Account Payable > Journal Template.
- Click 'New' to create a new format.
- Define transaction type and link it to Chart of Accounts.
- Specify debit/credit structure and any references.
- Save and test the format configuration.
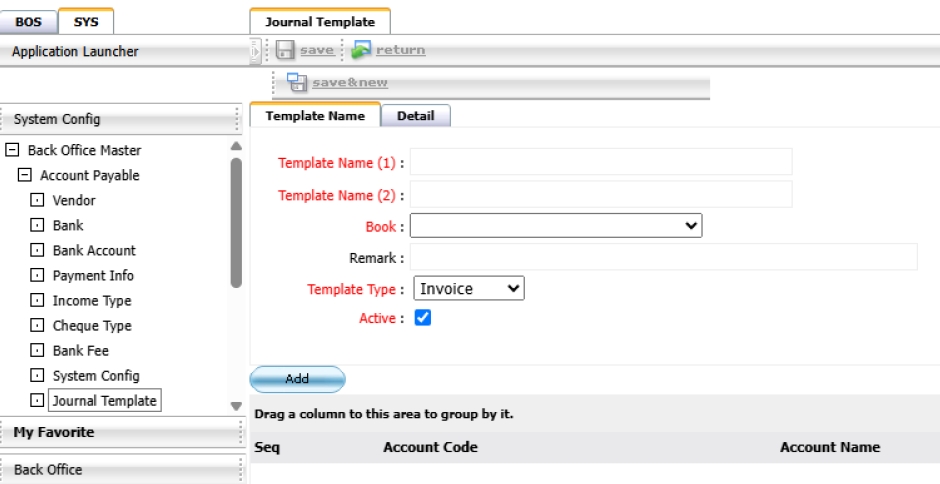
Note: Misconfiguration in accounting format can cause incorrect postings in the GL.
3. PAYABLE SYSTEM
The Payable System is used to manage all operational transactions related to accounts payable. It covers invoice creation, payment processing, withholding tax, deposit records, debt adjustments, and related financial activities. The system supports various payment methods and tax requirements, ensures proper documentation, and enables submission of finalized transactions to the General Ledger (GL). This module helps streamline financial workflows, ensures data accuracy, and maintains compliance with company policies and legal regulations.
3.1 Invoice
This menu allows users to create invoice documents, either manually or imported from other systems. Invoices are used to record accounts payable transactions and form the basis for future payments.
To perform the task:
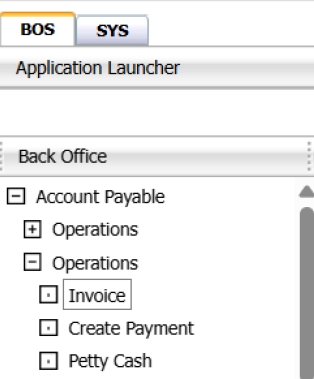
- Go to BOS > Accounts Payable > Operation > Invoice.
- Click 'New' to create a manual invoice or select import option to retrieve from linked systems.
- Fill in creditor name, invoice number, date, and amount.
- Attach reference documents or PO as required.
- Save the invoice for further processing or approval.
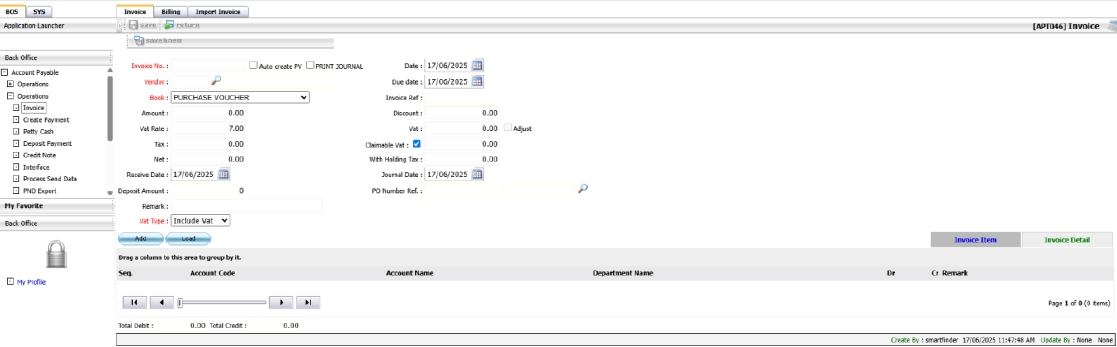
Note: Ensure invoice information matches the actual supplier invoice to prevent payment discrepancies.
3.2 Import Invoice
This function allows users to import multiple invoice records into the SmartBOS Account Payable module using a predefined Excel template. It helps streamline data entry and reduce manual errors.
To perform the task:
- Navigate to: BOS > Account Payable > Operations > Invoice
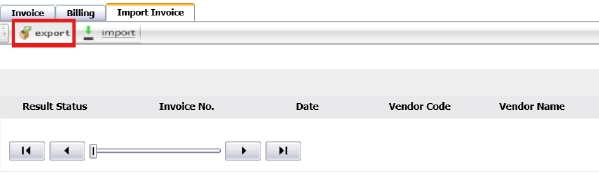
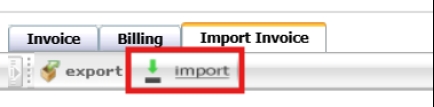
- Select the tab “Import Invoice.”

- Click the Export button to download the Excel import template.
- Open the downloaded file and enter invoice data in the designated fields.
![]()
Important: Do not modify any column headers or cell formats.
- Required fields in the Excel file include:
- Receive No., Symbol No., Invoice Date, Vendor Code, Seq No.
- Debit Amount, Credit Amount, Account Code, Department Code, Remark
- Due Date, Discount, Amount, VAT, Claim VAT
- Tax, Net, Journal Remark, Journal Date, GL Book Code, VAT Rate, VAT Type

- Save the file, return to SmartBOS, and click the Import button to upload the file.
- If validation is successful, the system will display the imported invoice data.

- Review the data and click Save to complete the process.

The “Result Status” column will show Success upon successful upload.
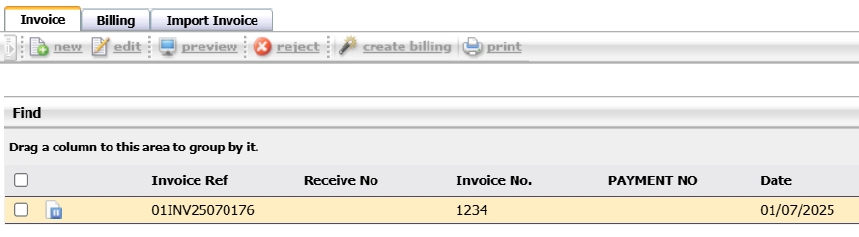
- The imported invoices will now be available in the Invoice menu.
Note: Do not change the Excel template structure; invalid formats will cause the import to fail.
3.3 Billing
The Billing function allows users to group multiple invoices from the same vendor into a single billing document. This simplifies document handling and helps manage payments more efficiently.
To perform the task:
- Navigate to: BOS > Account Payable > Operations > Invoice
- Select multiple invoice records and click Create Billing.
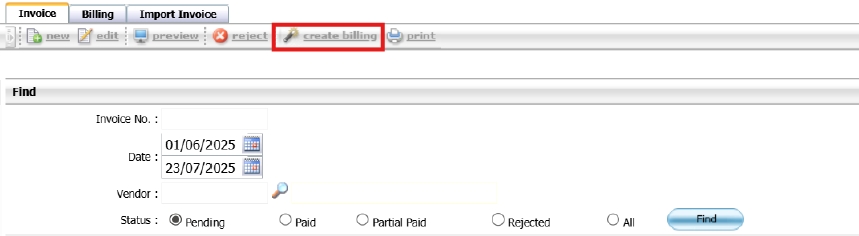
- Choose the Billing Date and click Confirm.

- Go to the Billing tab to view the newly created billing document and its related invoices.
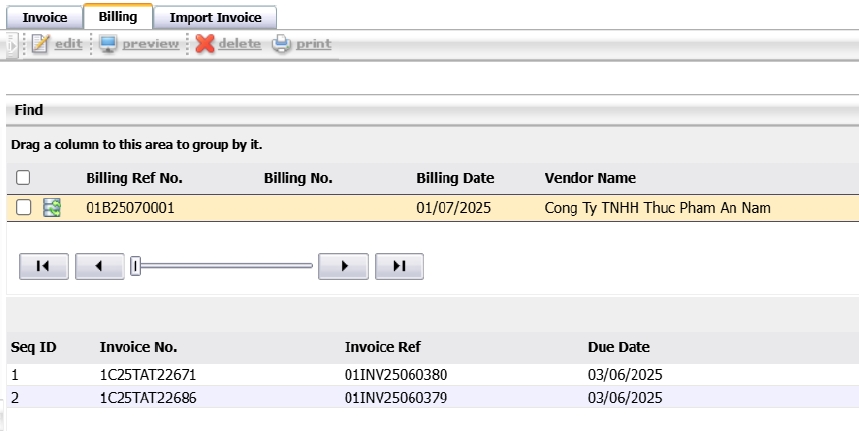
- To preview or print, click Preview or Print.
- To add more invoices, click Edit on the billing document.
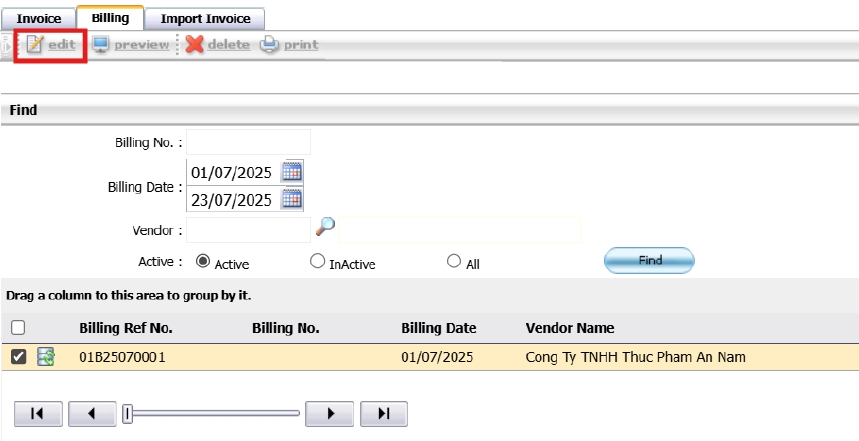
- In the edit screen:
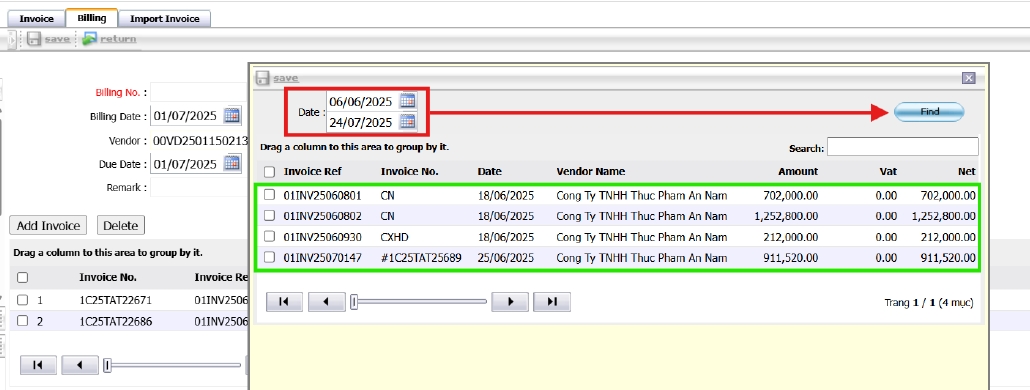
- Click Add Invoice.
- Specify the Date parameter, then click Find.
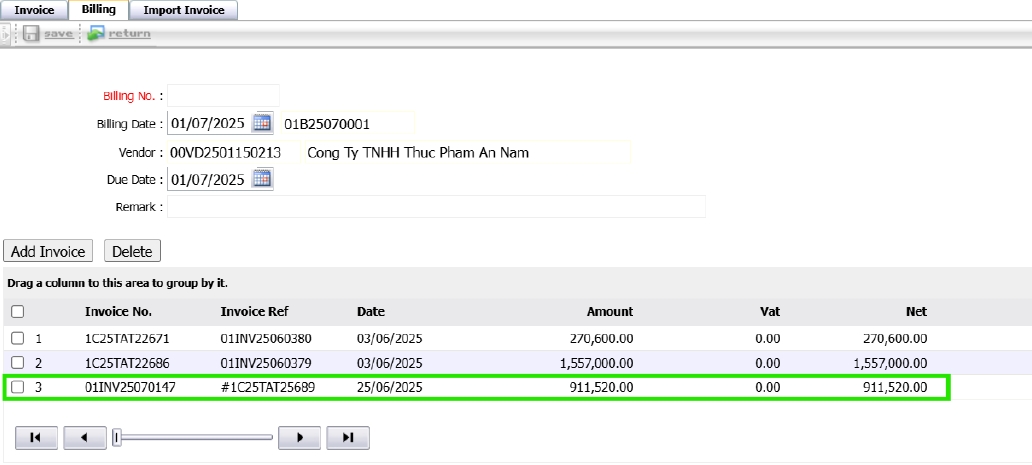
- Select the invoice(s) from the results and click Save.
- Add or confirm the Billing No.
- Click Save at the top left of the editing screen to complete and return to the billing list.
- To print the document, select the record and click Print to generate or download the PDF file.

Note: Only invoices from the same vendor can be grouped under one billing document.
3.4 Payment
The Payment menu is used to settle debts recorded from invoices. Users can issue payments via cash, cheque, bank transfer, or direct debit depending on setup.
To perform the task:
- Go to BOS > Accounts Payable Operation > Create Payment.
- Click 'Create' and select creditor to view outstanding invoices.
- Choose invoices to pay and specify payment type and method.
- Enter payment details such as cheque number, transfer ref, or bank account used.
- Save and approve the payment.
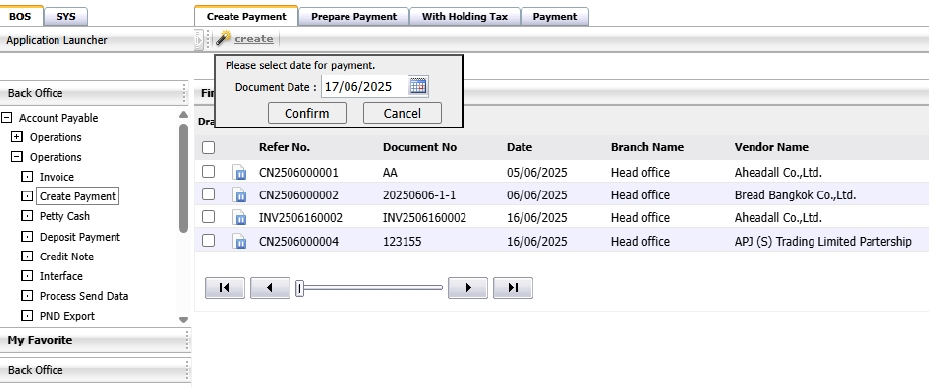
Note: Only approved invoices can be paid. Confirm payment method is aligned with setup in the system.
3.5 Payment No Invoice
This function allows users to record a payment to a vendor without referencing an existing invoice. The payment will be logged and can be offset against future transactions.
To perform the task:
- Navigate to: BOS > Account Payable > Operations > Create Payment
- Select the tab Prepare Payment.
- Click Pay No Invoice.

- Enter the payment details:
- Date
- Vendor
- Due Date
- Remark and other necessary fields
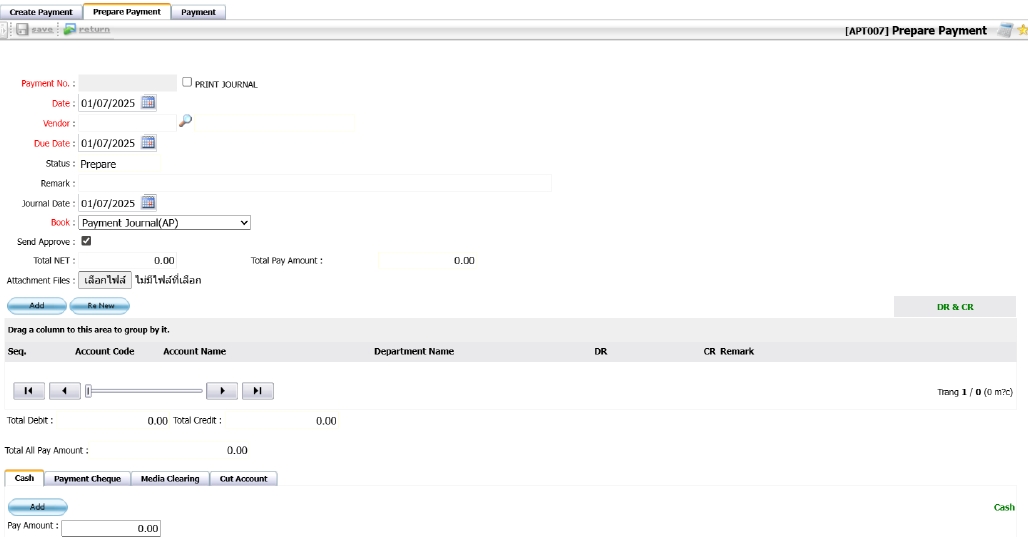
- To add debit and credit accounts:
- Click Add
- Select the account, then click OK.
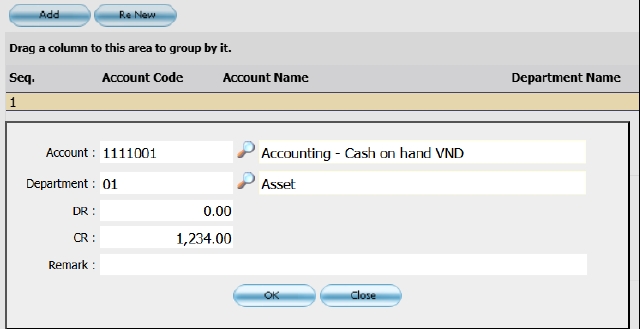
- The account entry will appear in the list below.
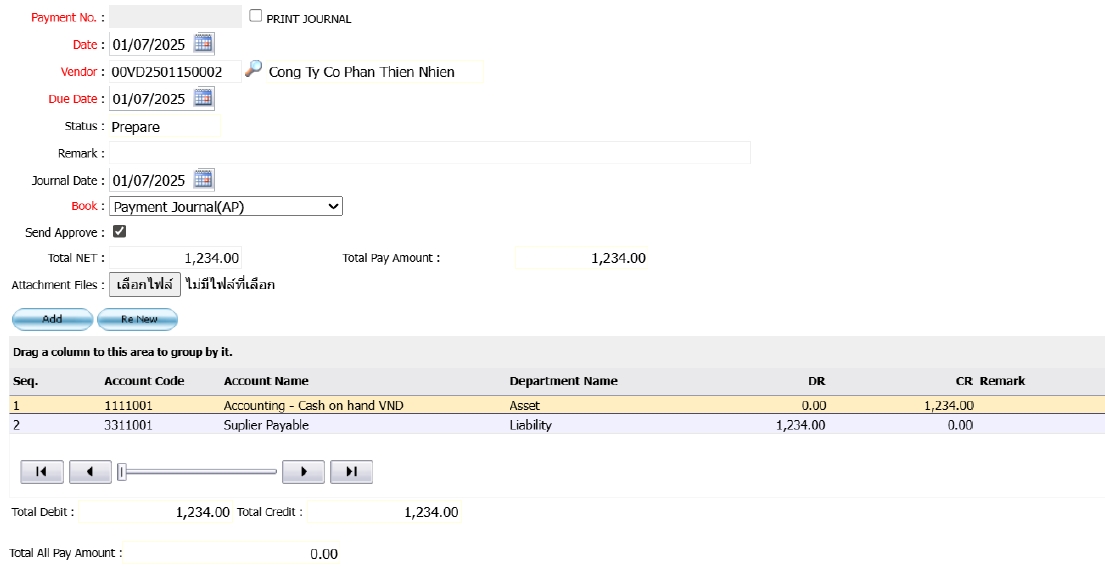
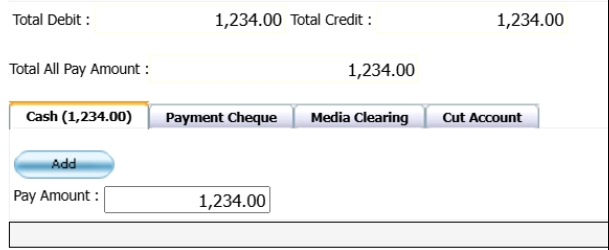
- Select the payment method tab, then click Add or enter the amount.
- Click Save at the top left to return to the Prepare Payment page; the document will appear under the Payment tab.
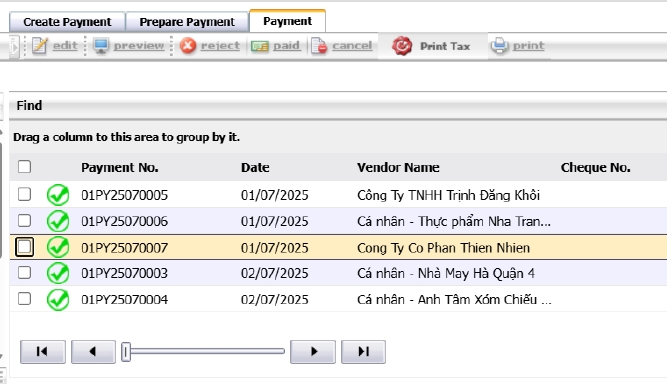
- Click Paid to mark the document as completed.

Note: This function is useful for recording advance payments or standalone transactions without prior invoices.
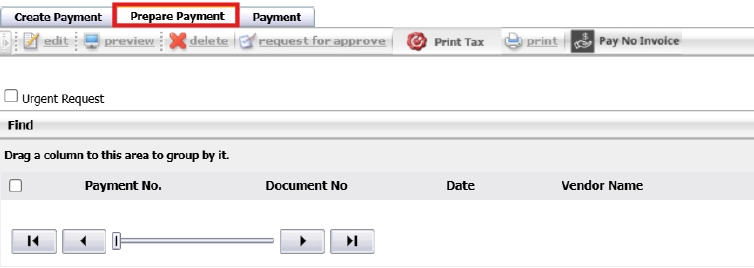
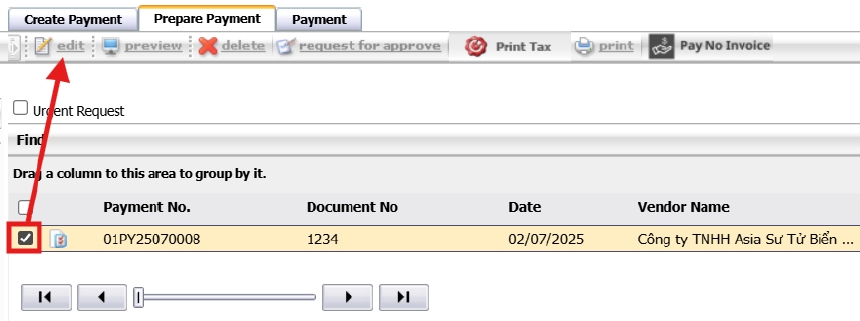
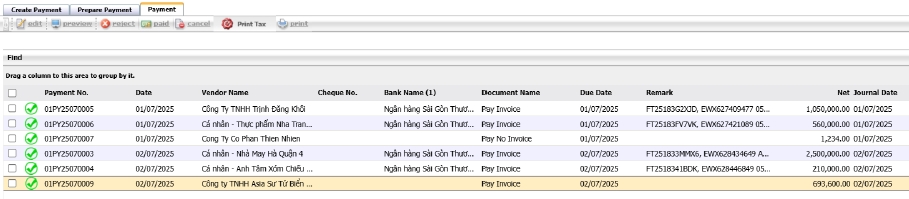
3.6 Prepare Payment
This page lists pending payments awaiting review. Users can edit payment details, assign payment methods, and finalize the document before approval. It ensures all information is complete and accurate prior to processing.
To perform the task:
- Navigate to: BOS > Account Payable > Create Payment
- Select the tab Prepare Payment.

- All created payment records will be shown here, except those from Pay No Invoice.
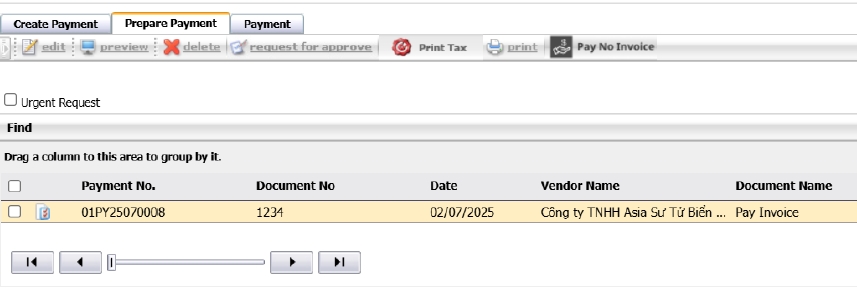
- To edit a record, select it by ticking the checkbox, then click Edit.
- Choose the payment method from the tabs below the invoice details.
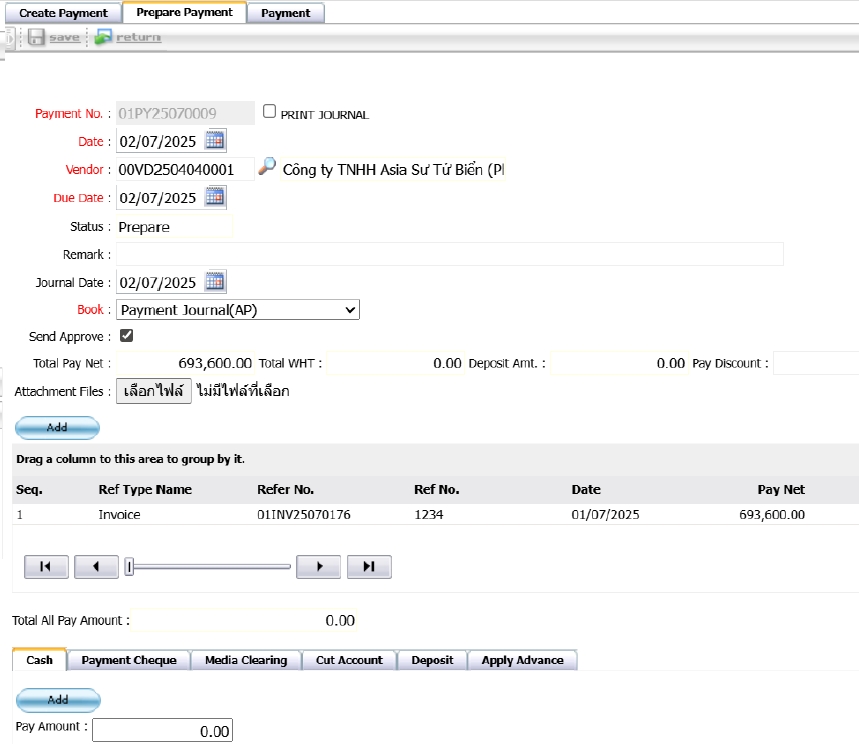
- Complete the form based on the selected payment method (e.g., amount, bank), then click Add.
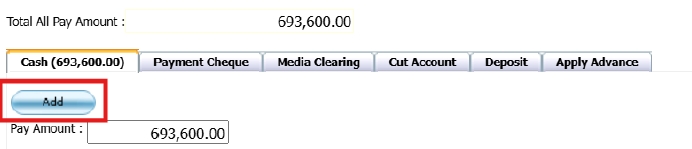
- Click the DR&CR tab to view accounting entries.

- Debit and credit account codes will auto-fill from system settings. Users can edit them as needed.

- Click Save to finalize the payment; you’ll be redirected to the previous page.
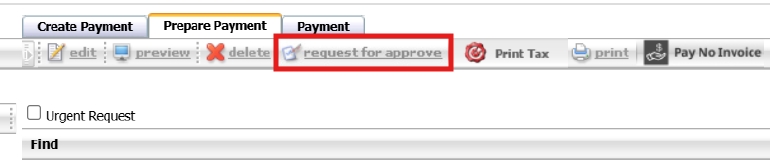
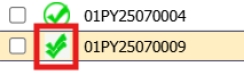
- Once approved, the document will appear on the Payment page. Confirm the payment after completion.
- Click Paid to mark the document as completed.

- Use Preview or Print at the top of the page if needed.
Note: Payment methods and account codes can be edited before final approval.
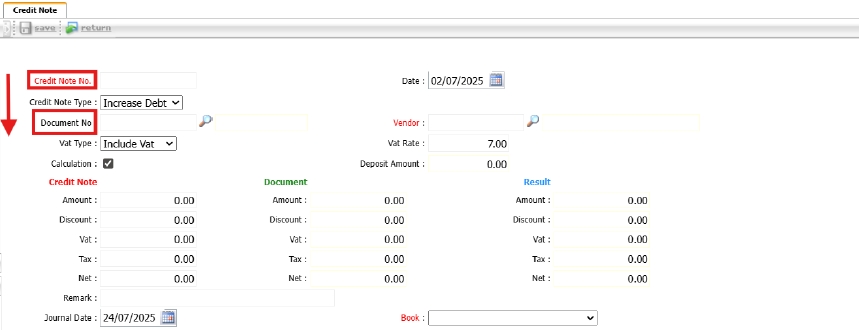
3.7 Credit Note
A Credit Note is used to reduce the balance of an invoice or payable document due to returns, overcharges, or other adjustments, ensuring accurate account reconciliation.
To perform the task:
- Navigate to: BOS > Account Payable > Operations( 2 ) > Credit Note
- Click New to create a new credit note document.

- Enter the Credit Note number, select the adjustment type (increase/decrease), choose the date, and click Document No. to link the credit note to a payable document.
- Set parameters such as Document No., Date, and Vendor, then click Find.
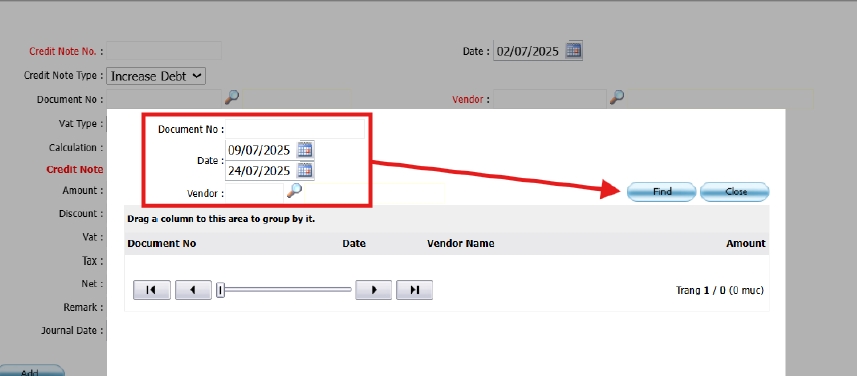
- Select the desired document from the result list below.
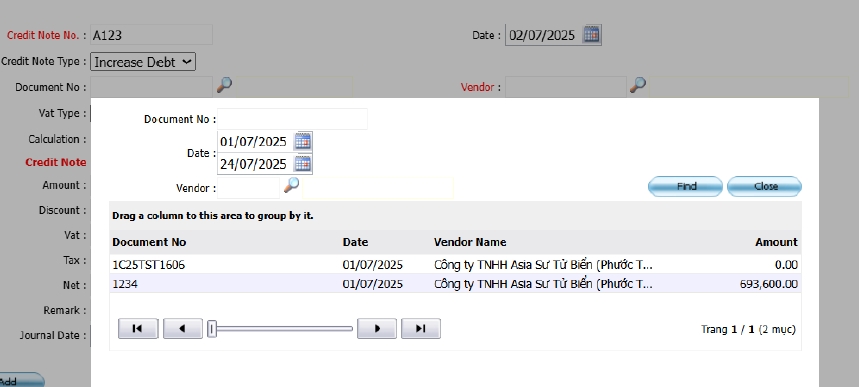
- Enter the credit amount; the system will automatically update the UI.
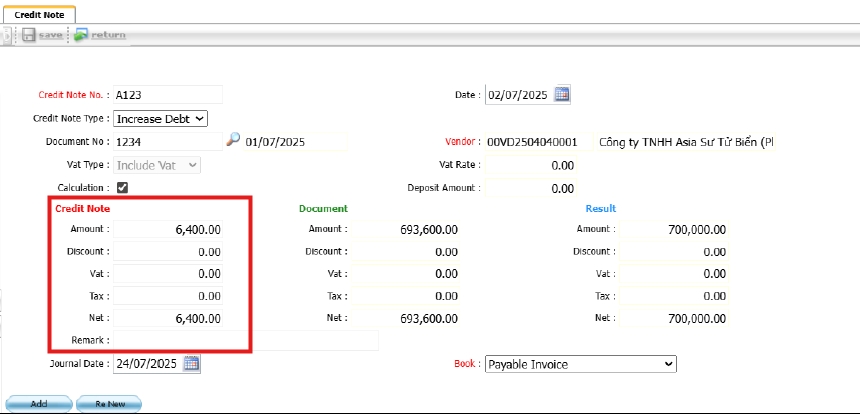
- Click Renew to recalculate debit/credit entries or adjust account lines manually.

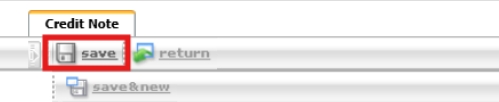
- Click Save to complete and return to the previous screen.
- The Credit Note will also appear in the Create Payment page and can be selected together with other payable documents to offset the total amount.
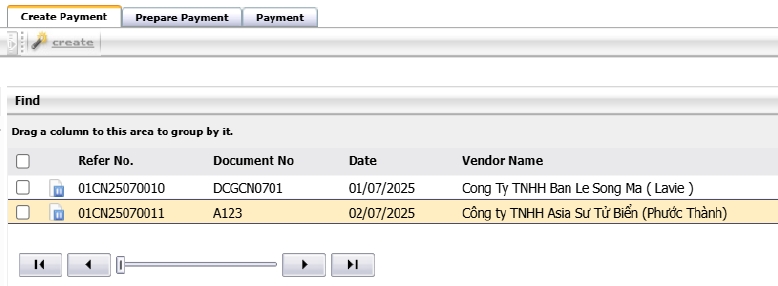
Note: Only one credit note can be applied per vendor per payment transaction.
3.8 Withholding Tax
This function calculates and records withholding tax based on invoice type and income category. It ensures compliance with tax law and enables generation of tax reports (e.g., PND 3/ 53 ).
To perform the task:
- Go to BOS > Accounts Payable > Operation > Create Payment > Withholding Tax.
- Select the invoice to apply withholding tax or click New.
- Choose income type and verify tax rate.
- Save the transaction for submission and reporting.
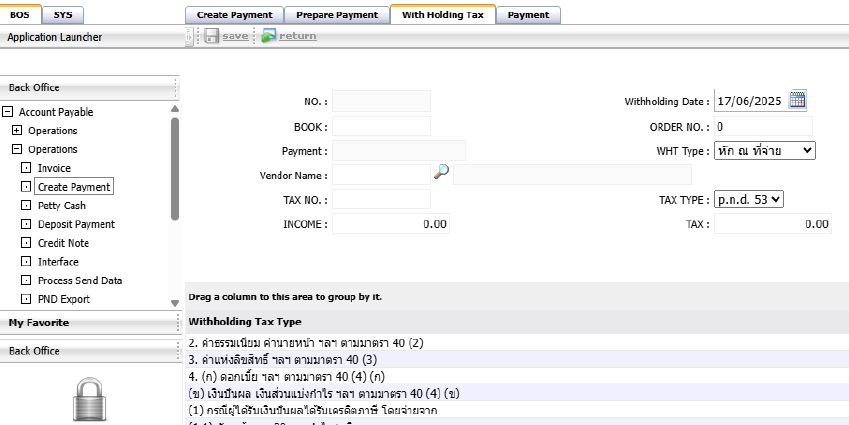
Note: Income type setup must be completed before processing withholding tax.
3.9 Deposit Documents
Used to record advance payments or deposits made to suppliers. These are tracked separately and can be applied to invoices later.
To perform the task:
- Go to BOS > Accounts Payable >Operation > Deposit Payment
- Click 'New' and enter deposit details including creditor, amount, and deposit date.
- Attach supporting documents if any.
- Save to record the deposit.
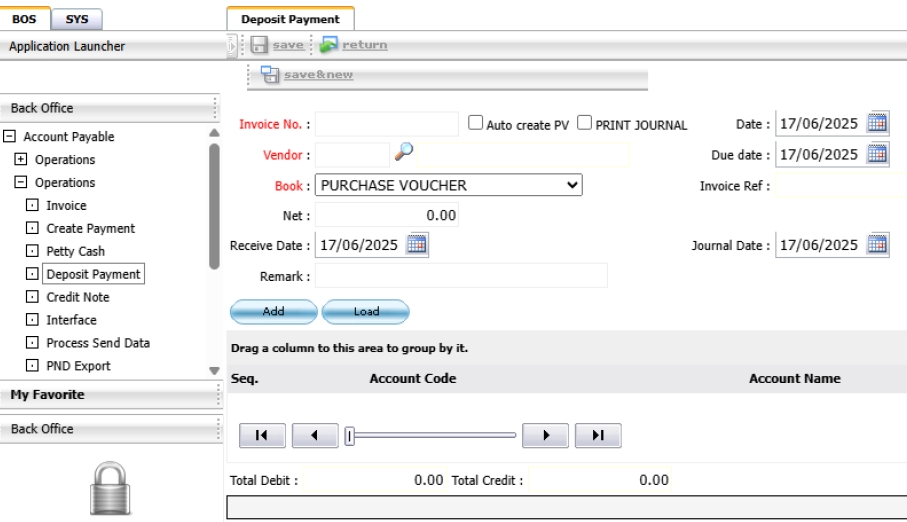
Note: Deposits can later be applied to offset against future invoices.
3.10 AP Document Approval
This function allows users to manage the approval workflow for Accounts Payable documents. Documents must be reviewed and approved before they can be printed or processed further.
To perform the task:
- Navigate to: BOS > Account Payable > AP Document Approval
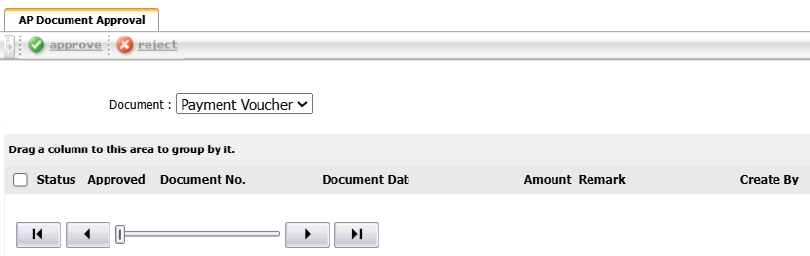
- All pending approval documents will be listed on this page.

- Click the document icon to view or preview the document in PDF format.

- The Levels section shows how many approval stages the document has passed.
- Up to 4 approval levels can be configured.

- To approve or reject, select the document and click the appropriate button at the top of the screen.
Note: Only users with approval rights can take action on documents.
3.11 Submission of Debt Settlement Information
This step is used to finalize all payment and invoice documents before posting to the accounting system. It locks data for the specified period to ensure integrity.
To perform the task:
- Go to BOS > Accounts Payable > Process Send Data
- Select period and document types.
- Click 'Submit' to send all completed transactions to the General Ledger.

Note: Only finalized and approved documents can be submitted to GL.
3.12 Export the Data File
Allows export of AP data into standard file format (e.g., XML, Excel) for submission to external agencies or internal analysis.
To perform the task:
- Go to BOS > Accounts Payable > PND Export.
- Choose export type and data range.
- Click 'Export' and save file to designated location.
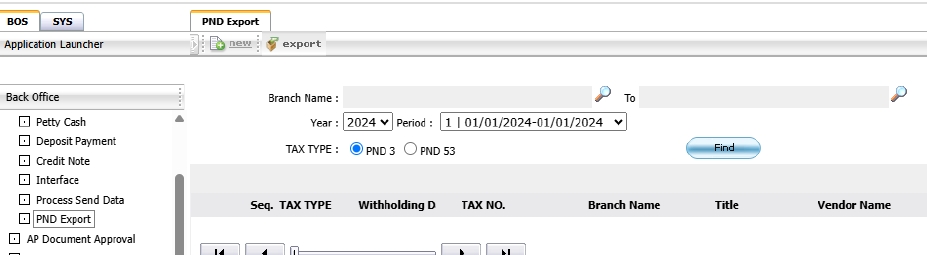
Note: Ensure file is reviewed before submitting to revenue authorities or auditors.
3.13 Manage Taxes
This section is used to manage tax reporting related to AP including preparation of monthly forms and summaries for withholding taxes. To perform the task:
- Go to BOS > Accounts Payable > Operation > Vat.
- Select period and tax form type (e.g., PND3, PND53).
- Review list of tax transactions and generate report.
- Print or export tax form.
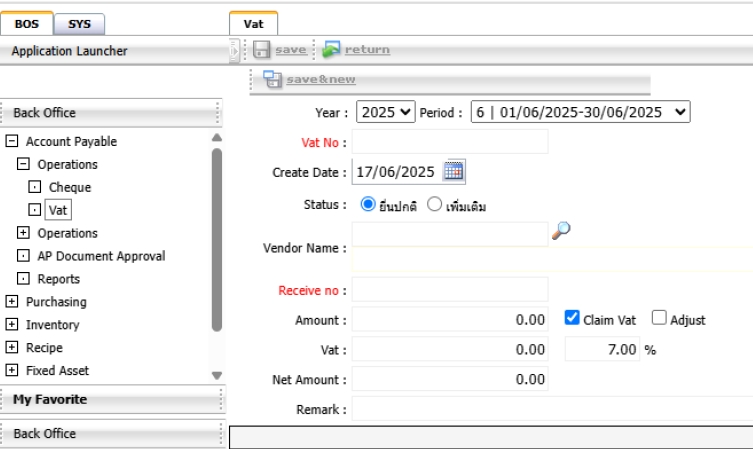
Note: Only transactions marked with income type and withholding setup will appear in tax reports.
3.14 Check Information
Provides functions for tracking, printing, voiding, and managing cheque transactions. Useful for cheque-based payments issued via the AP system.
To perform the task:
- Go to BOS > Accounts Payable > Check Information.
- Search for issued cheques by date, supplier, or bank account.
- Print cheque, void or mark as cleared as necessary.
- Export cheque list for review.
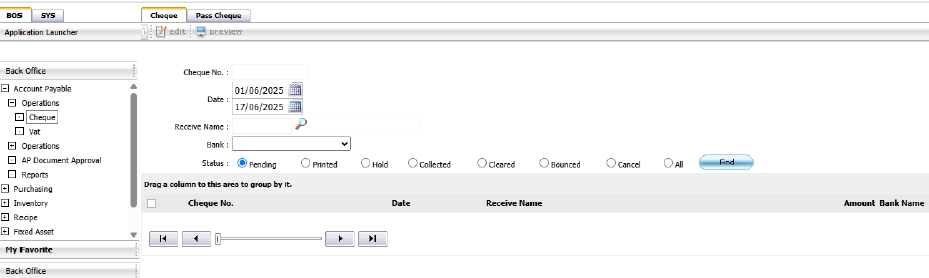
Note: Always cross-reference cheque status with bank statement before marking as cleared.
4. Process Send Data
This function allows users to post finalized debt and payment documents from the Accounts Payable module to the General Ledger (GL), ensuring the accounting system is up-to-date.
To perform the task:
- Navigate to: BOS > Account Payable > Operations> Process Send Data
- The Process Send Data tab will display all debt documents.
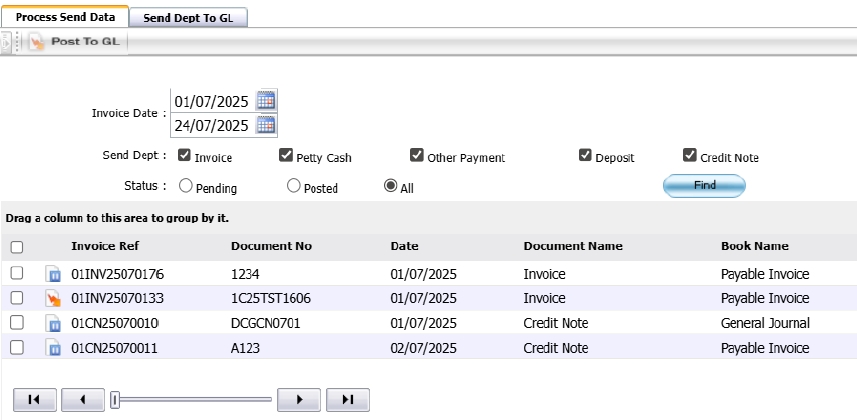
- The Send Debt to GL tab will display all payment documents.
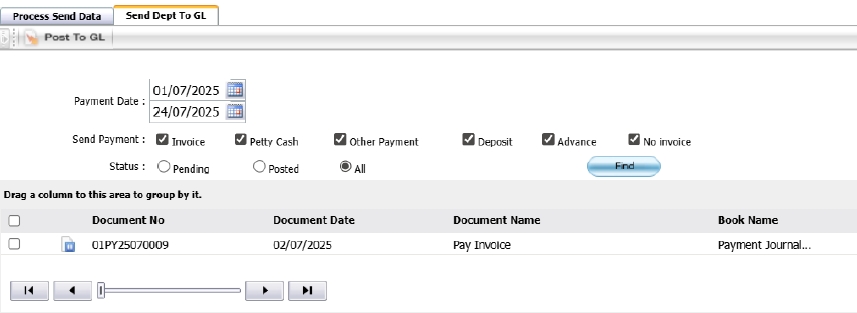
- To post, select the documents by ticking the checkboxes.
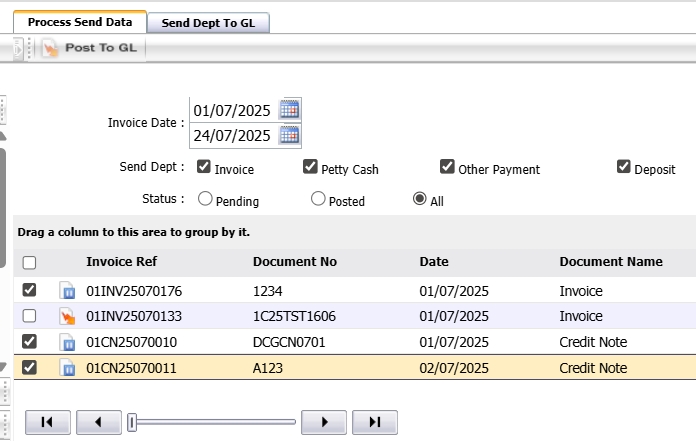
- Click Post to GL to send the selected documents to the General Ledger.

- Once complete, a system message will confirm success, and the document status icons will update.
![]()
Note: Only finalized documents can be posted to the GL.