BOS - Fixed Asset User Guide
1. Overview
The Fixed Asset system enables hotels to manage assets from acquisition to final depreciation. It supports asset grouping, categorization, location assignment, and depreciation account mapping. The system provides tools for recording, splitting, transferring, repairing, and approving assets, as well as submitting depreciation to the accounting system. Integration with procurement and accounting modules ensures complete asset traceability and financial compliance.
2. Set Configuration
The Set Configuration section is used to define fundamental asset data before operational use. It allows users to prepare essential structures like asset groups, types, and item lists, ensuring readiness for accurate tracking, depreciation, and reporting.
2.1 Menu Items
The Menu Items module enables users to configure asset classifications such as groups, types, and individual items. Each item is linked to depreciation accounts, providing a standardized structure for efficient asset control and financial integration.
2.1.1 Group
Asset groups represent major categories of fixed assets such as furniture or equipment. Grouping ensures consistent depreciation and reporting structure.
To perform the task:
- Go to SYS Tab > Procurement
- Select "Group"
- Click "New"
- Fill in item group code and names (English/Thai)
- Bind depreciation (Dr.) and accumulated depreciation (Cr.) accounts
- Define account legs by department if required
- Click "Save"
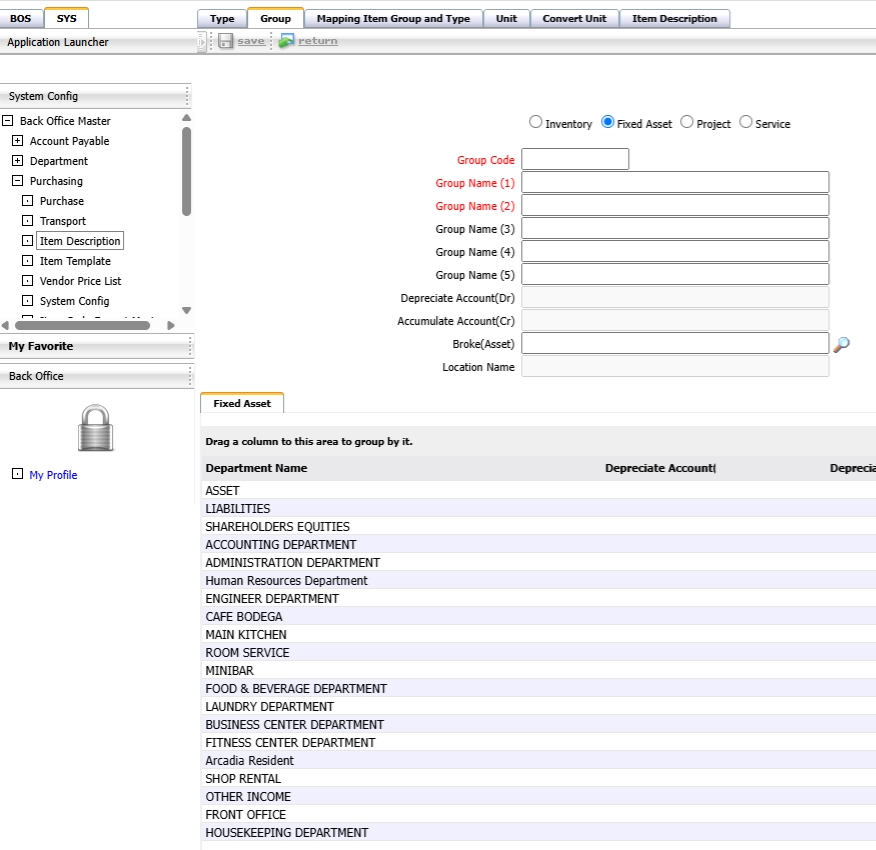
Note: It is recommended to name groups based on accounting categories, such as Furniture or Equipment, to align with depreciation reports.
2.1.2 Type
Asset types are subcategories within a group (e.g., office furniture under furniture group). These support more detailed classification.
To perform the task:
- Go to SYS Tab > Procurement > Type
- Click "New"
- Enter type code and names (English/Thai)
- Assign to item group
- Click "Save"
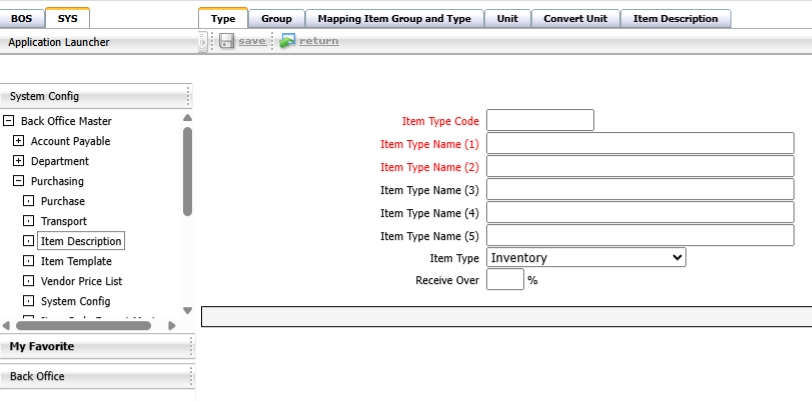
Note: Use specific and relevant type names that match the group, such as "Office Chair" under the "Furniture" group, for accurate classification.
2.1.3 Mapping Group and Type
This step links specific asset types to corresponding asset groups to support accurate reporting and categorization.
To perform the task:
- Go to SYS Tab > Procurement > Mapping
- Select desired item group
- Click "Edit"
- Select desired asset types
- Use arrow buttons to assign or unassigned
- Click "Save"
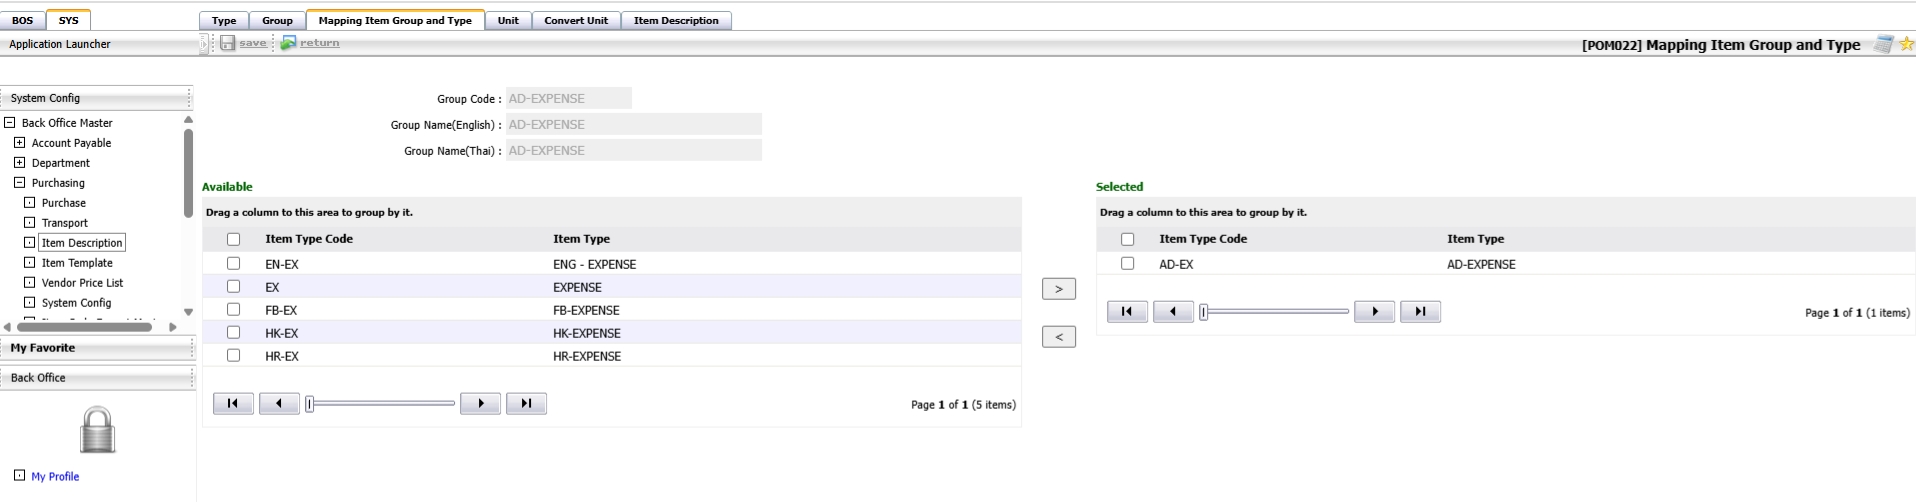
Note: Double-check the mapping before saving, as it directly affects reporting and asset categorization.
2.1.4 Item
Asset items represent individual asset records with complete details, account bindings, and categorization.
To perform the task:
- Go to SYS Tab > Procurement > Item
- Click "New"
- Enter item name (English/Thai), select unit
- Choose asset group and type
- Bind to correct account legs
- Click "Save"
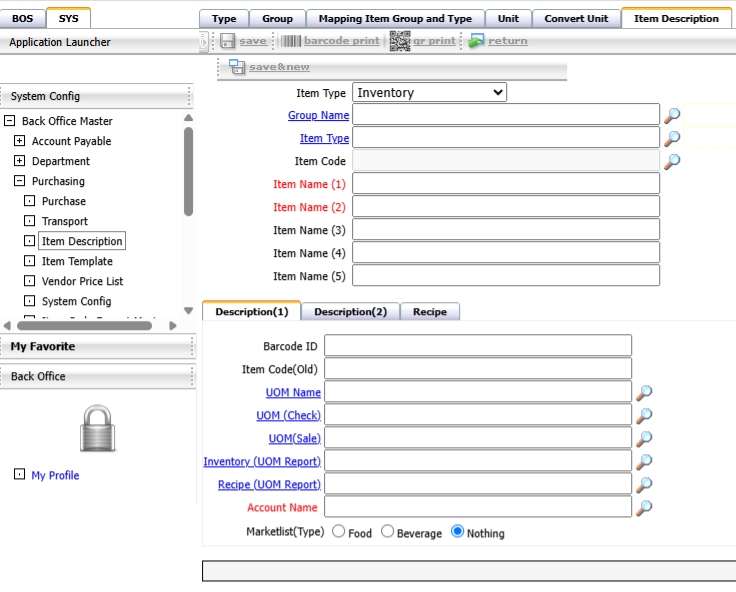
Note: It is recommended to upload images or details of the asset for future reference and to select the correct account based on the hotel’s accounting policy.
2.2 Venue
Venues represent asset storage or usage locations for proper tracking and control.
To perform the task:
- Go to SYS Tab > Assets > Locations
- Click "New"
- Enter venue number and name
- Click "Save"

Note: Use meaningful names that reflect the actual location, such as “Meeting Room – 2nd Floor” or “Warehouse 01,” to simplify asset tracking.
3. Operation
The Operation section covers all essential asset activities, including asset saving, splitting, transactions, approvals, and posting to the accounting system. It ensures end-to-end control of asset lifecycle management, from acquisition to depreciation, with traceable and compliant processes.
3.1 Save Assets
Assets can be added via the procurement system or directly within the Fixed Asset module.
To perform the task:
- Go to BOS Tab > Asset System > Save Assets
- For direct entry, click "New"
- Fill in asset details, set depreciation years/rate
- Upload images if needed
- Click "Save"
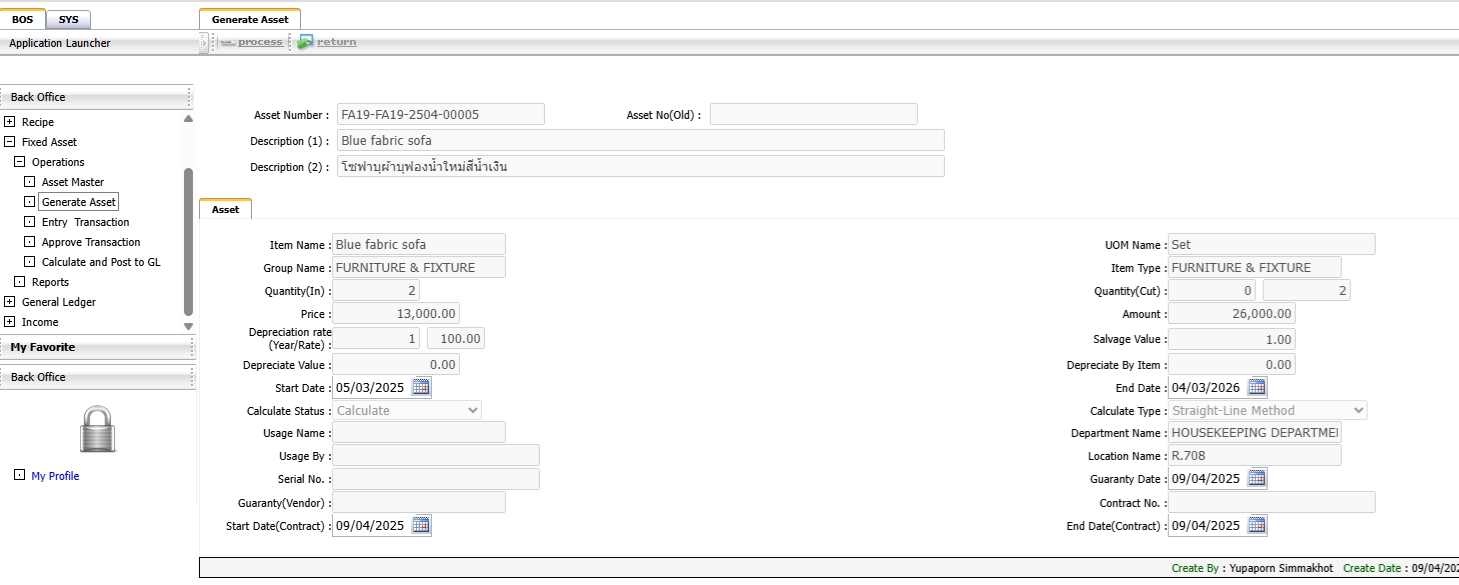
Note: Asset records from the procurement module appear automatically after goods receipt confirmation.
3.2 Asset Transactions
Includes transactions such as amortization, transfers, and repairs. Supports tracking movement and value adjustments.
To perform the task:
- Go to BOS Tab > Asset System > Asset Transactions
- Click "New"
- Select transaction type (write-off, transfer, repair)
- Set original/new agency and location
- Select asset ID
- Click "Save"
- Use "Preview" to print, "Request for approval" to initiate approval
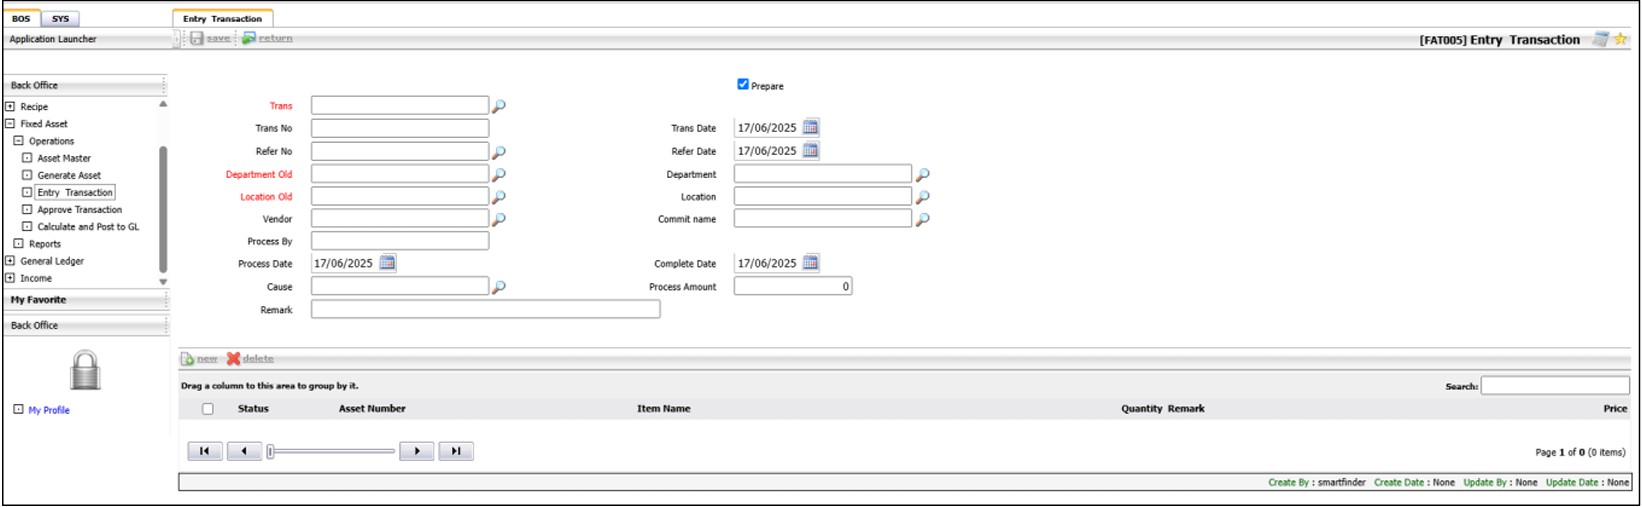
Note: Please verify the data before clicking “Request for Approval,” as the transaction will be officially recorded in the system.
3.3 Approval of Asset Transaction
Asset transaction approval finalizes changes like depreciation, transferring asset status accordingly.
To perform the task:
- Go to BOS Tab > Asset System > Approval
- Select document
- Click "Approve" or "Reject"
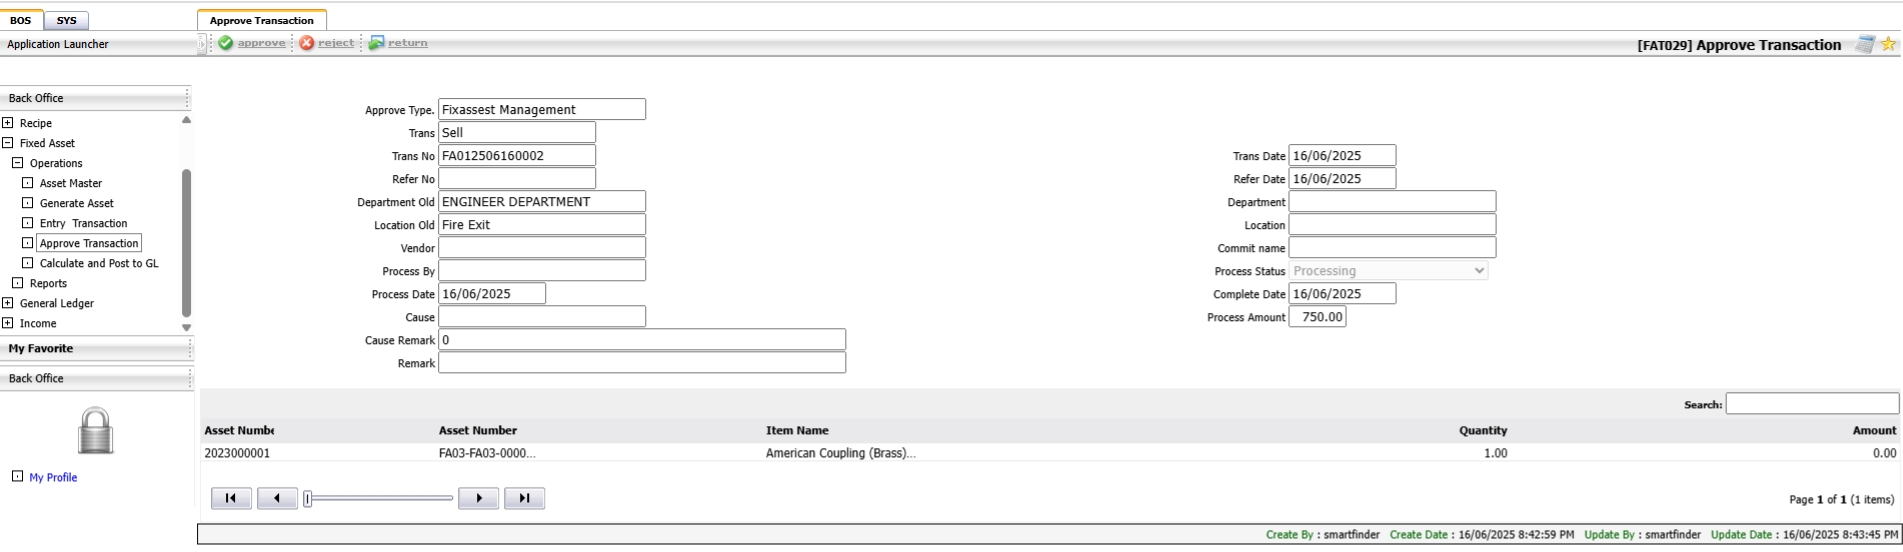
Note: Approvers should review all asset details carefully before approval to avoid incorrect postings.
3.4 Submit Account Login Information
Submit processed depreciation and asset data to the GL system monthly.
To perform the task:
- Go to BOS Tab > Calculate and Post to GL
- Select period (year/month)
- Click "Process" to generate batch
- Click "Post to GL" to submit
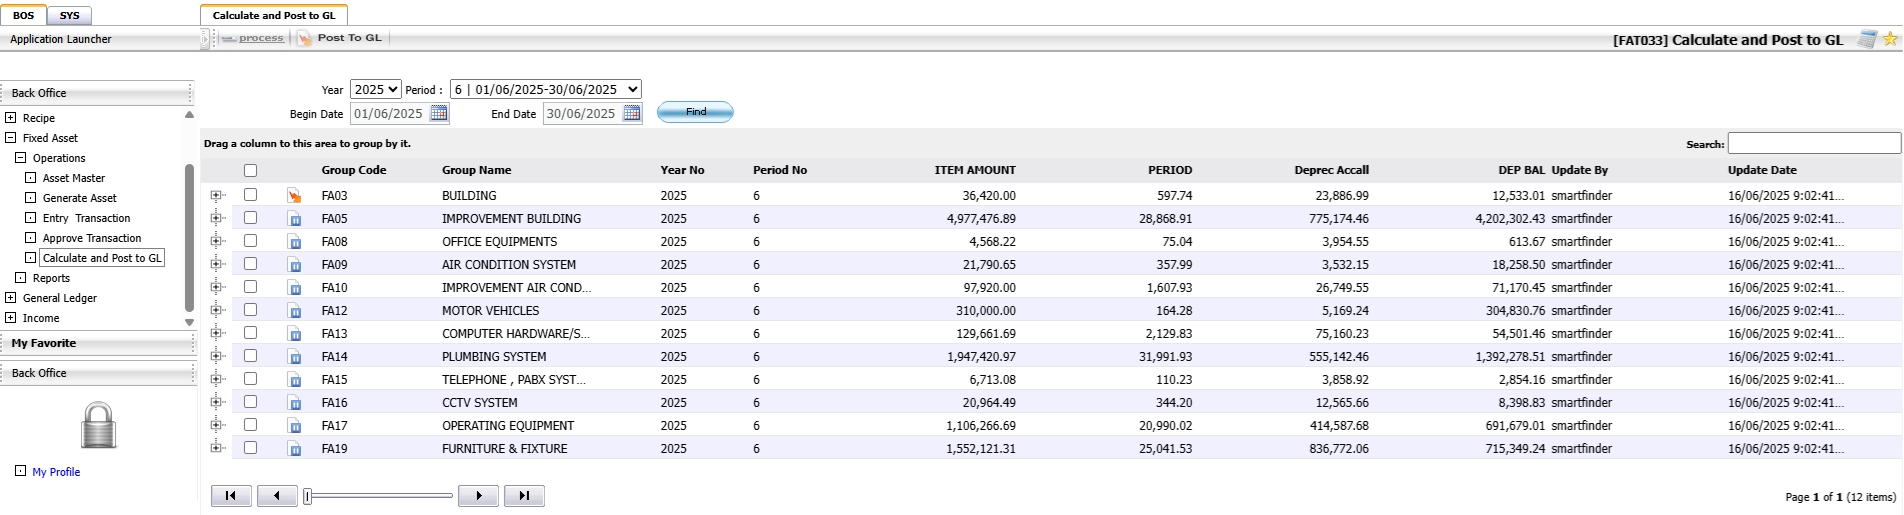
Note: Once submitted, new assets in the same group can't be re-sent unless the previous batch is removed.