BOS - Inventory User Guide
1. Overview
Available under the Smart Inventory module, this system helps manage inventory, stock movement, warehouse locations, and item tracking across departments. It ensures cost transparency and supports integration with accounting and procurement systems, enabling efficient stock control and financial tracking.
2. SET CONFIGURATION
Available under SYS > Back Office Master > Purchasing, this section defines the setup for inventory management. This includes grouping items, defining types, unit conversion, item creation, storage setup, and receipt/pay type configurations. It ensures a standardized structure for tracking inventory and integrating with procurement and accounting modules.
2.1 Menu Items
This section includes the foundational setup for managing inventory structure, such as item grouping, categorization by type, unit definitions, conversion rates, and individual item master data. Proper configuration is crucial for procurement, usage tracking, and integration with accounting modules.
2.1.1 Group
Defines inventory groups and account mapping for accurate cost tracking and integration with financial modules.
To perform the task:
- Navigate to SYS > Back Office Master > Purchasing > Items > Group
- Click the New button to create a new inventory group (e.g., Fresh Food, Beverages)
- Fill in Item Group ID, English & Thai Names
- For inventory groups, assign Cost Account, Expense Account, Waste Account
- Click Edit to find and bind accounts using the search function, then click Update
- For Direct Inventory: assign accounts directly to eligible departments and save
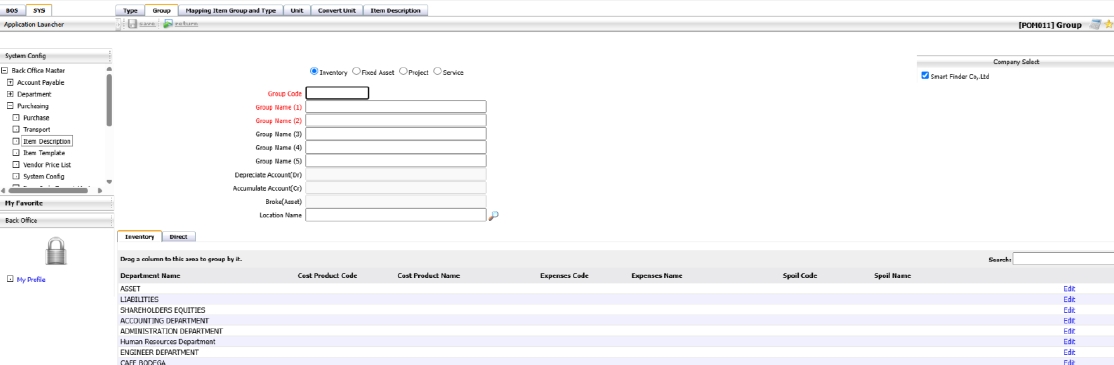
Note: Defining groups with correct account mapping ensures accurate cost posting and allows the system to deduct items correctly during withdrawal or purchase.
2.1.2 Type
Creates subcategories within groups to classify items more precisely for procurement and reporting.
To perform the task:
- Navigate to the 'Type' tab
- Click New to define subcategories of groups (e.g., fresh, dry food)
- Enter type code (max 4 digits), English and Thai names, select Inventory as category
- Save the entry
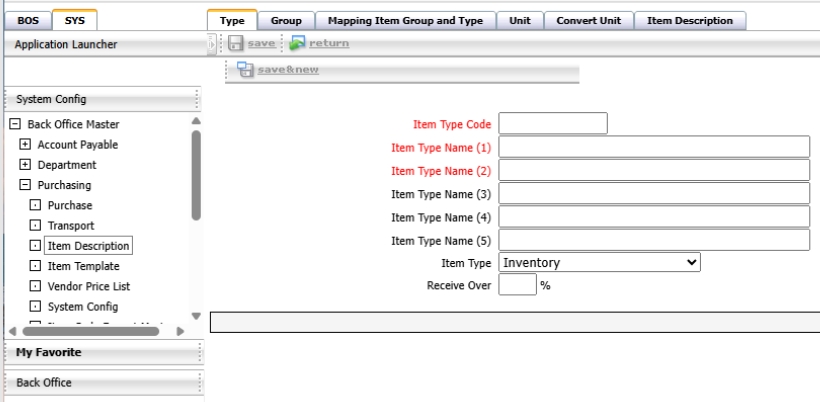
Note: Types help in categorizing items more precisely within each group.
2.1.3 Mapping Group Item and Type
Links item types to groups to form a structured item hierarchy for consistent inventory organization.
To perform the task:
- Select a group, click Edit
- Select item types from the left and use the '>' button to link them to the group
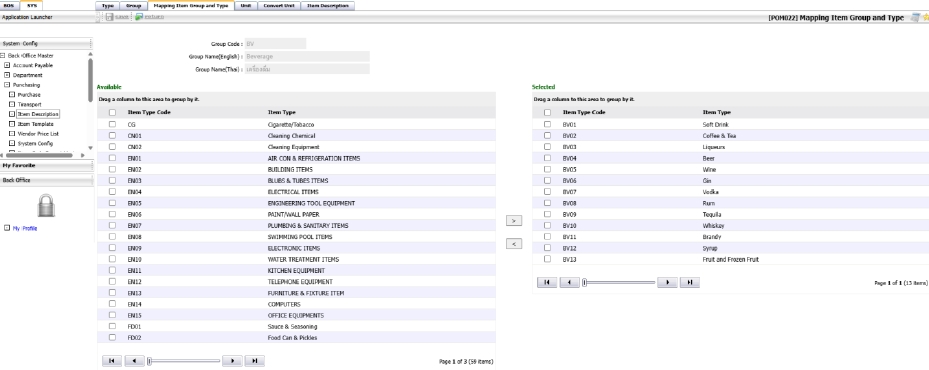
Note: Group-type mapping is required for structured item hierarchy.
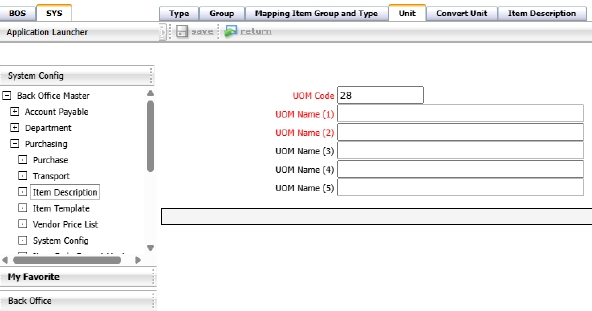
2.1.4 Unit
Sets up standard measurement units used across inventory items for consistent tracking and reporting.
To perform the task:
- Navigate to the Unit section
- Click New and enter unit code, English and Thai names
- Save the unit

Note: Standard units ensure consistency in procurement and stock tracking.
2.1.5 Convert Unit
Defines unit conversion ratios between purchase and stock units to ensure correct stock adjustments.
To perform the task:
- Click New in the Convert Unit tab
- Set receiving unit (e.g., Crate 1x48), stock unit (e.g., Bottle)
- Define conversion ratio (e.g., 1 Crate = 48 Bottles)
- Save the conversion
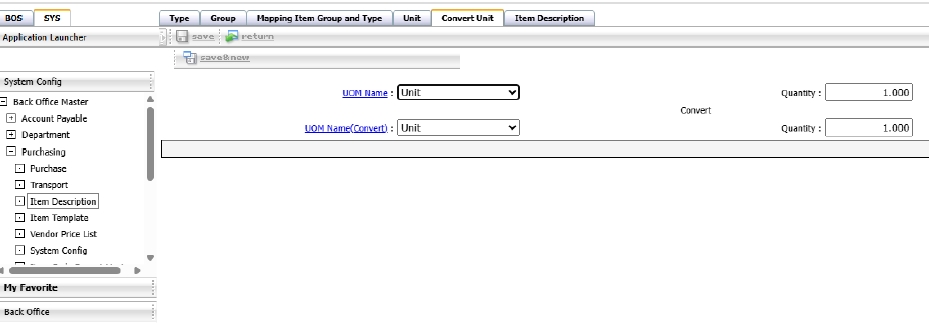
Note: Unit conversions allow flexibility between procurement and stock keeping.
2.1.6 Item
Creates master records for inventory items including codes, types, units, pricing, and accounting details.
To perform the task:
- Click New to create an item record
- Define type, group, product code, names (EN/TH), units, and account name
- Optionally define pricing, withdrawal limits, min/max stock, tax types
- For recipe items, define if it's a raw material, main ingredient, or costed item
Note: Accurate item setup enables precise tracking and integration with recipe or POS systems.
2.2 Storage
This section sets up various storage locations (e.g., general inventory, kitchen stores), allowing the system to track stock movement and balances across different locations accurately.
To perform the task:
- Navigate to SYS > Back Office Master > Inventory > Warehouse
- Click New and define storage location code, name (EN/TH), agency (if needed)
- Choose Store Type: General Inventory or Kitchen Store
- Save the storage location

Note: Storage locations allow item tracking across different warehouses or outlets.
2.3 Receipt-Pay Type
This section defines the types of inventory transactions such as receiving, payment, usage, and disposal. These definitions are essential for generating accurate stock movement documents and tracking transaction sources.
To perform the task:
- Navigate to SYS > Back Office Master > Inventory > Transaction Type
- Click New and define code, name (EN/TH), related storage location
- Set Receive or Pay category (e.g., Buy, Sell, Use)
- Save the entry
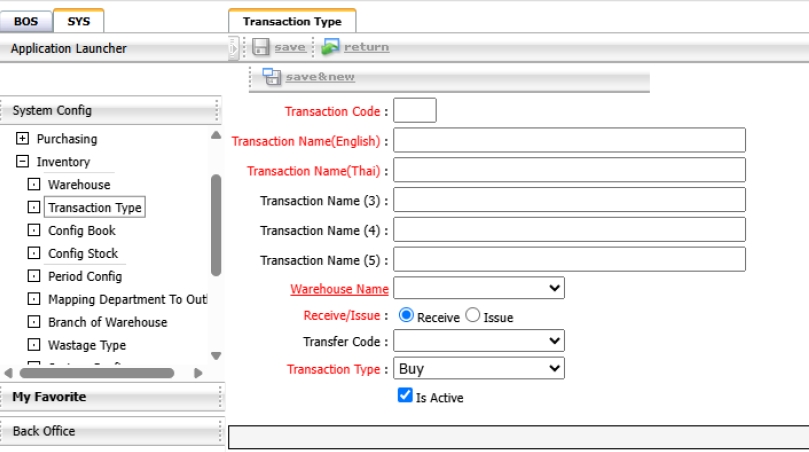
Note: Receipt/Pay types define how stock movement documents are generated and categorized.
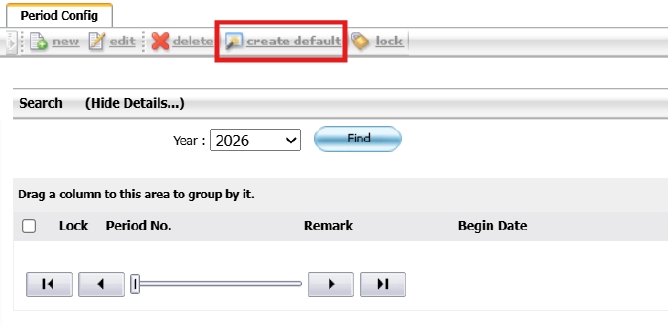
2.4 Period Config
The Period Config function is used to define accounting periods for the Inventory module. It allows the administrator to create monthly fiscal periods and control the lock/unlock status to maintain data integrity.
To perform the task:
- Navigate to SYS > Back Office Master > Inventory > Period Config to access the configuration page.
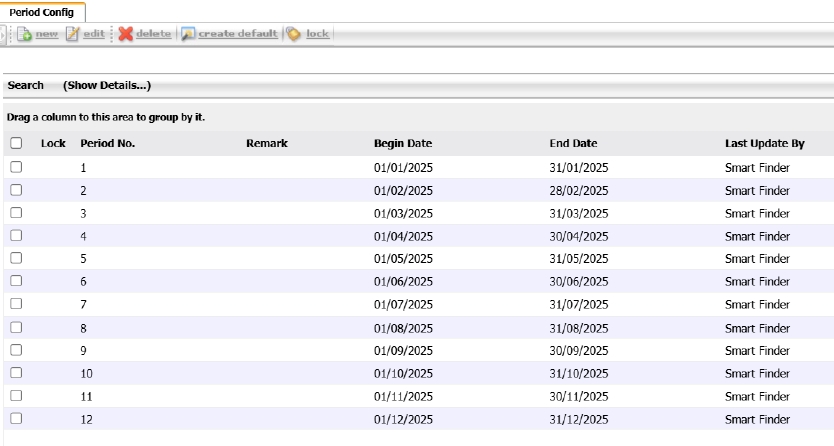
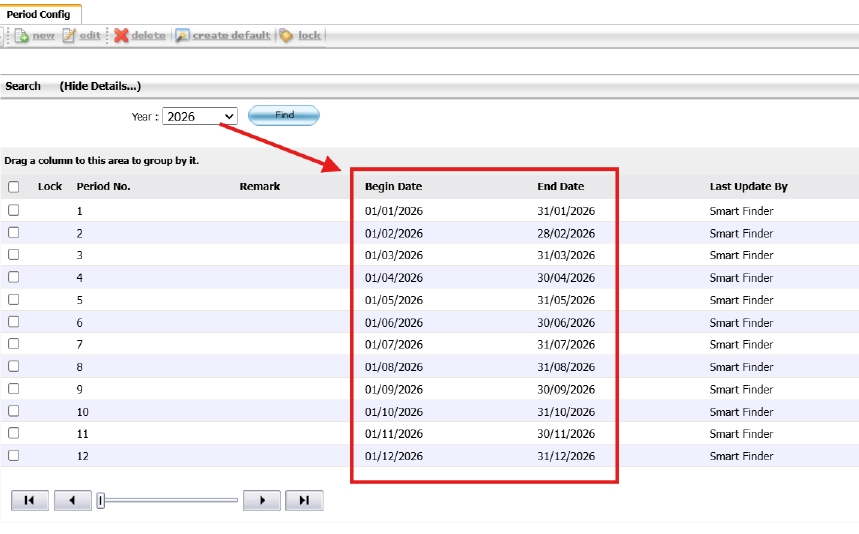
- The system displays all previously created periods, including Begin Date and End Date columns.

- Click the Search tab to open the filter parameters. Select the target Year (e.g., 2026) and click Find.
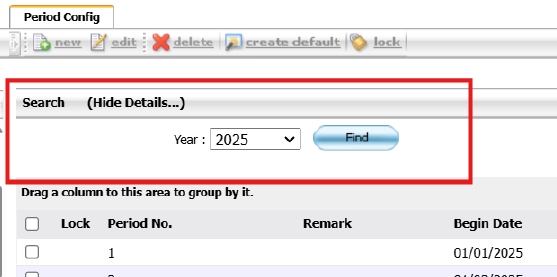
- If no periods are found, click Create Default to generate standard monthly periods.
- A confirmation message will appear after successful creation.
- To lock a period, select the desired row and click Lock.
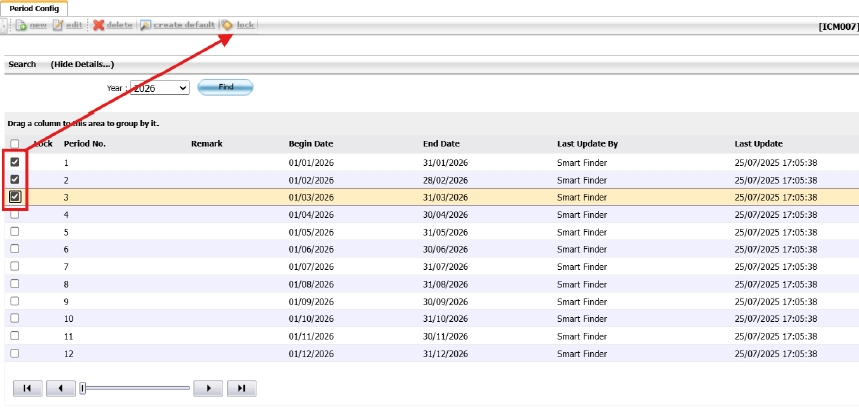
- To unlock a period, select the same row and click Lock again.
- Locking a period will freeze all inventory transactions within that time frame.
- Only authorized users can unlock periods once locked.
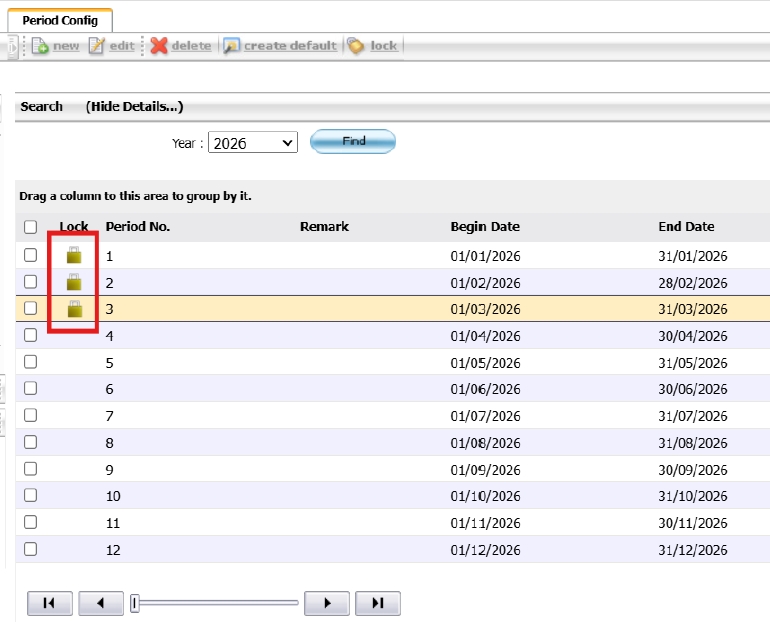
Note: Please ensure all transactions are finalized before locking the period.
3. WORKFLOW INVENTORY SYSTEM
This section outlines the workflow of inventory transactions, covering how items are received, issued, transferred, and adjusted. It includes the process from item movement between stores to stock adjustments, ensuring traceability, accountability, and integration with other systems like procurement and accounting.
3.1 Receive Item
This process allows users to record inventory received from various sources, such as suppliers or internal transfers. It ensures that all received items are documented with correct cost and quantity for accurate inventory and financial reporting.
To perform the task:
- Navigate to BOS > Inventory > Operation > Receive Entry.
- Click New to create a new receive transaction.
- Fill in the document details: Receive Type, Date, Reference Number, Supplier/Source, Storage Location.
- Add items by selecting Item Code, Unit, Quantity, and Cost per Unit.
- Click Save or Submit to record the transaction.
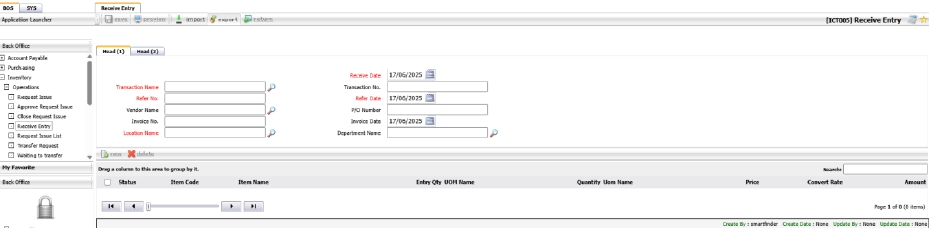
Note: Ensure accurate cost and quantity entry to reflect correct inventory valuation and accounting impact.
3.2 Issue Item
This process records the issuance of inventory for various purposes, including kitchen use, internal transfers, or wastage. It ensures correct deduction from stock and proper tracking of usage.
To perform the task:
- Navigate to BOS > Inventory > Operation > Request Issue.
- Click New to create a new issue transaction.
- Select Issue Type (e.g., Use, Transfer, Waste).
- Fill in required fields: Date, Reference, Storage Location.
- Add items with Quantity and Remarks.
- Click Save or Submit.
Note: Item issue affects stock balances. Use correct issue type to track purpose.
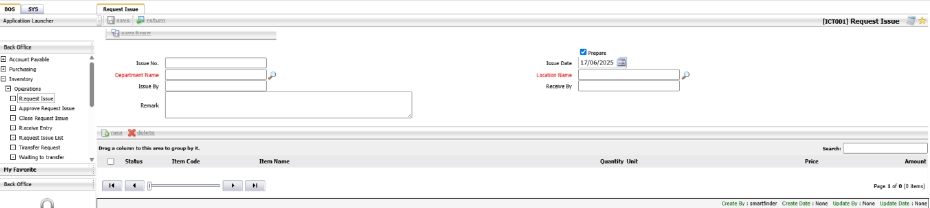
3.3 Request Issue
This function allows users to create an item issue request from inventory, specifying department, location, and receiving details for stock movement control.
To perform the task:
- Go to BOS > Inventory > Operations > Request Issue.
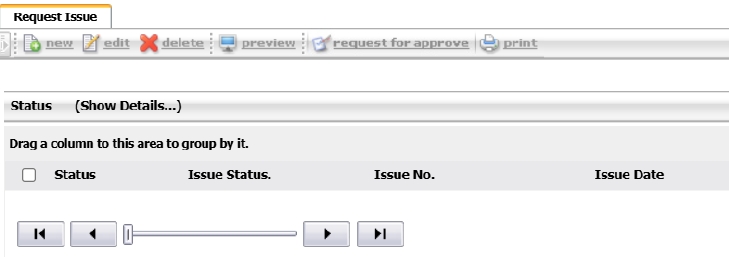
- Click New to create a new request.
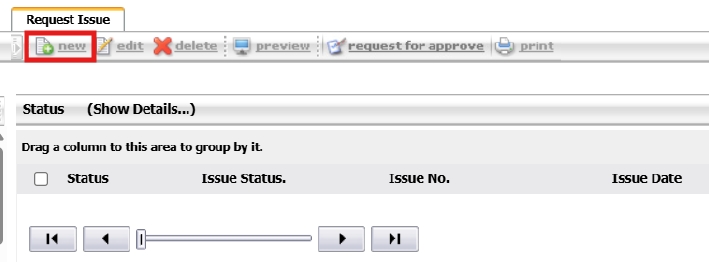
- The system will auto-generate an Issue No.
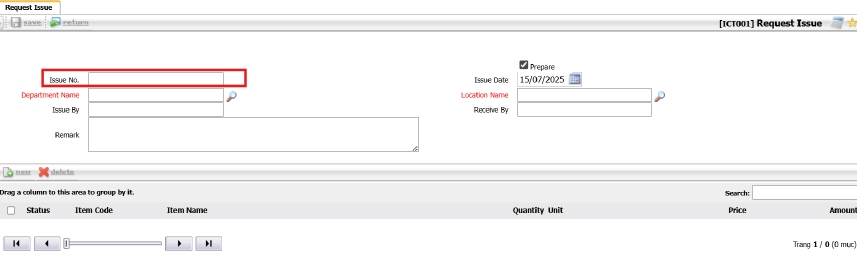
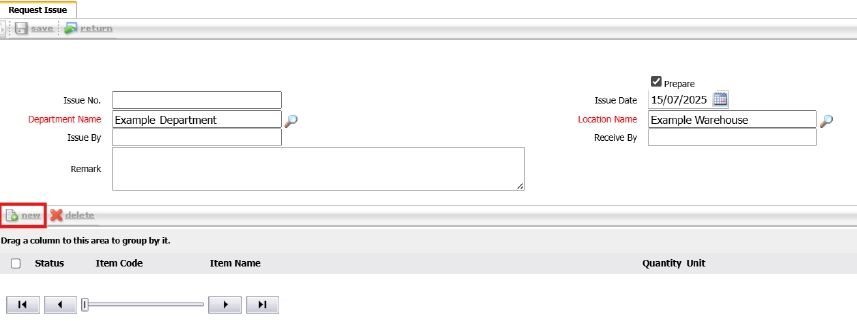
- Select the relevant Department and Location.

- Enter Issue By and Receive By (optional).

- Add a Remark if needed.

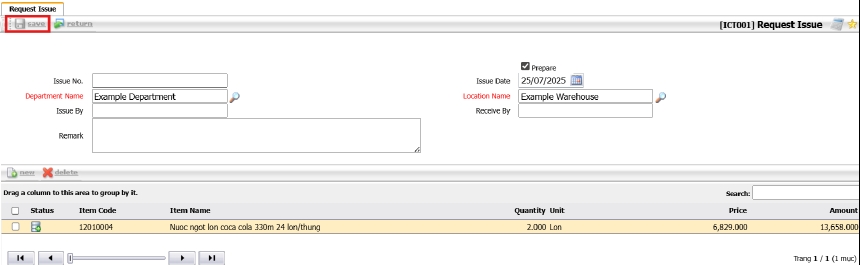
- Click New to open the item selection modal.
- Select the item(s) to be issued and click Save.
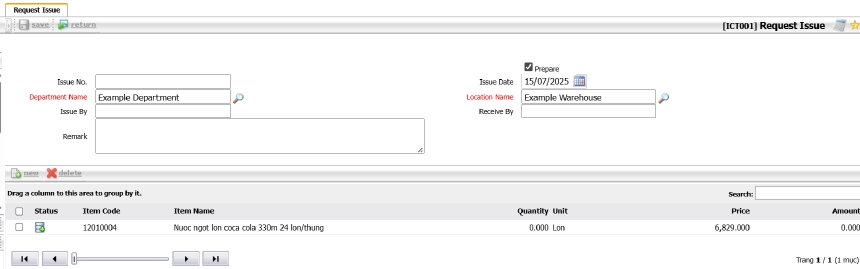
- Ensure available stock in the selected warehouse on the date.
![]()
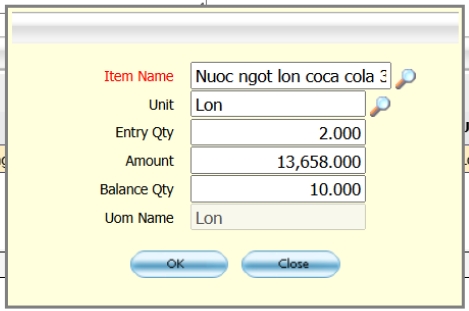
- Double-click the item row to input Quantity , then click OK.
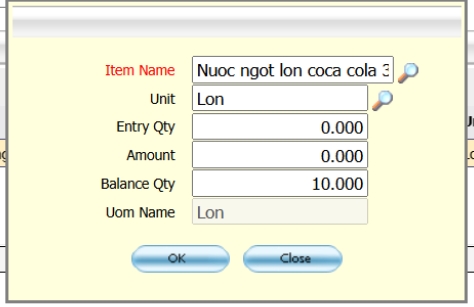
- The system will calculate all relevant values automatically.
- Click Save (top-left) to save the issue request.
- Select the document and click Request Approval to finalize.
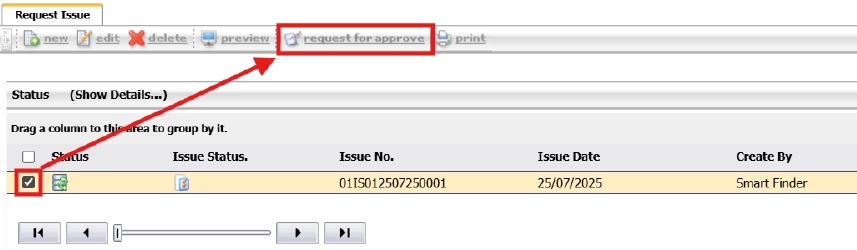
Note: Make sure stock is available in the selected warehouse before submitting for approval.
3.4 Approval Process
This function is used to approve or reject inventory issue requests submitted by users before the actual stock deduction.
To perform the task:
- Go to BOS > Inventory > Operations > Approve Request Issue.
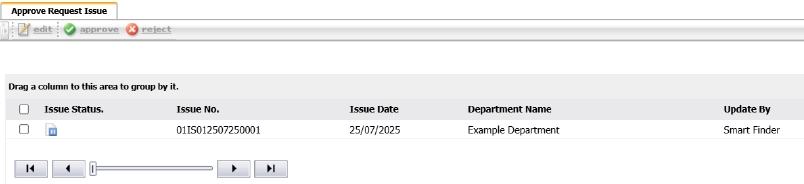
- To check document details, select a document and click Edit.
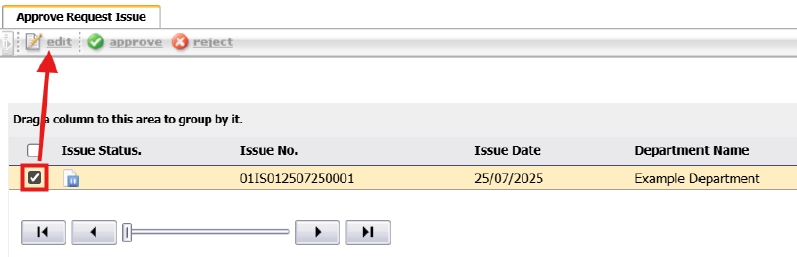
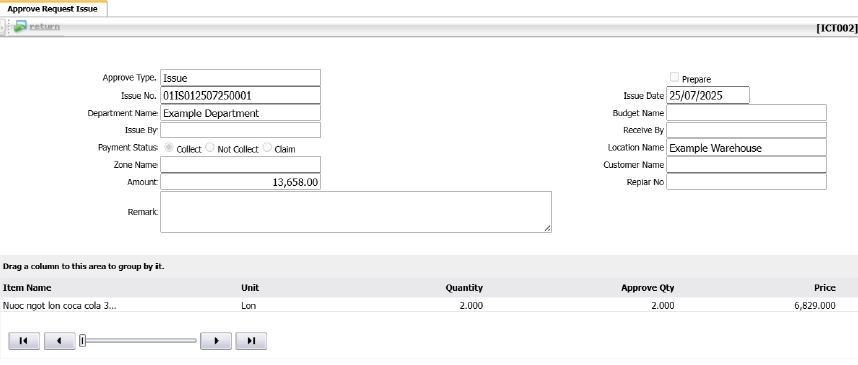
- To approve or reject, select the document and click the respective button located above the issue document list.
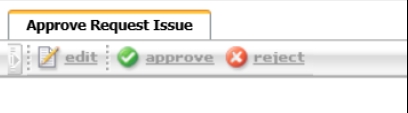
Note: Only users with approval rights can perform this action. Approval is required before items are deducted from inventory.
3.5 Inventory Issue List
This function is used to finalize the issuance of stock after the inventory issue request has been approved.
To perform the task:
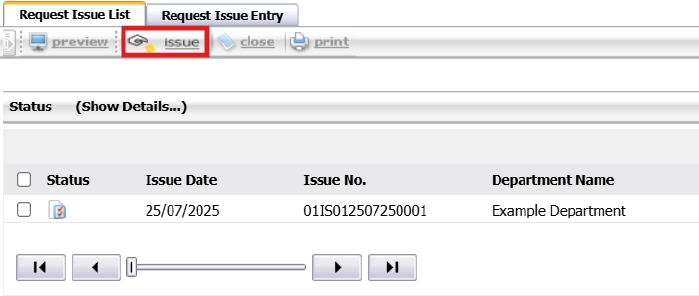
- Go to BOS > Inventory > Operations > Request Issue List.
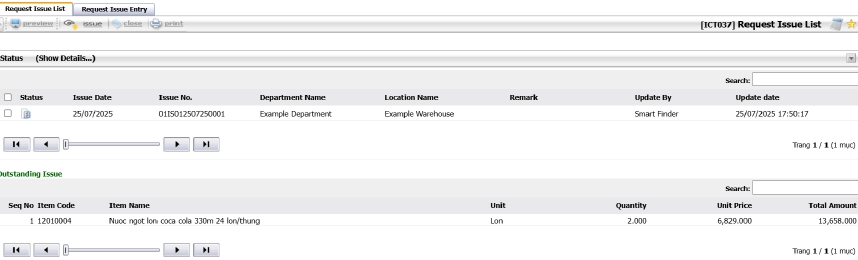
- To preview the document, select it and click Preview.
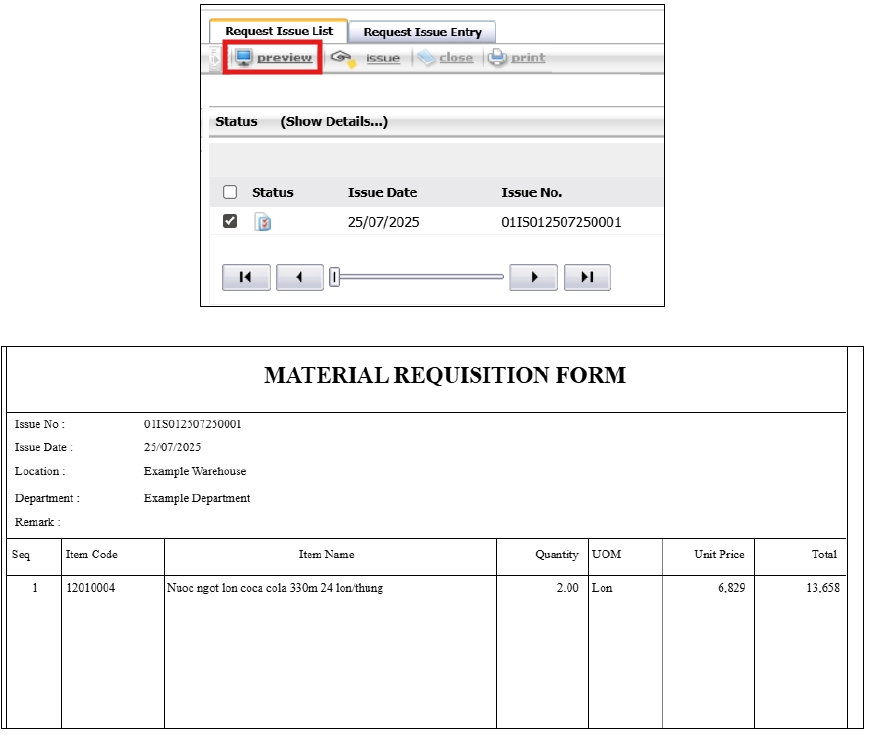
- To proceed, select the document and click Issue.
- Choose the issue type (cost or expense) by clicking the magnifying glass icon.
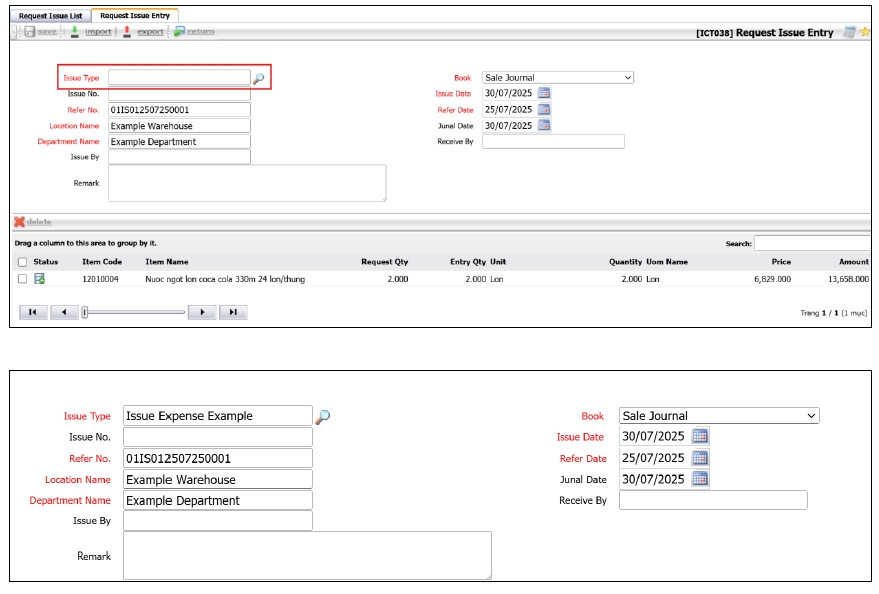
- Click the item row to adjust the quantity to match the requested amount or lower. If no changes, click Save.
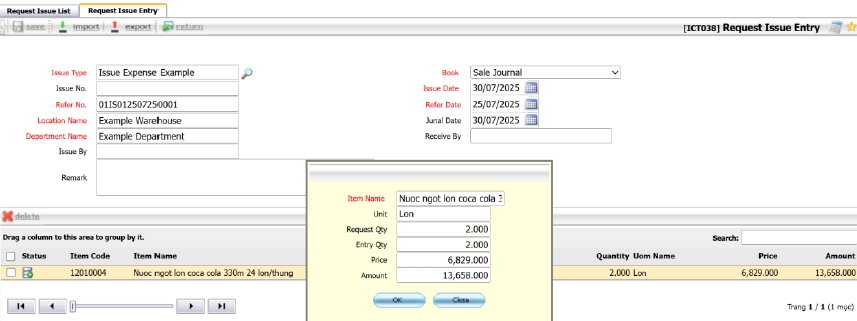
- After saving, the issue is completed. The inventory is deducted and status is updated.
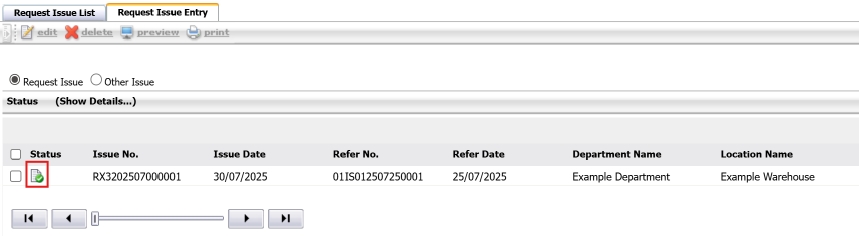
- The transaction will appear in the Stock Card and related reports.
Note: Ensure that stock is available before issuing. Partial issues are allowed if stock is insufficient.
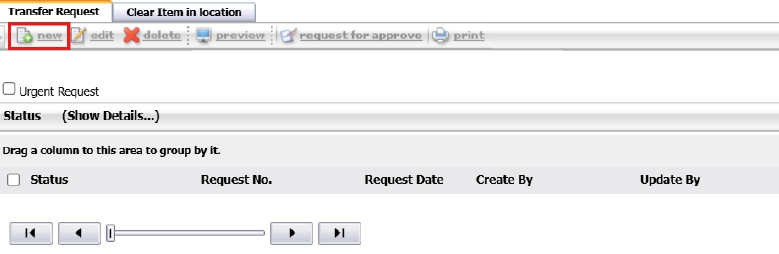
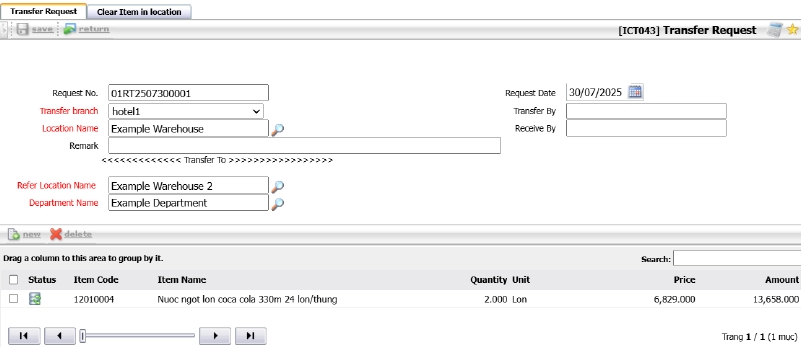
3.6 Transfer Item
This function is used to transfer item quantities between warehouses, ensuring correct cost and inventory tracking across departments or branches.
To perform the task:
- Go to BOS > Inventory > Operations > Transfer Request.
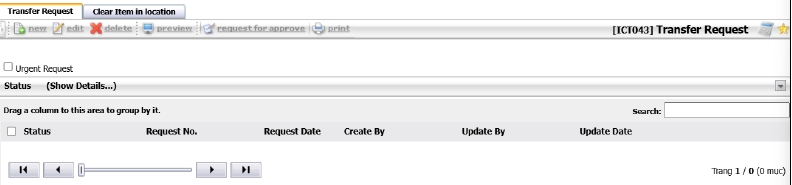
- Click New to create a new transfer request.
- If multiple branches exist, select the branch, then choose the item’s current location, destination location, and department.
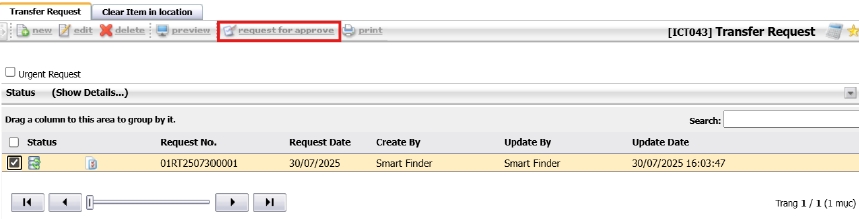
- Click Request for Approve to submit the request.
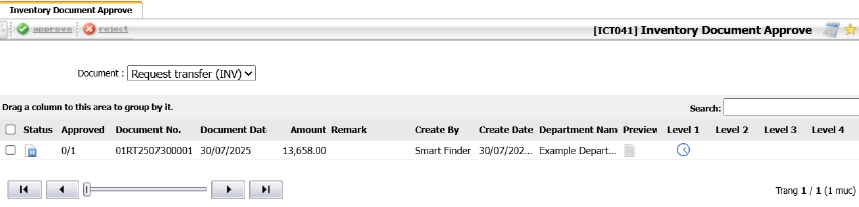
- To approve, go to BOS > Inventory > Inventory Document Approve.
- Once approved, go to BOS > Inventory > Operations > Waiting to Transfer.
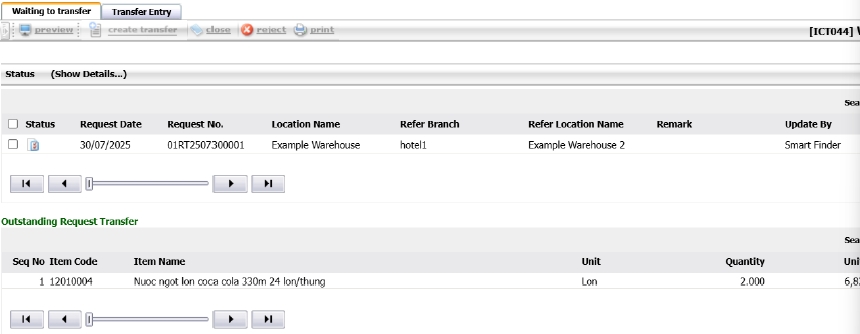
- Select the document and click Create Transfer.
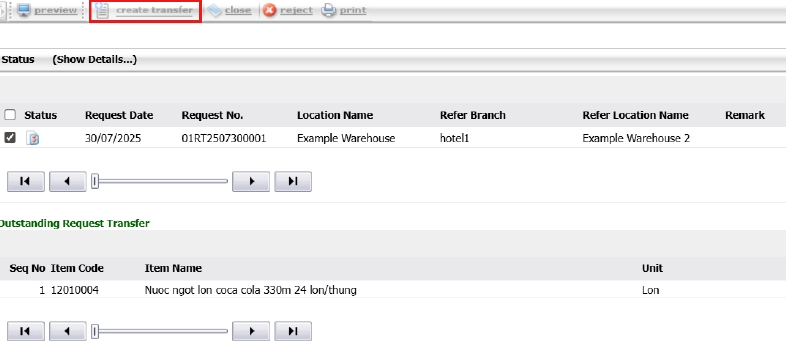
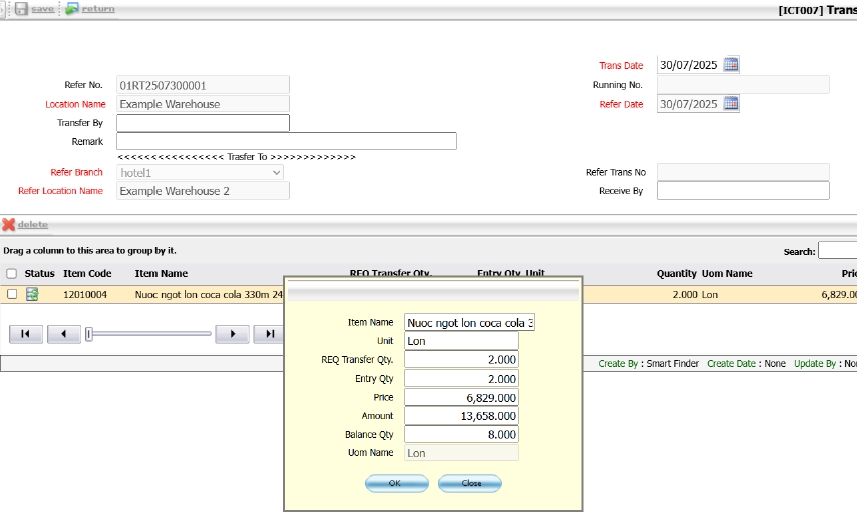
- To adjust quantity, click the item row, edit the value, and click Save.
- Select the document and click Approve to complete the transfer.
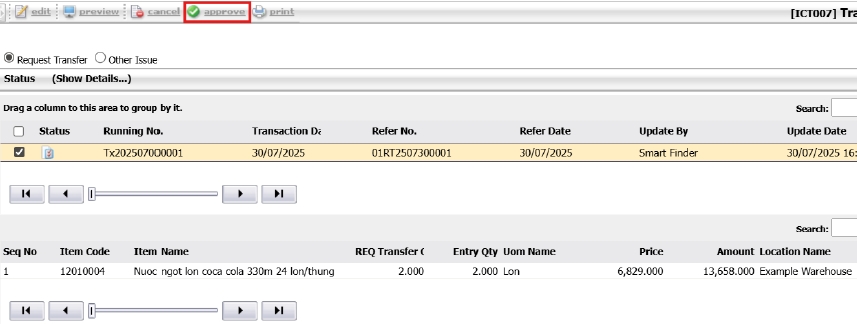
- Items are now successfully moved to the destination warehouse.
Note: Ensure both warehouses are correctly configured. Transfer only deducts stock after final approval.
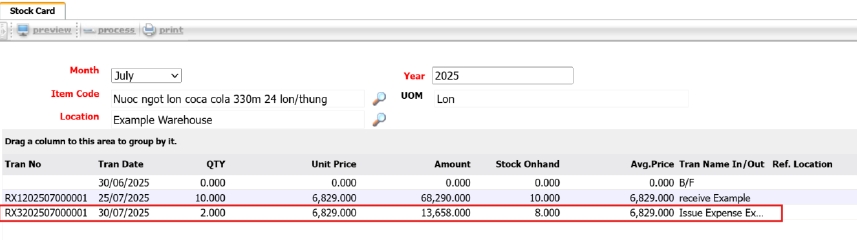
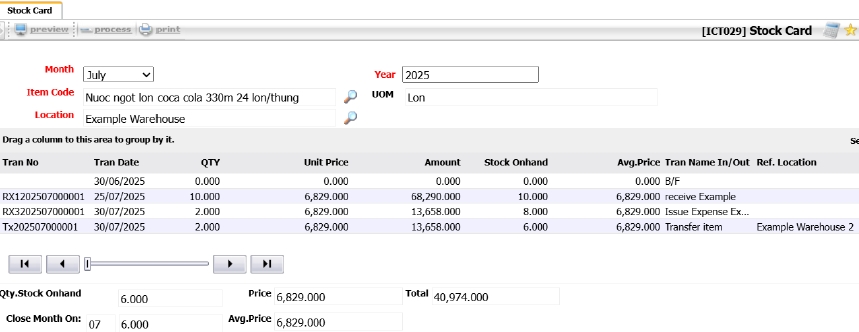
3.7 Stock Card
The Stock Card displays detailed item movements by warehouse and period, based on selected parameters.
To perform the task:
- Go to BOS > Inventory > Operations > Stock Card.
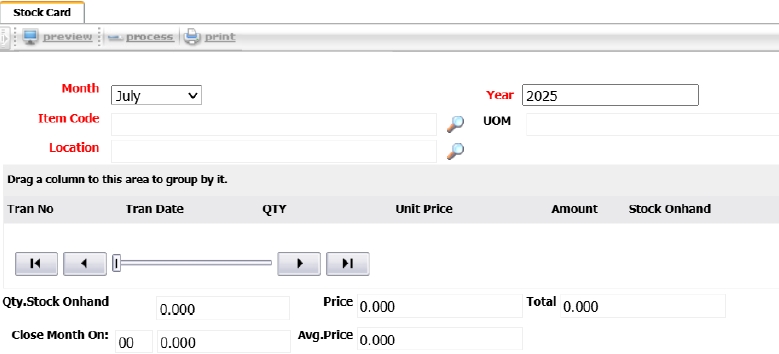
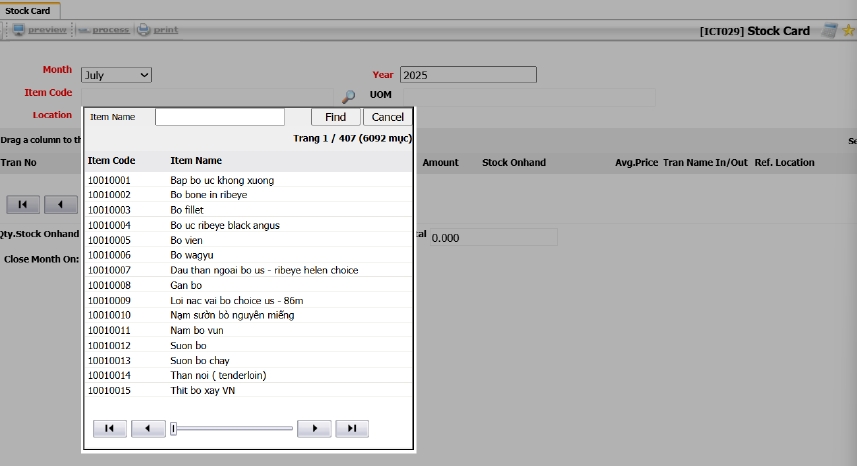
- Select the month (e.g., July ).

- Click the magnifying glass icon to open the item list and choose the desired item.
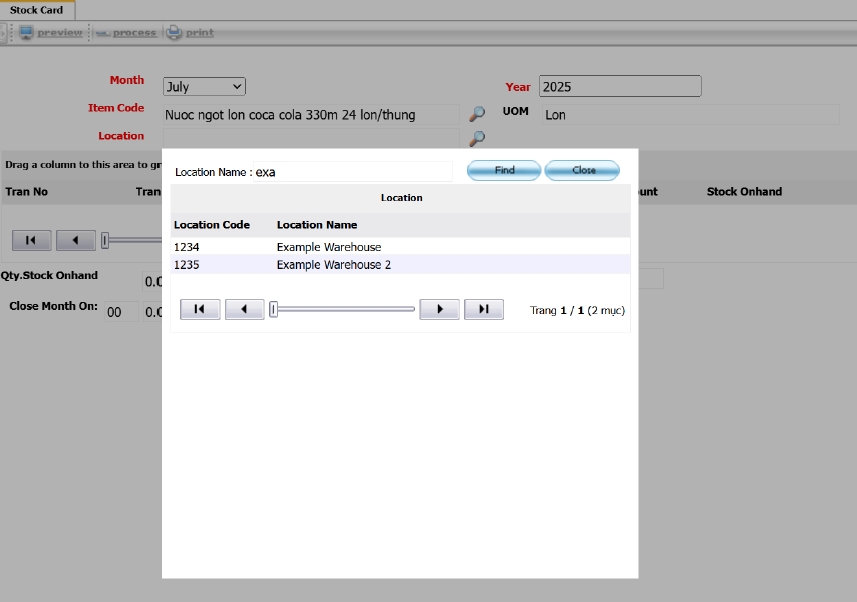
- Choose the warehouse location to check.
- Click Process to view the Stock Card. You can preview or print the document.
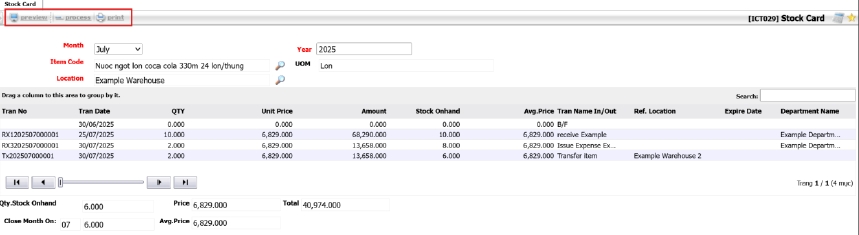
Note: Ensure the selected item and location are correct before processing to avoid incomplete reports.
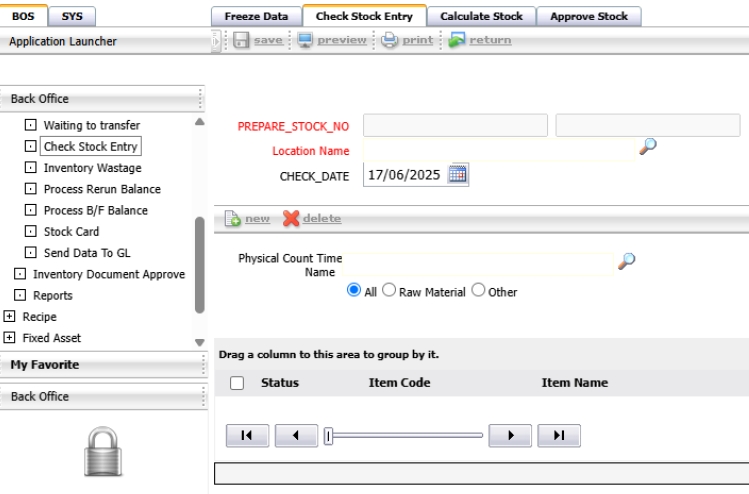
3.8 Check Stock Entry
This function verifies the actual stock count against system records. It supports cycle count and physical stock take activities.
To perform the task:
- Navigate to INV > Transaction > Check Stock Entry.
- Click New to initiate a stock check.
- Enter the Storage Location and Date of stock check.
- List items and input actual quantities found during counting.
- Click Save to record the data for comparison. Note: Ensure that physical counts are performed by authorized staff to maintain integrity.
Note : Stock adjustments should be reviewed and approved by authorized personnel. Use reasons clearly.
3.9 Inventory Wastage
This function records items that are wasted or discarded due to spoilage, damage, or expiration. It helps maintain accurate stock levels and identifies areas for cost control.
To perform the task:
- Navigate to BOS > Inventory > Operation > Inventory Wastage.
- Click New to create a wastage transaction.
- Select the Storage Location and Wastage Type (e.g., expired, damaged).
- Add items with quantity and remarks explaining the reason.
- Click Save to complete the transaction.
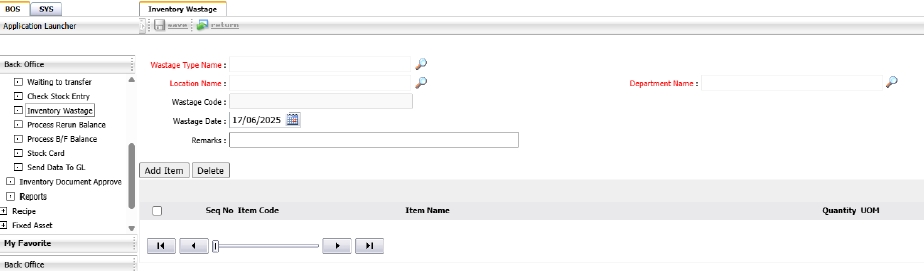
Note: Wastage entries should be reviewed regularly to detect patterns and reduce future losses.
3.10 Process Rerun Balance
This step consolidates various transactions (issue, receive, adjustment) to reflect the actual impact on stock balances. It is typically used before posting to GL.
To perform the task:
- Go to BOS > Inventory > Operation > Process Rerun Balance
- Select Date Range and Transaction Types.
- Click Process to generate consolidated stock data.
- Review the summarized entries.
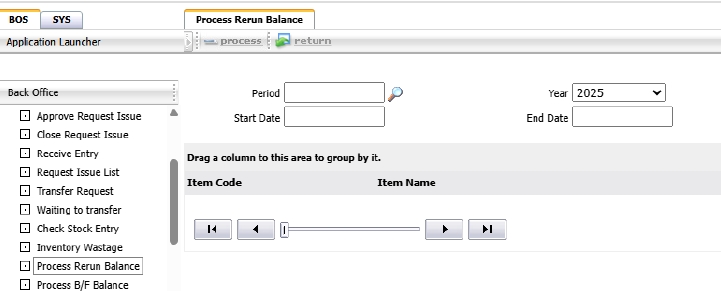
Note: Processing is recommended daily or before end-of-month closing.
3.11 Process B/F Balance
This function is used to carry forward the B/F (brought forward) balances of all warehouses to the new accounting period.
To perform the task:
- Go to BOS > Inventory > Operations > Process B/F Balance.

- Select the desired period (e.g., 07 / 2025 ).

- Click Process to generate the B/F balance for the new period.
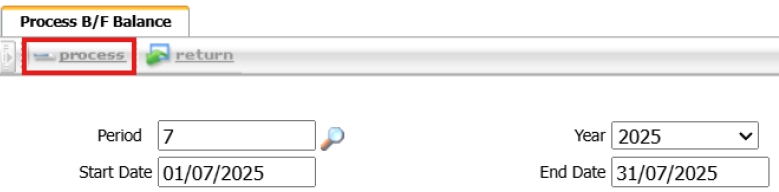
Note: Always process B/F after closing the previous period to maintain stock accuracy.
3.12 Submit to GL and Reports
This function sends finalized inventory transaction data to the accounting system (GL) and generates standard inventory reports for financial reconciliation.
To perform the task:
- Navigate to BOS > Inventory > Operation > Send Data To GL
- Choose Date Range and Transaction Types.
- Click Submit to transfer the data.
- Go to Report to generate supporting documents (e.g., Inventory Ledger, Stock Movement).
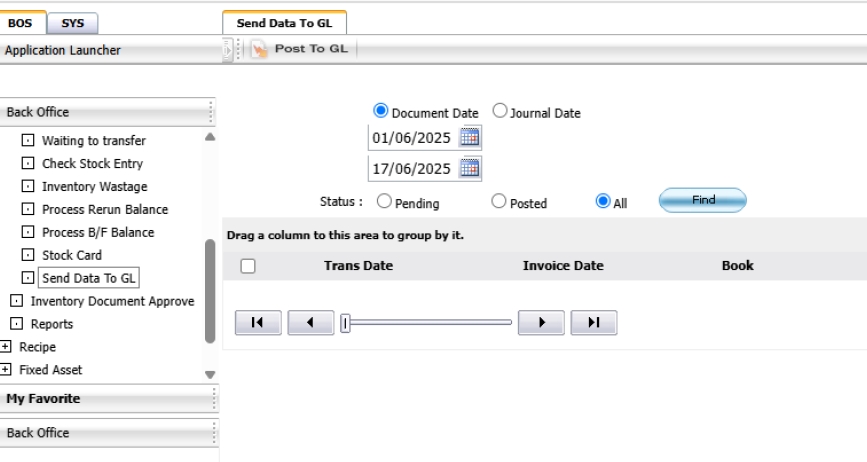
Note: Ensure all transactions are approved and processed before submitting to GL to maintain accounting integrity.