BOS - Income User Guide
1. Overview
The BOS Income System manages revenue data imported from the front office system, enabling account binding, adjustment, and posting to the general ledger (GL). It ensures that income transactions are accurately linked to the chart of accounts, adjusted as needed, and finalized for financial reporting. The system supports real-time integration, improving accuracy and auditability of hotel revenue operations.
2. SET CONFIGURATION
Available under SYS > Back Office Master > Income, this section is used to set up the foundational account mapping for income transactions. It ensures that revenue items from the front office system are correctly mapped to the general ledger, allowing for seamless income recording, adjustment, and posting to GL.
2. 1 Initial Revenue Configuration
This section explains how to configure and link transaction codes from the front system to the Chart of Accounts, which is a prerequisite for posting income to the general ledger.
To perform the task:
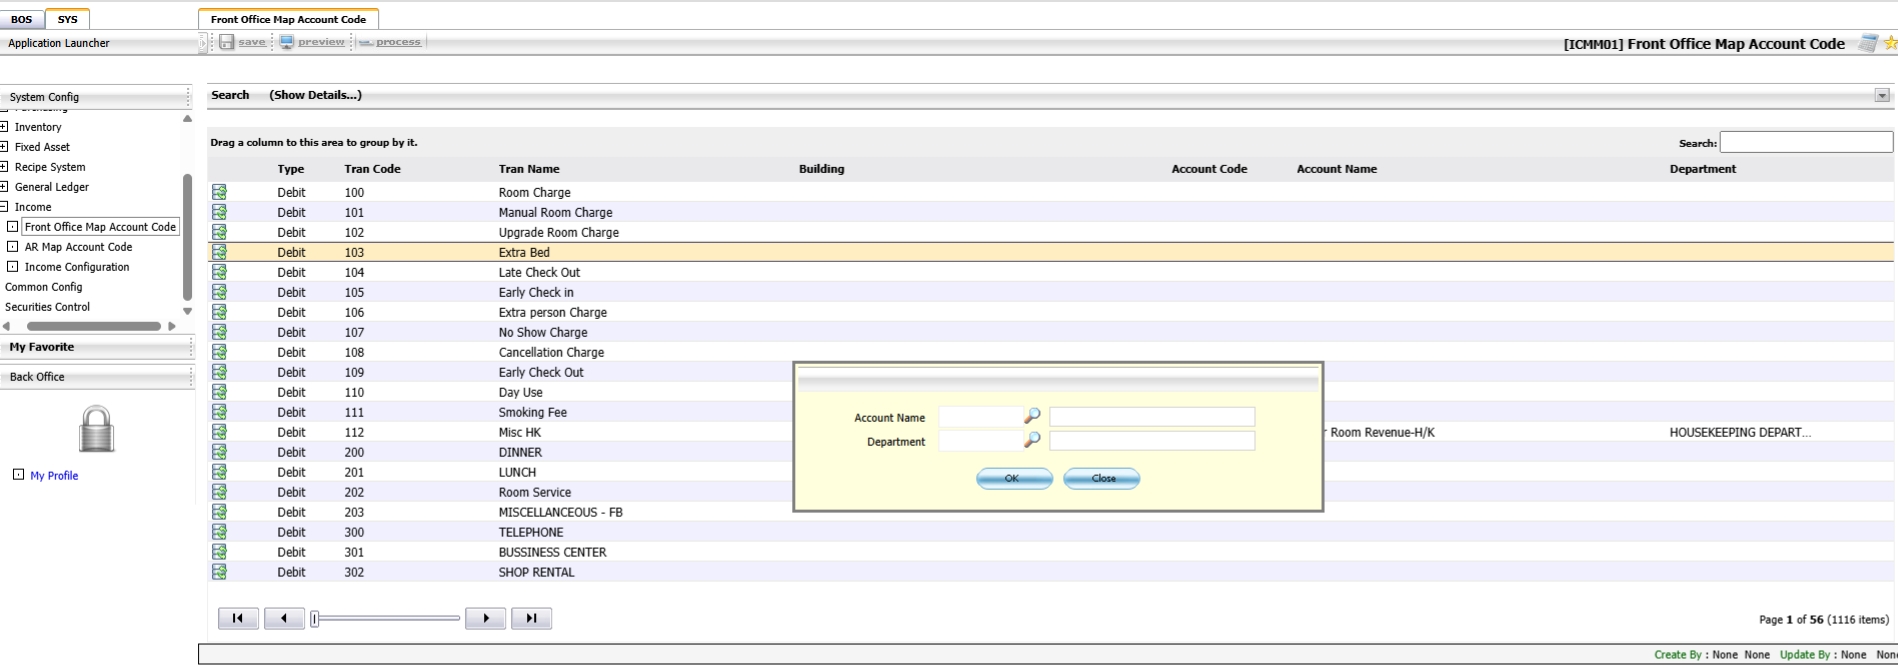
- Navigate to SYS > Back Office Master > Income > Front Office Map Account Code.
- Click the button to call and retrieve the Transaction Codes from the Front system.
- Click Save to store the retrieved codes.
- Double-click on the desired Transaction Code to open the Chart of Accounts binding window.
- In the new window, use the Search box to find and select the appropriate Chart of Accounts, then double-click to bind.
- Press OK to confirm the binding.
- Back on the main screen, the account name should now appear next to the transaction code.
- Click Save to save the account binding.
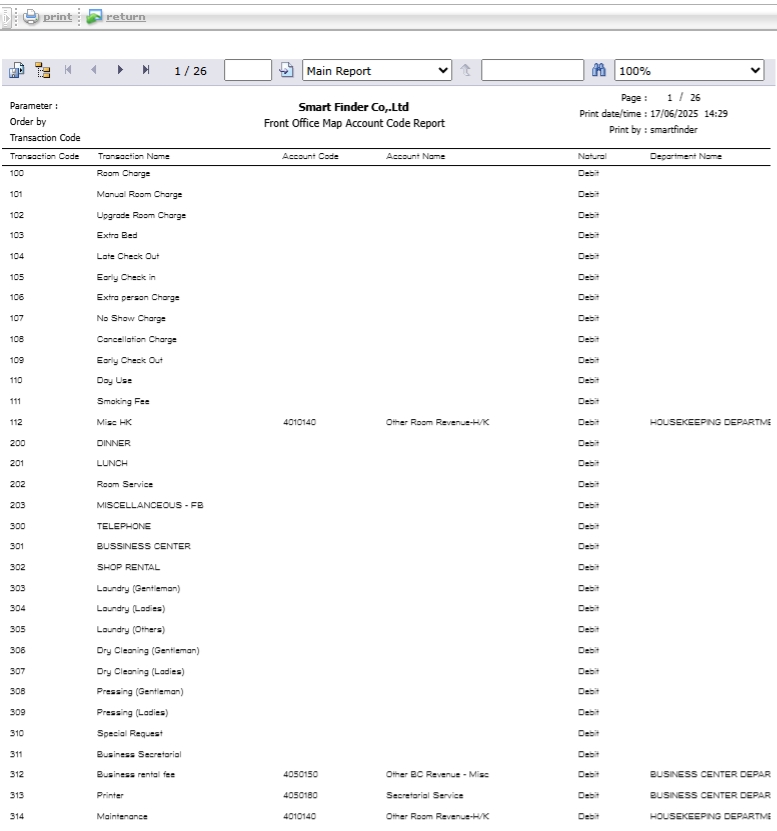
- To print the revenue accounting report, click the print button and follow the export instructions if needed.
Note: Make sure all new or updated transaction codes are linked to a Chart of Accounts before posting to GL. If not linked, posting will not be allowed.
3. INCOME OPERATION
Available under BOS > Income, this section allows users to process and manage income data retrieved from the front office system (e.g., SmartHMS), perform account bindings, make necessary adjustments, and post the data to the general ledger system (GL).
3. 1 Revenue System Workflow
This function allows users to view and manage income records from the front system via the Revenue Processing screen.
To perform the task:
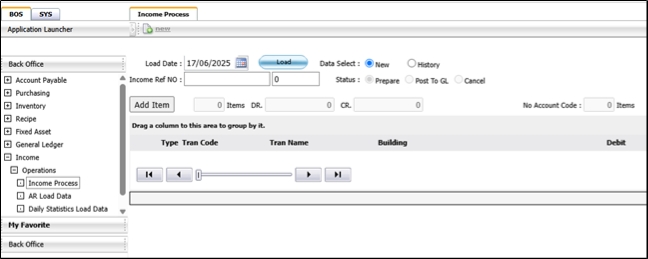
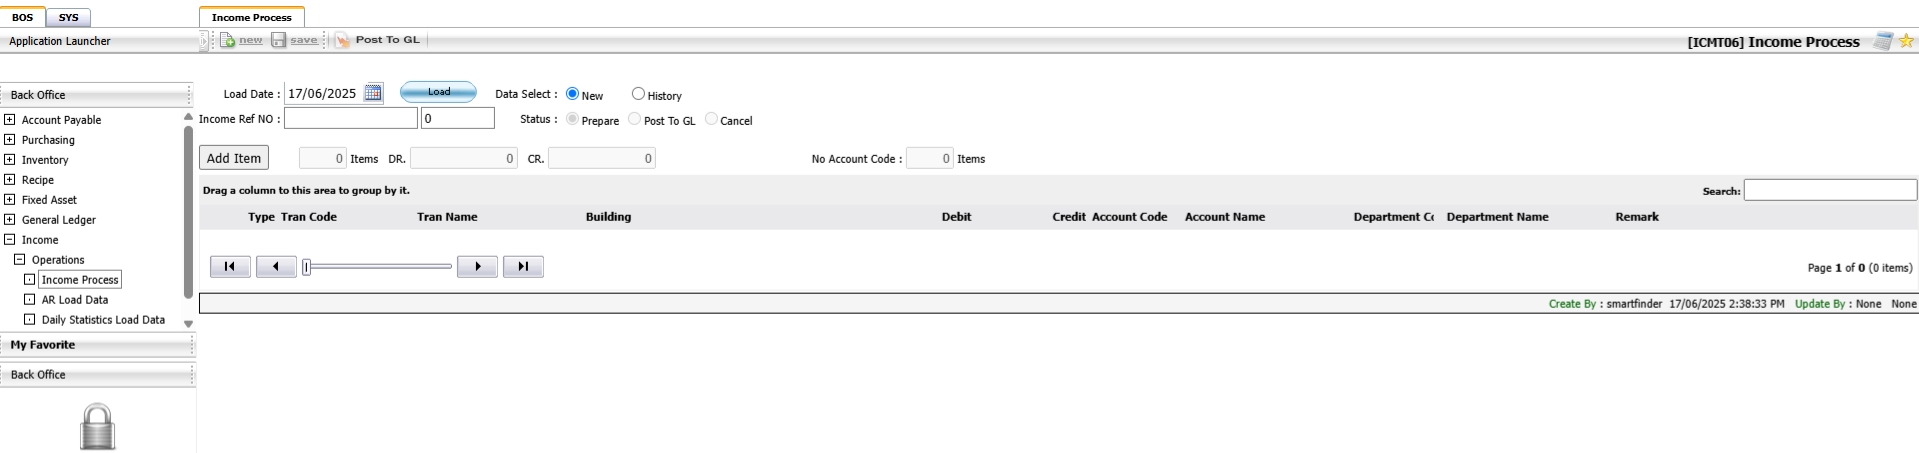
- Navigate to BOS > Income > Operations > Income Processing
- The system will display the Revenue Processing page
Note: Use this screen to monitor income records received from the front office system.
3. 2 Retrieving Revenue Data from the Front System
This function retrieves revenue data from the front office system such as SmartHMS-Mseries and displays the income information by date.
To perform the task:
- On the Income Processing screen, click the Load button
- Select the date of data retrieval
- Click the Load Data button to display the income data
Note : Ensure correct date selection to load accurate revenue data from the front system.
3. 3 Binding Accounts
Used when transaction codes from the front system have not yet been linked to the chart of accounts. This process allows users to bind them for proper GL posting.
To perform the task:
- In the Income Processing page, find transaction codes without an account name.
- Double-click on the blank transaction code to open the account binding window.
- Search for and select the appropriate Chart of Accounts, then double-click to bind.
- Click Save to confirm the binding.
- Click Post to GL to submit the income record to the ledger system.
Note: Transaction codes must be fully linked before posting to the GL system.
3.4 Adjustment
This function allows users to adjust income records by either transferring values to the correct transaction codes or correcting balance discrepancies. Adjustments ensure accounting accuracy before posting to GL.
3.4.1 Transaction Code Transfer
Allows users to transfer amounts between transaction codes to correct income allocations before posting to GL.
To perform the task:
- Navigate to the Adjustment screen from the Income Processing page.
- Click the Adjust button to open the adjustment window.
- Click Add Item to insert a new transaction line.
- Double-click on the item to select the target Transaction Code.
- Enter the amount to be transferred in the DR or CR field.
- Click OK and then Save to confirm the transfer.
- A confirmation message will appear. Click OK to proceed or Cancel to abort.
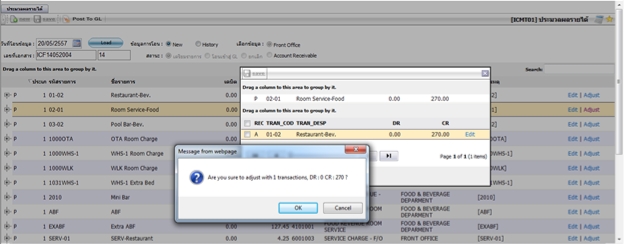
Note: Use this function to reallocate income amounts between transaction codes before posting to GL.
3.4.2 Balance Adjustment
Enables adjustment of income balances by editing debit or credit values for accurate financial reporting.
To perform the task:
- Click Add Item to begin a new adjustment entry.
- In the Data Addition Window, double-click to select an entry.
- Click the select button to choose the target Transaction Code.
- Use the search field to locate the desired Transaction Code.
- Specify the adjustment amount in the Debit or Credit field.
- Enter any relevant additional information and press OK.
- Click Save to update the record.
- To verify, click Detail to review the adjusted amount.
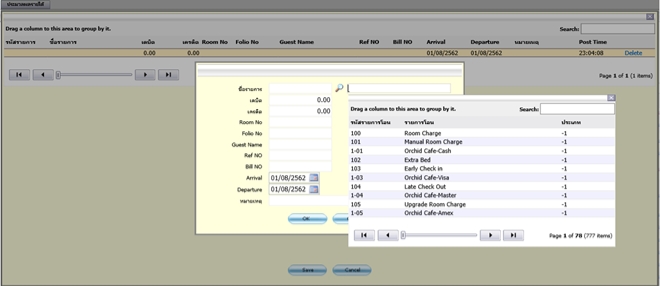
Note: Adjustments must be made carefully and should reflect actual corrections needed before posting to the ledger system.
3. 5 Post to GL
This function finalizes income transactions by sending the approved and adjusted data to the general ledger (GL) system.
To perform the task:
- After reviewing or adjusting records, click the Post to GL button.
- Confirm the data to be exported to the ledger system.
- Click OK to complete the submission.
- The system will display a confirmation message: Submission to Ledger System Completed.
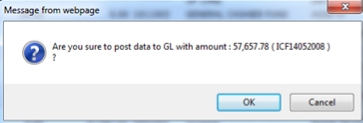
Note: Only completed and verified records should be posted to the GL to ensure accurate financial reporting.