POS - Point of Sales Operation User Guide
1. Overview
This POS – Menu Store User Guide provides hotel staff and system users with clear instructions to manage and configure POS menu items, including additional item s and condiments. It supports accurate order processing and enhances guest experience through structured, easy-to-follow steps.
2. Merge Table
Merge Table is used to combine nearby tables into one group, making it easier to serve large parties and manage orders tog ether. Merged tables will be shown with a Merge status on the table layout.
To perform the task:
- Go to the Table Layout and click the three-dot icon of the table you want to start as the main table for merging.

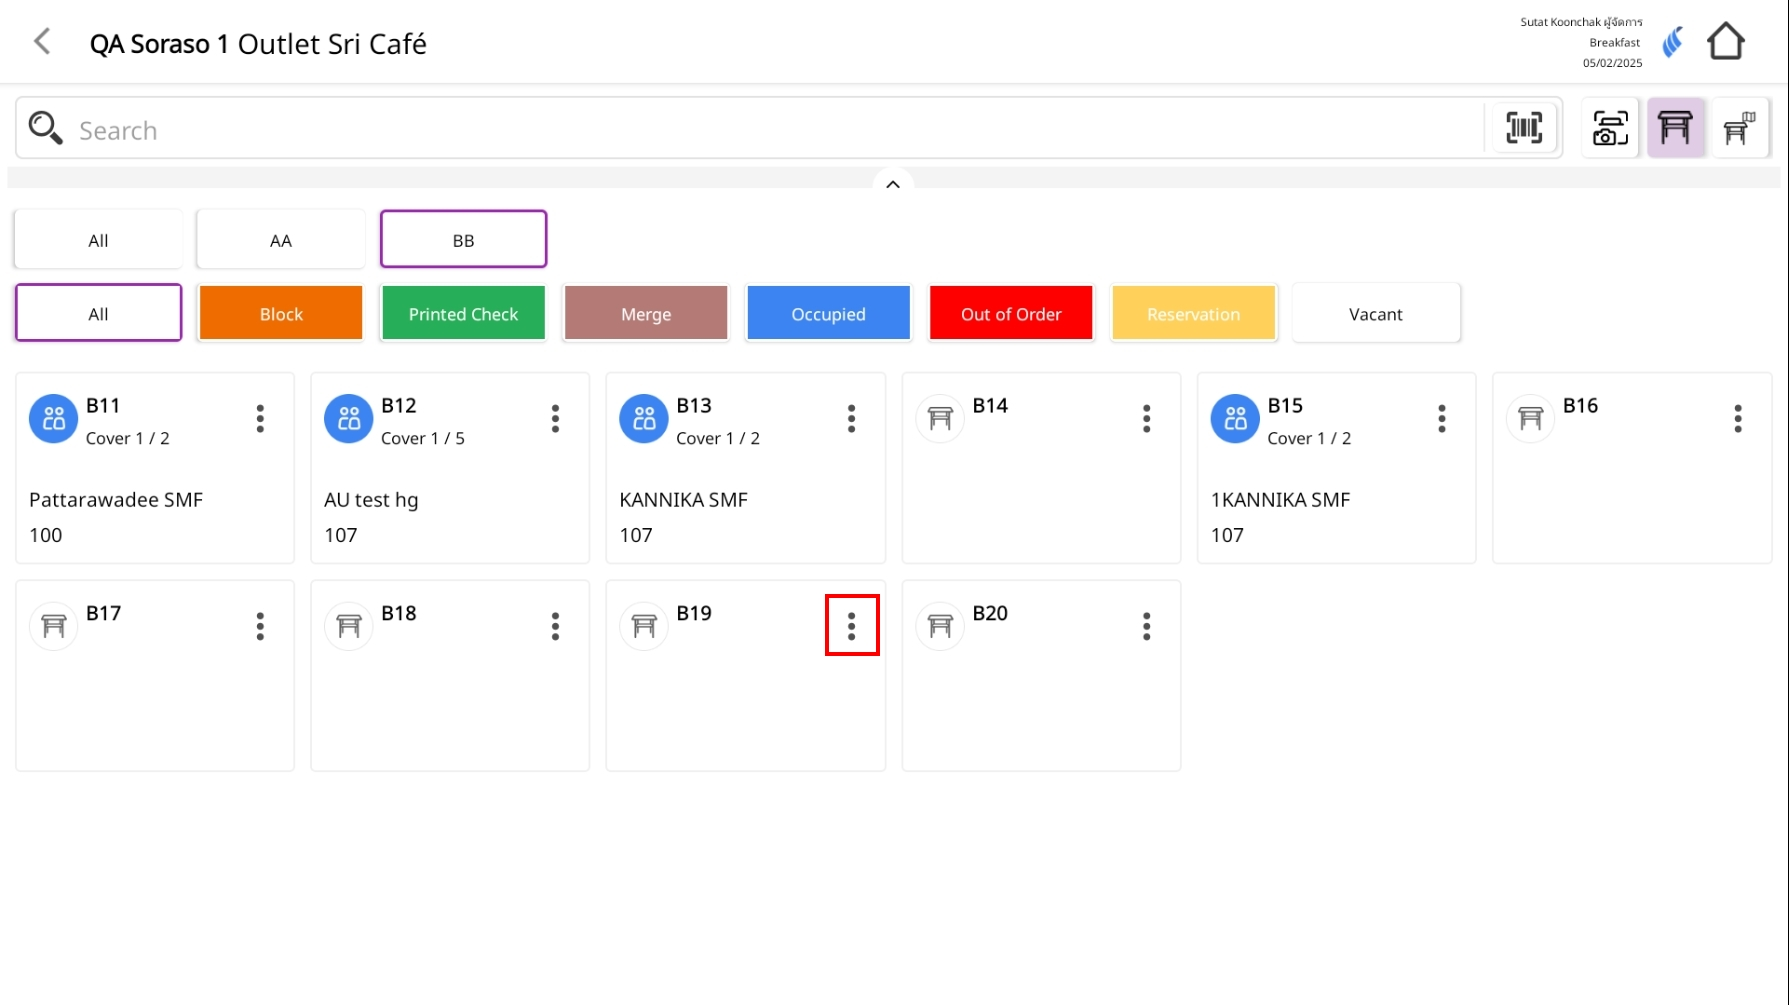
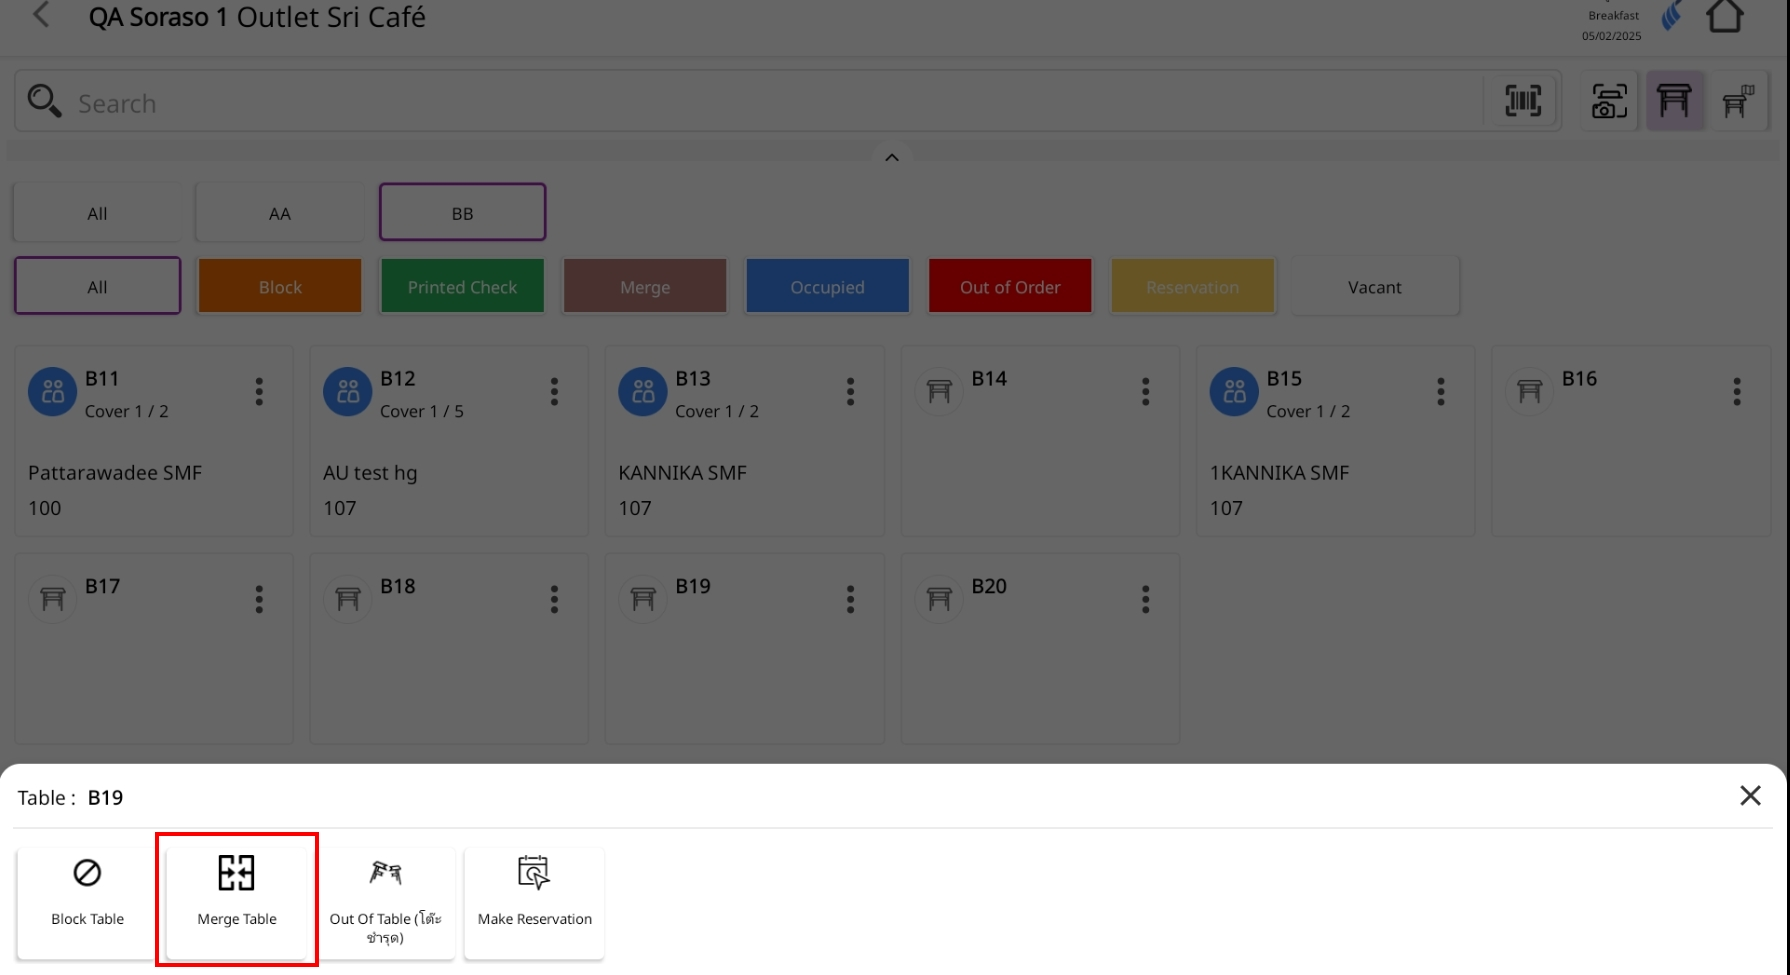
- From the menu, select Merge Table.
- On the Merge Table screen:
-
Left side ( Table List ): Shows all available tables for merging.
-
Right side ( Table Merge ): Shows the selected tables to be merged.
-
How to merge :
1.1 Press and hold the table you want to merge on the Table List (left side).
1.2 Drag it to the Table Merge area (rig ht side).
1.3 Repeat until you have selected all the tables you want to merge.
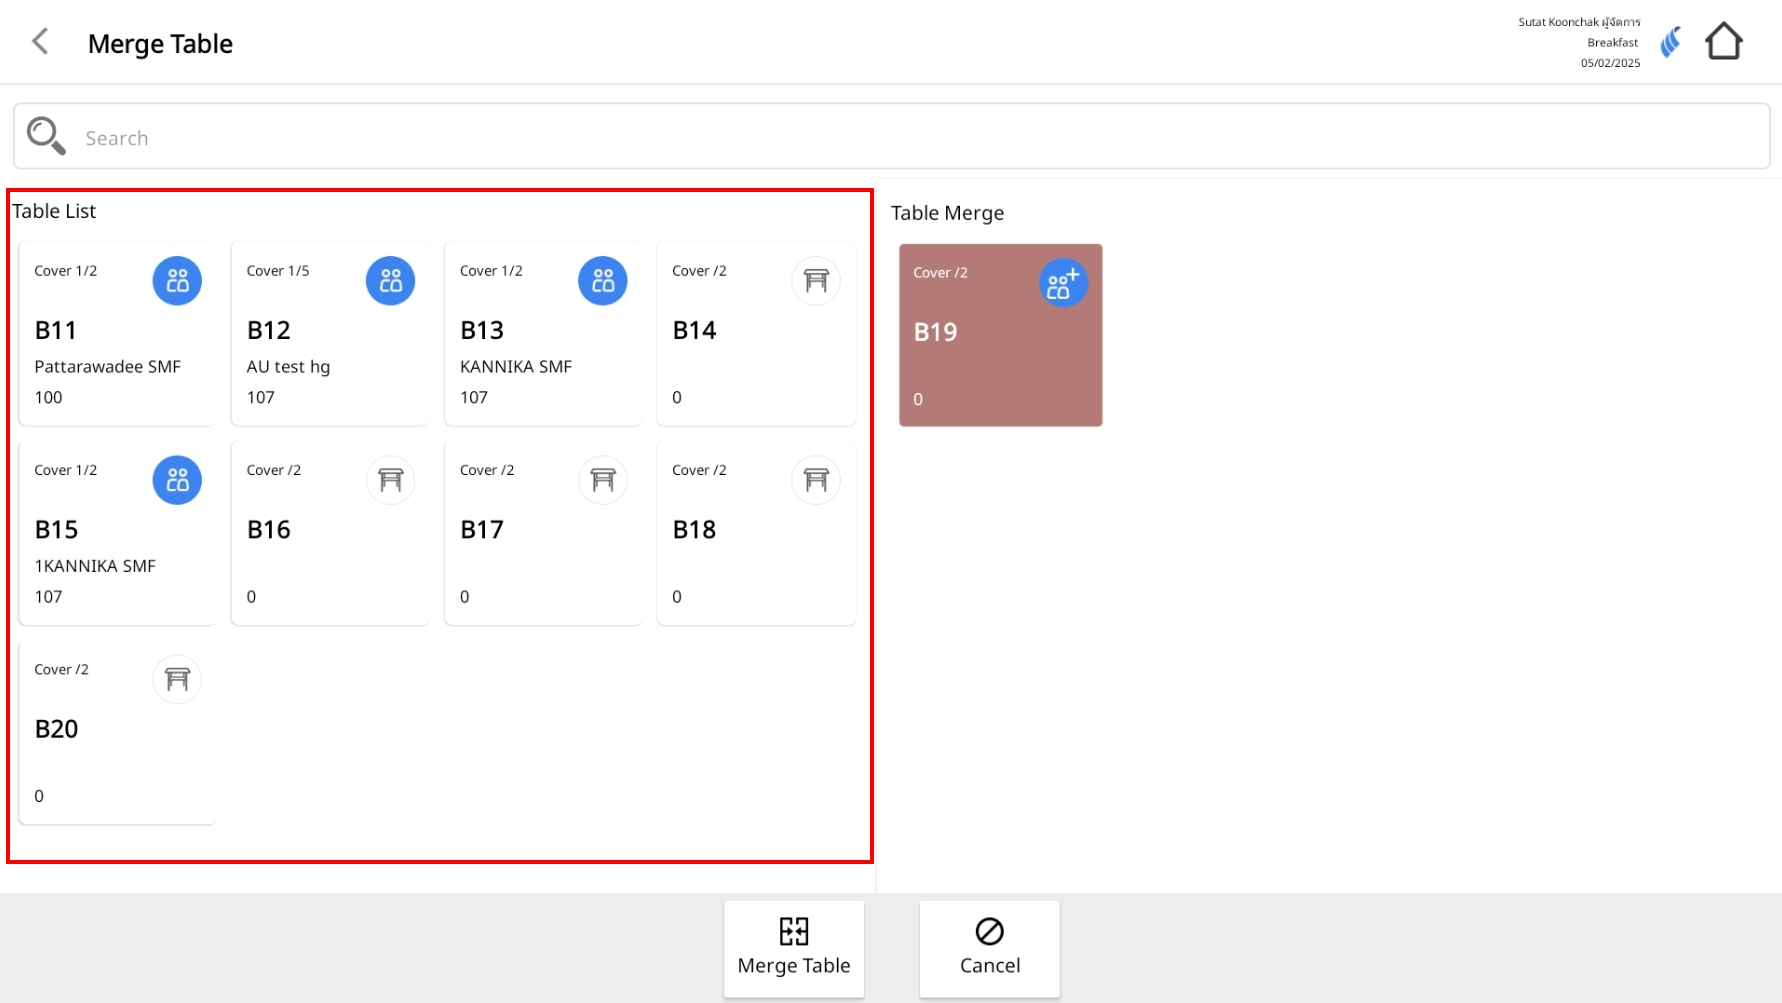
- Once you have selected the tables, click Merge Table to confirm.
- Result: The merged tables will be displayed with a Merge status (icon/color based on the system ) on the table layout.
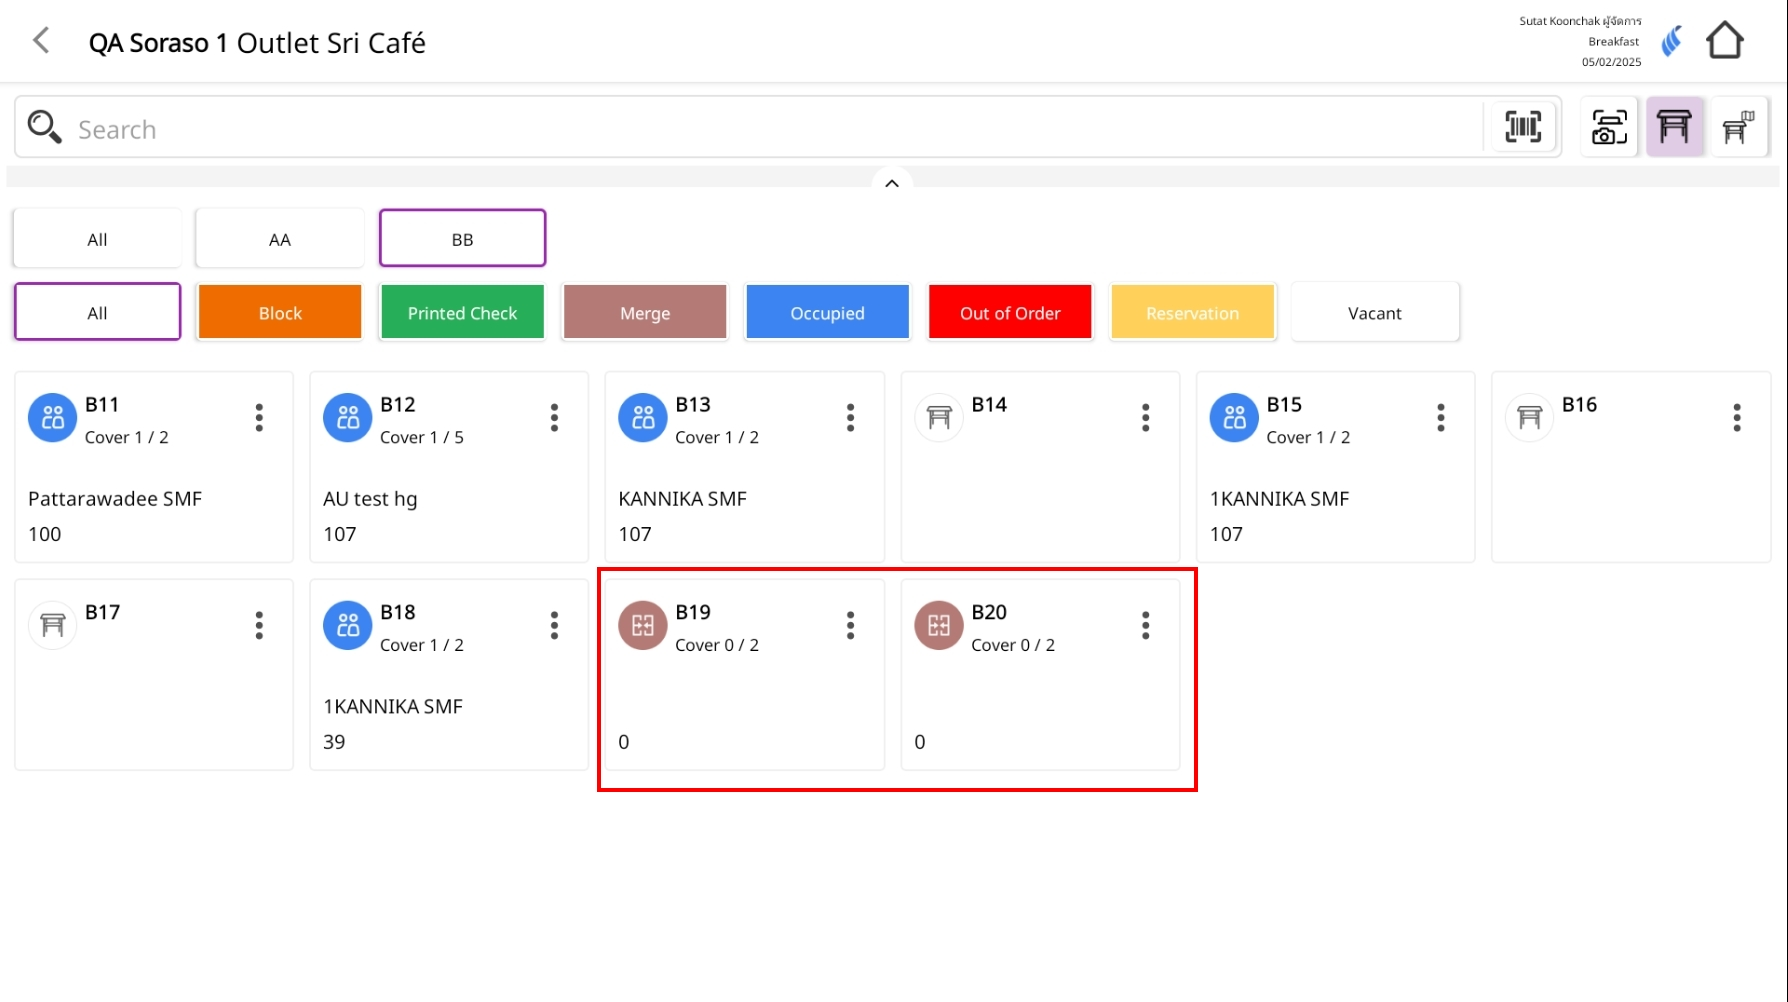
Notes: The Merge status will remain until you perform a Cancel Merge. Simply leaving the screen or changing the view will not undo the merge. Tables with the Printed Check status cannot be merged.
3. Cancel Merge
Used to separate previously m erg ed tables back into individual tables. After cancellation, each table will return to its original status and can be managed independently as before.
To perform the task:
- Go to the Table Layout screen and tap the three-dot icon of the table you want to cancel merge.

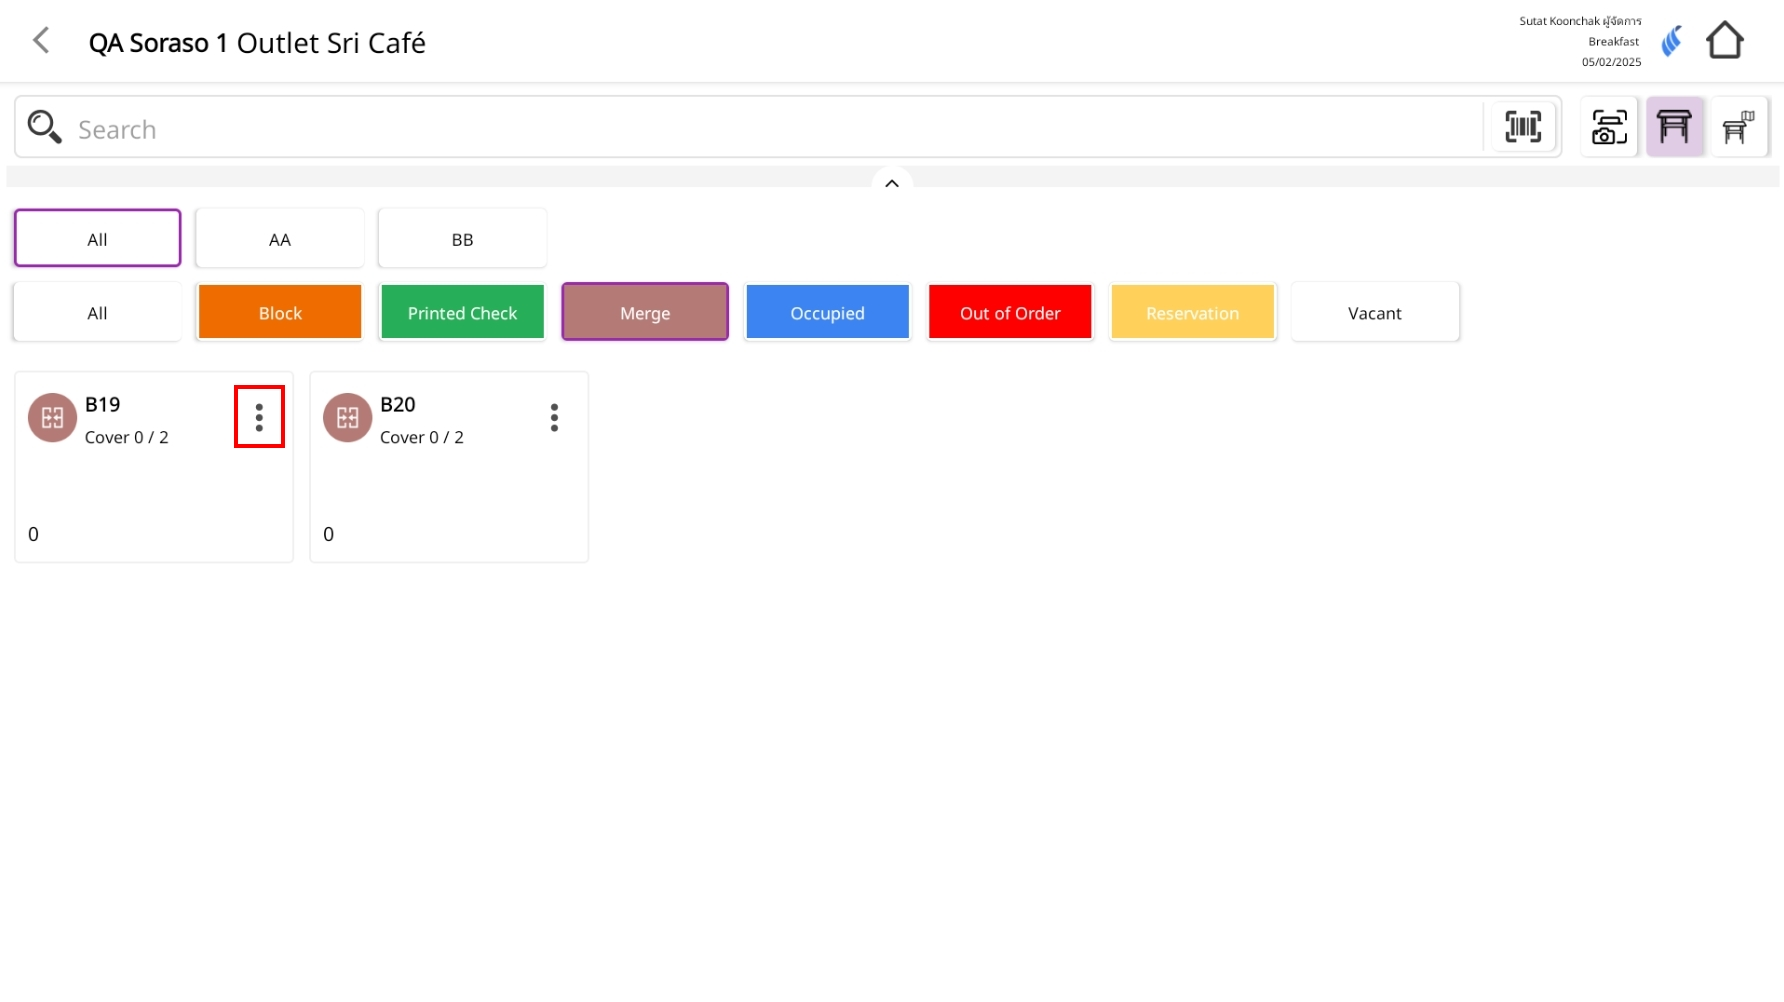
- Select Cancel Merge.
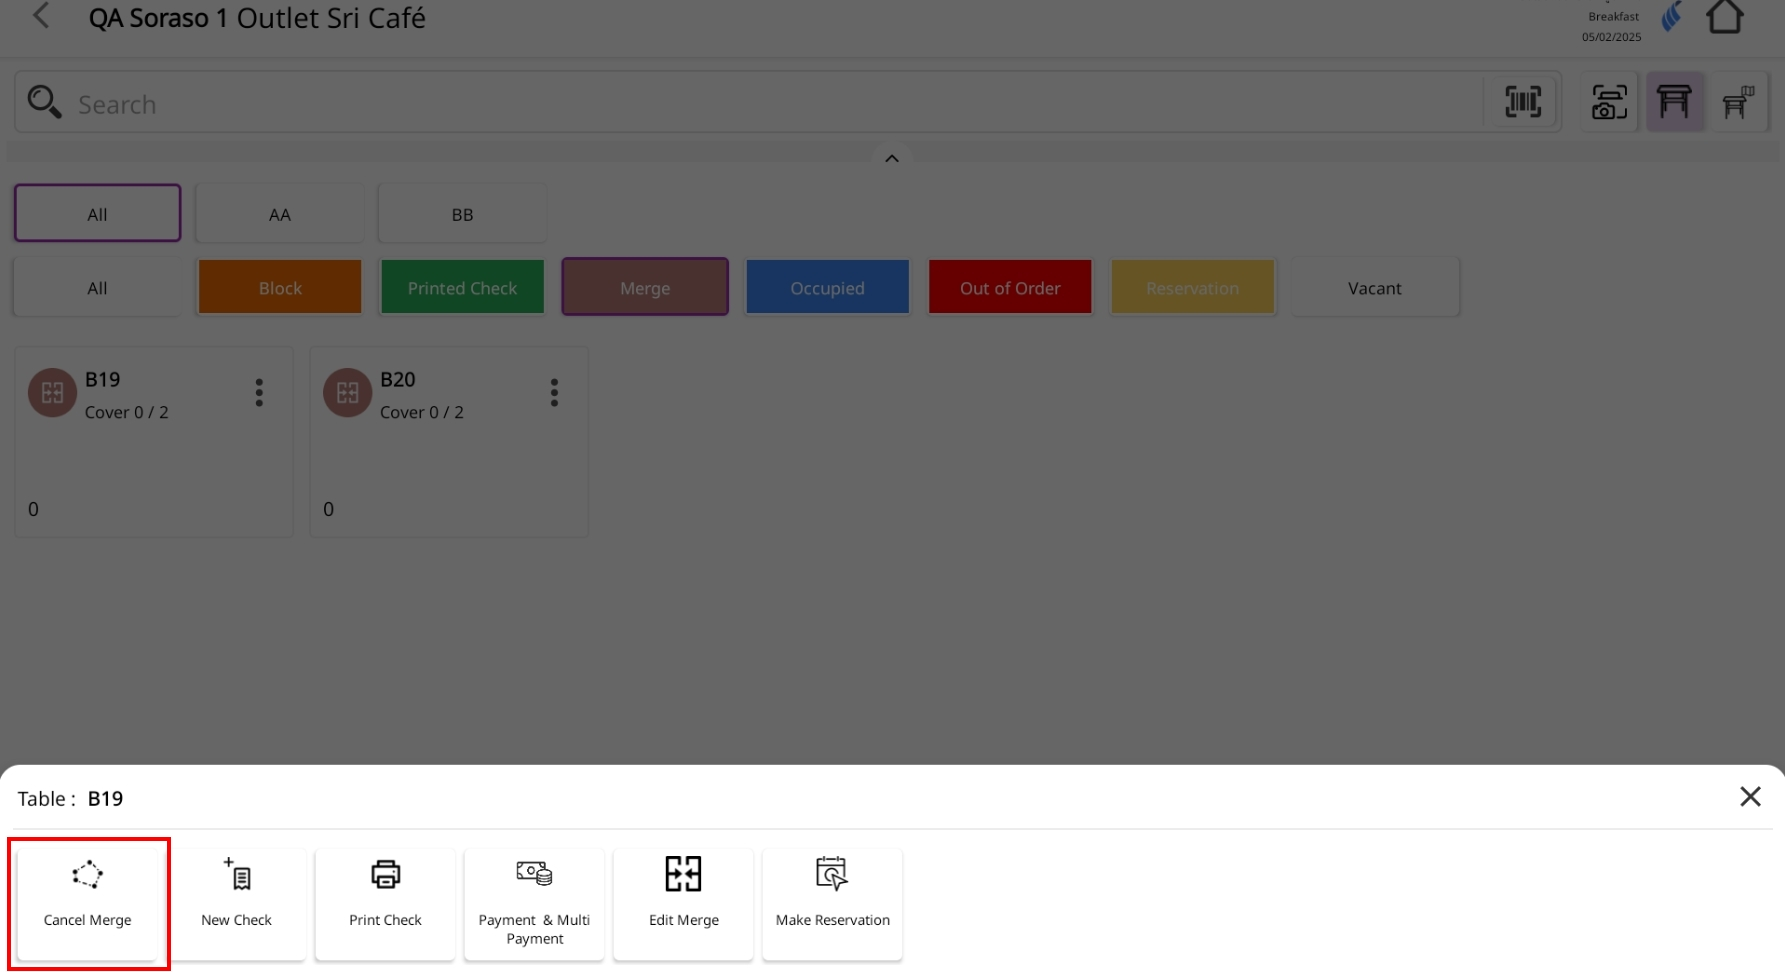
- The system will display a confirmation message: Are you sure want to cancel merge this table?
- Tap Confirm to proceed.
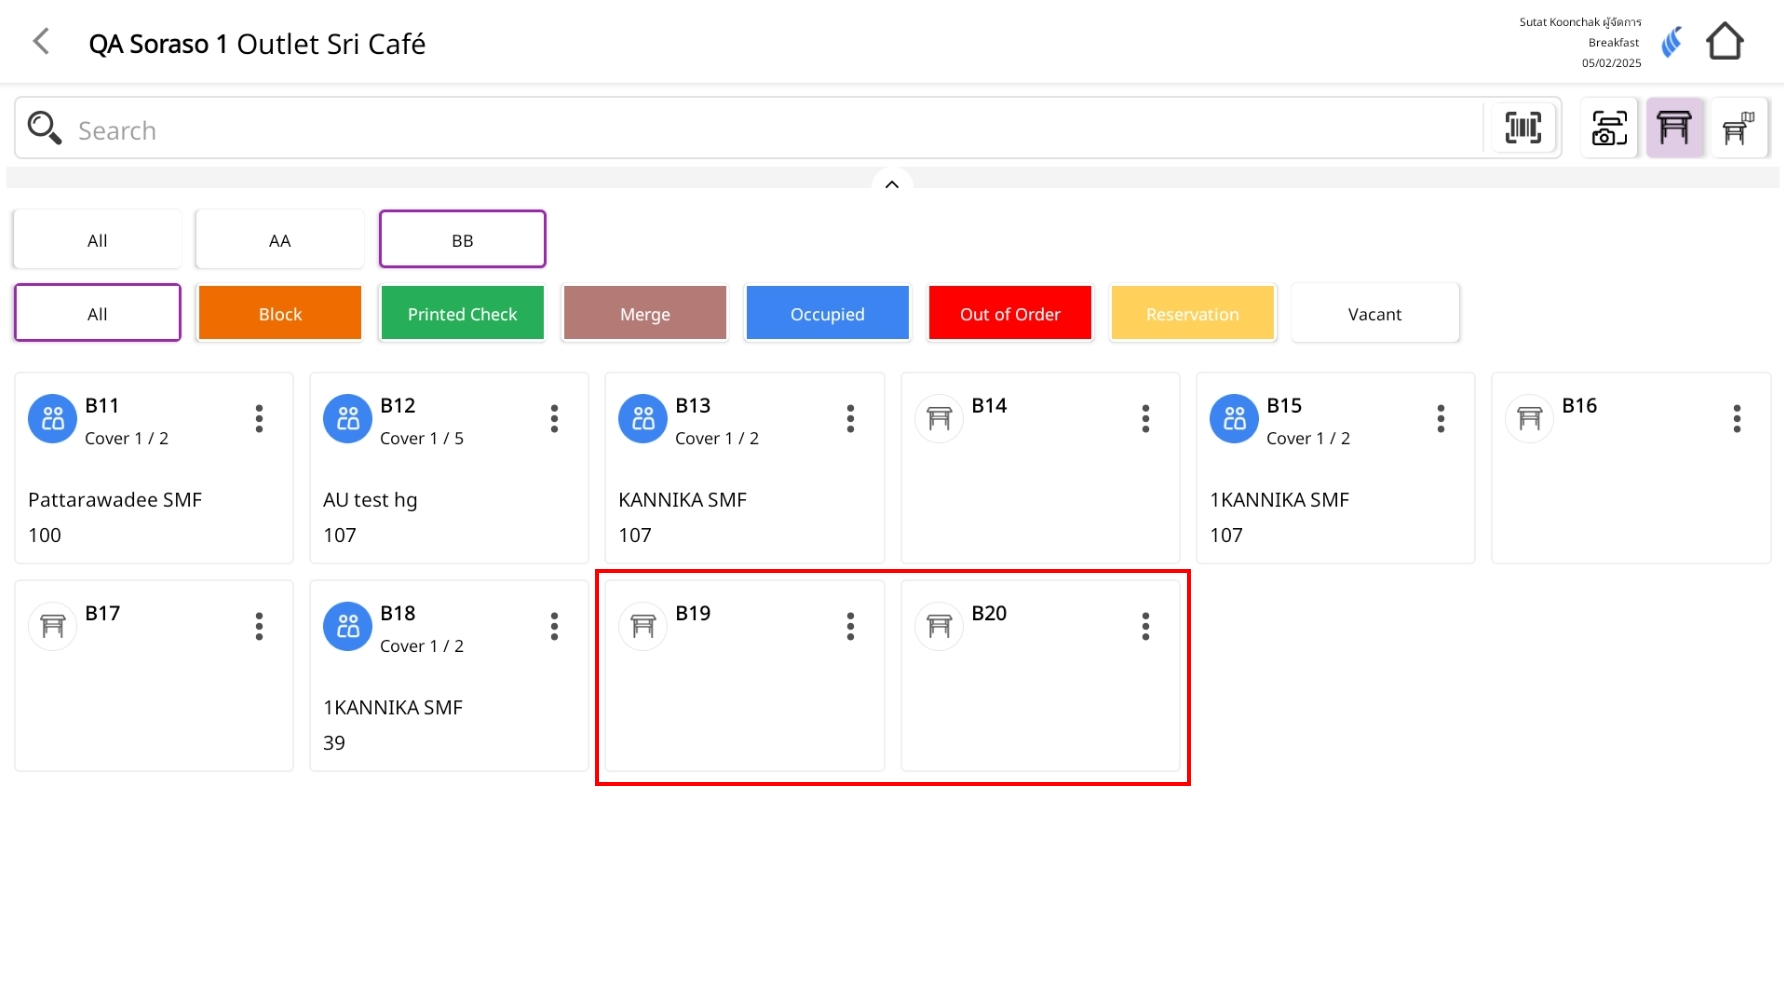
Note : If the table still has a check the status will chang e to Occupied (OC). If there is no check the status will chang e to Vacant (VC).
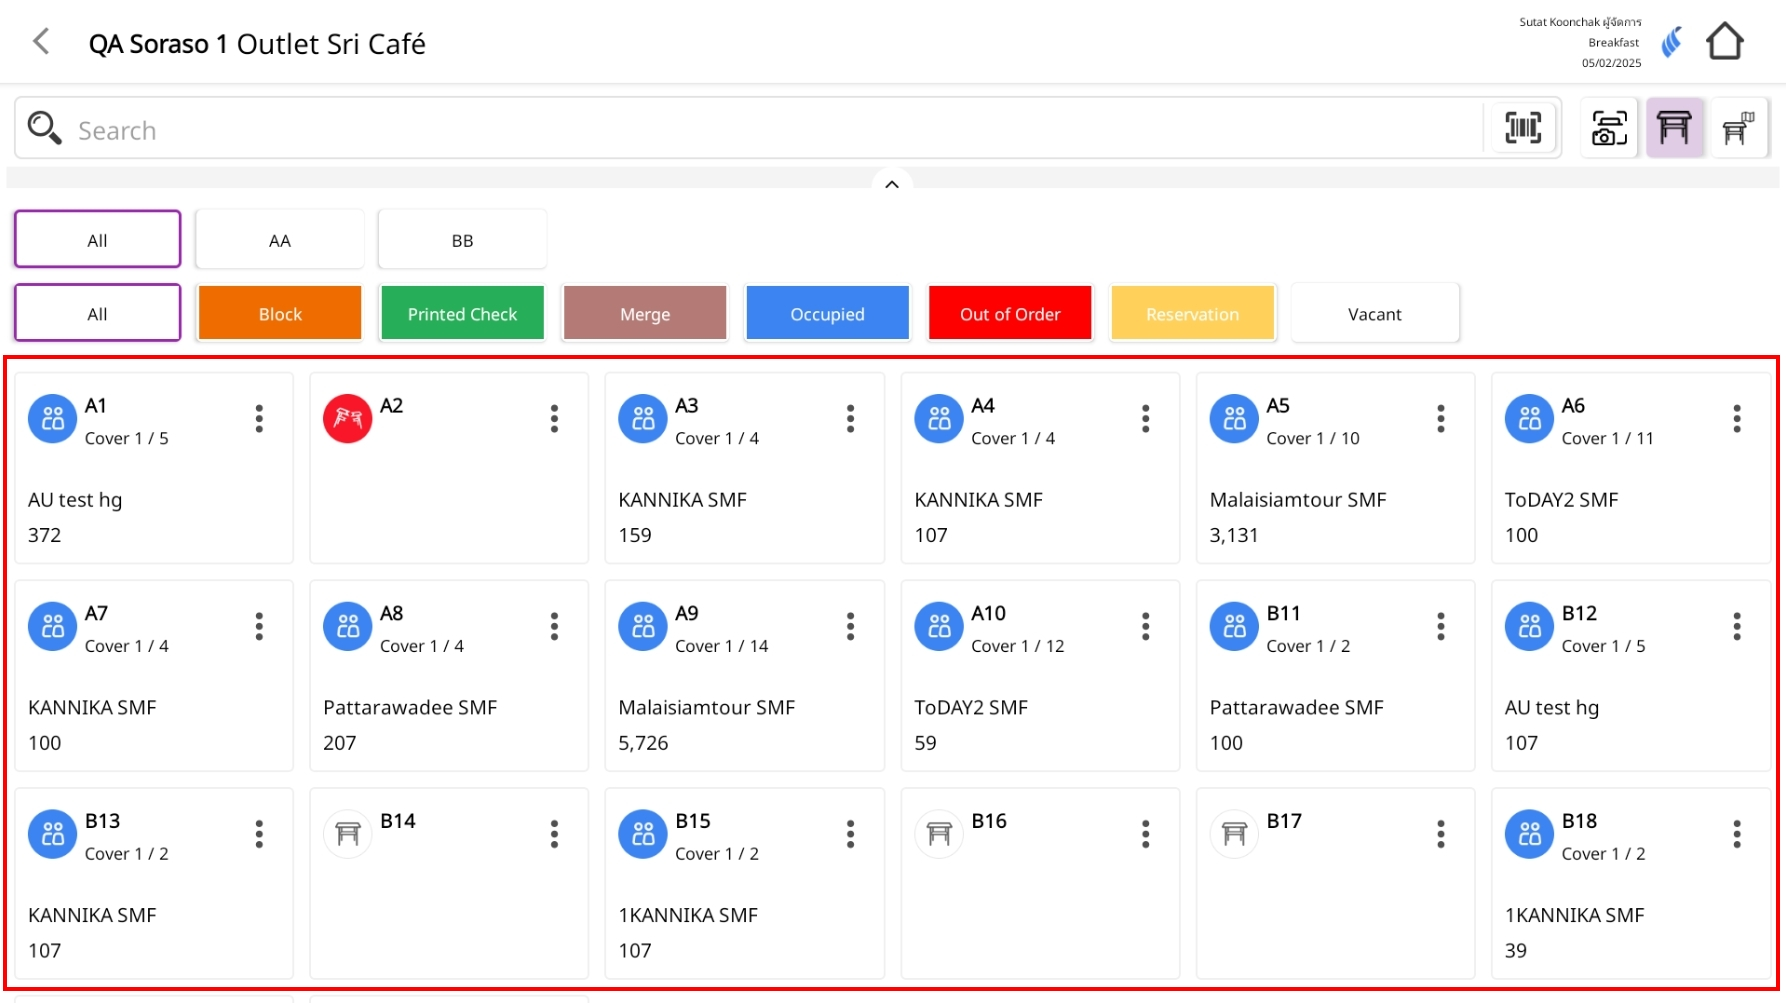
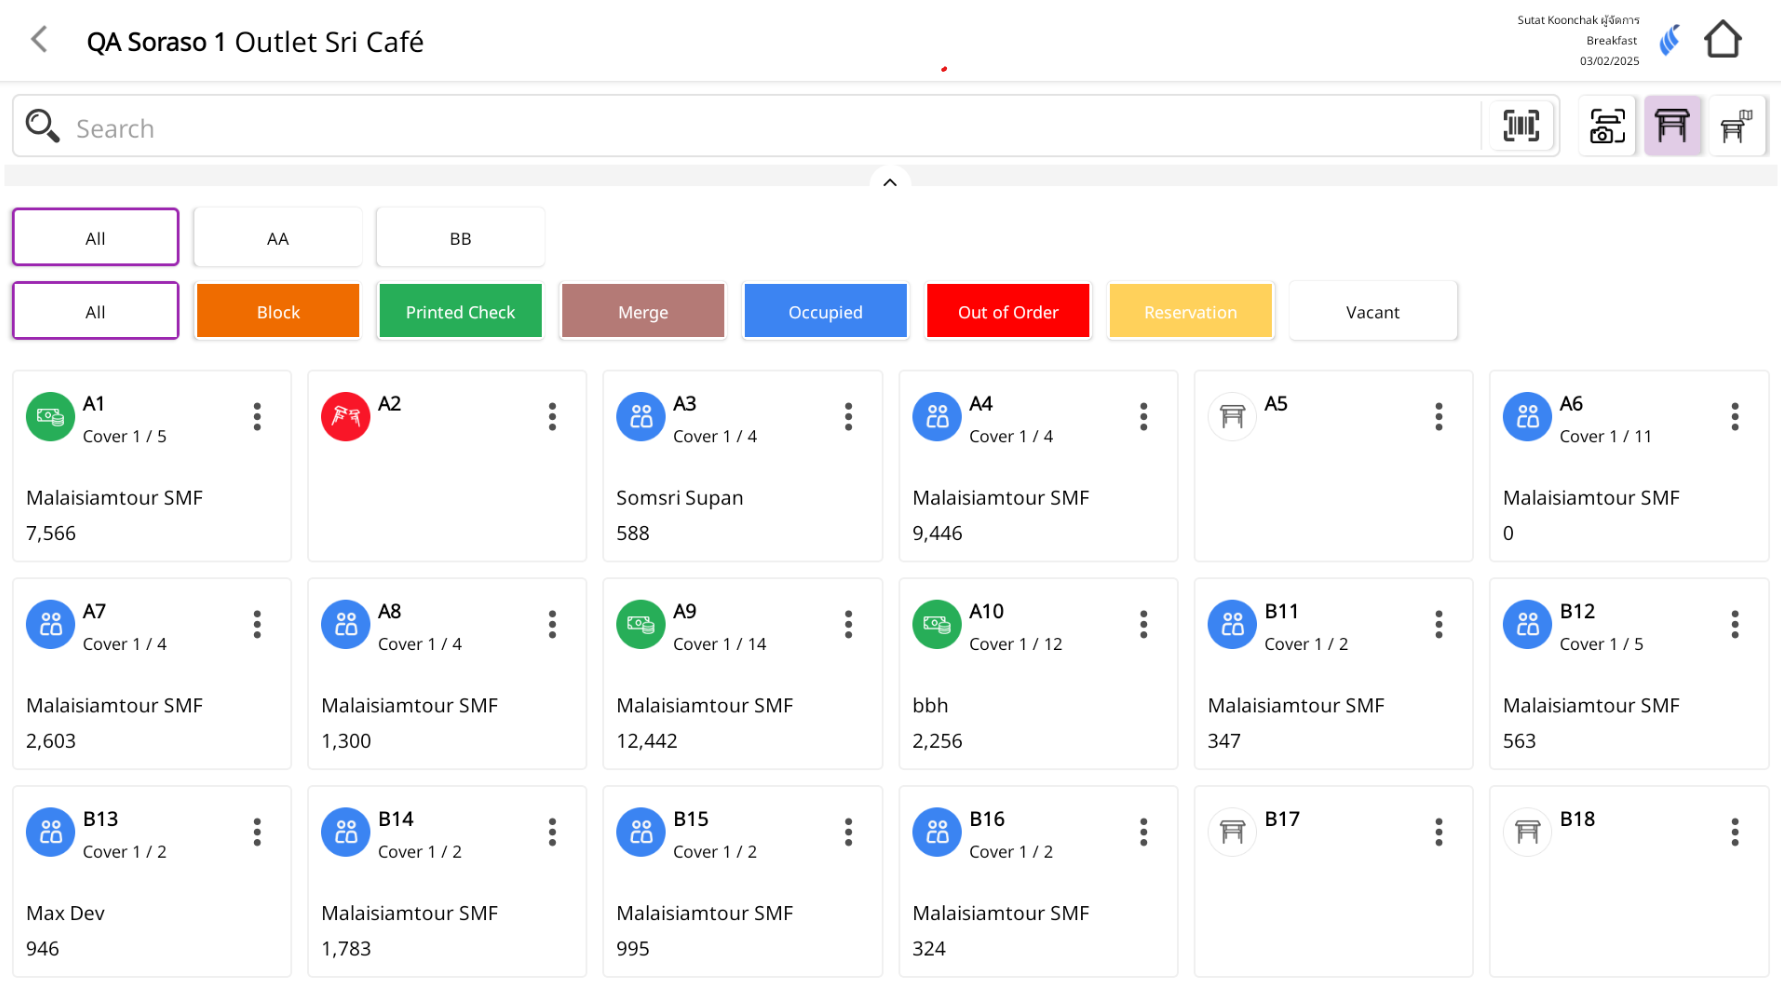
4. Block Table and Cancel Table
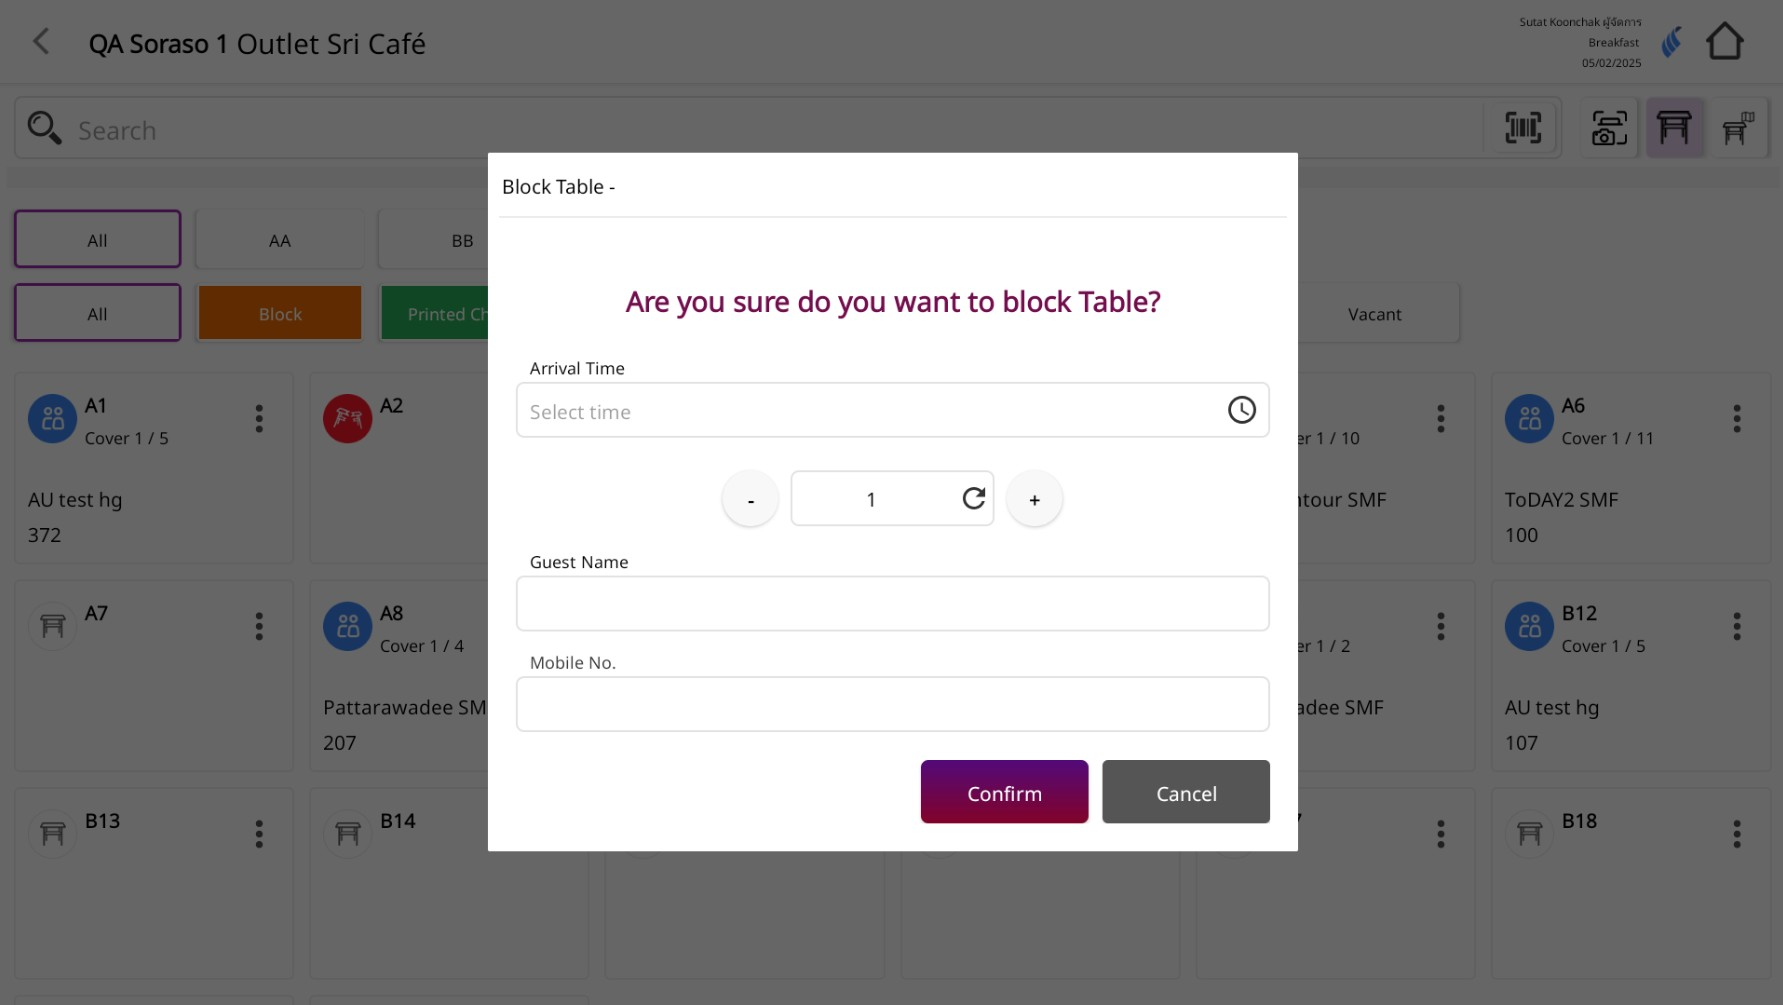
The Block Table function is used to temporarily block a table, preventing it from being seated. This is useful for situations such as table maintenance or advance reservations. Blocked tables are shown in orange on the Table Layout and rem ain unavailable until unblocked.
4.1 Block Table
To perform the task:
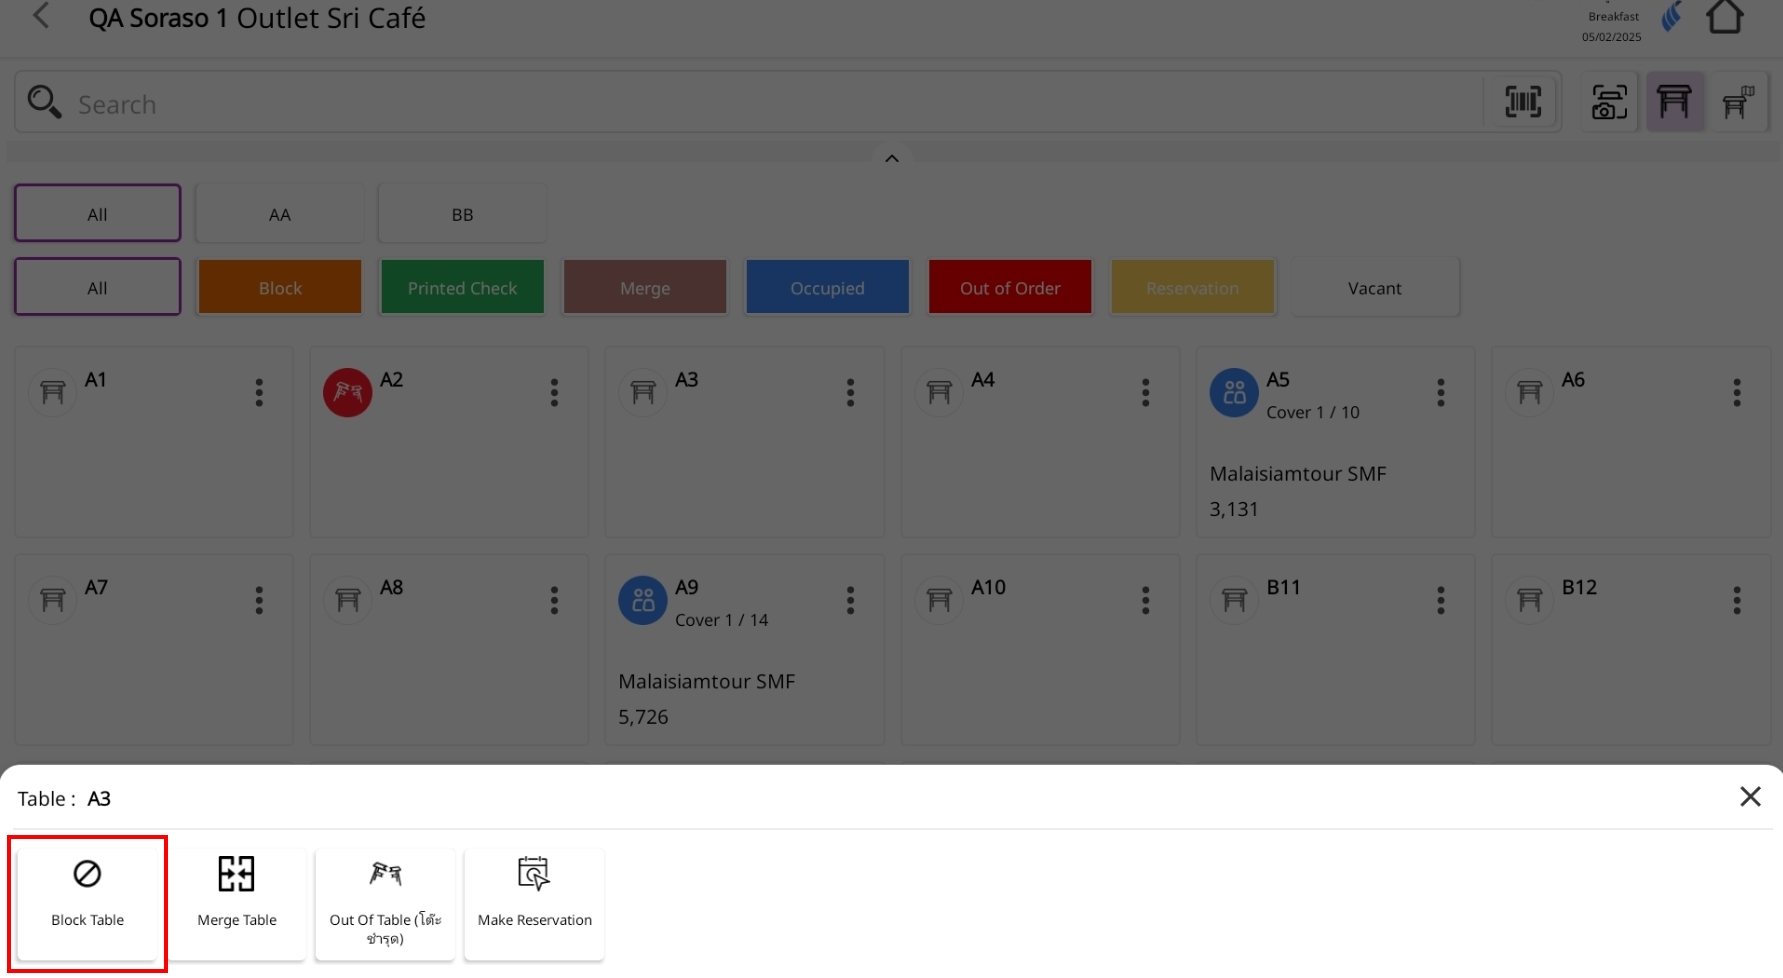
- Go to the Table Layout screen and tap the three-dot icon of the table you want to block.


- From the m enu, select Block Table.
-
Fill in the block table details:
- Arrival Time: Select the customer’s arrival time (if applicable).
- Cover: Adjust the number of guests using the – / + buttons.
- Guest Name / Mobile No.: Enter the guest’s name and contact number (optional but recommended).
-
Press Confirm to confirm the block.
-
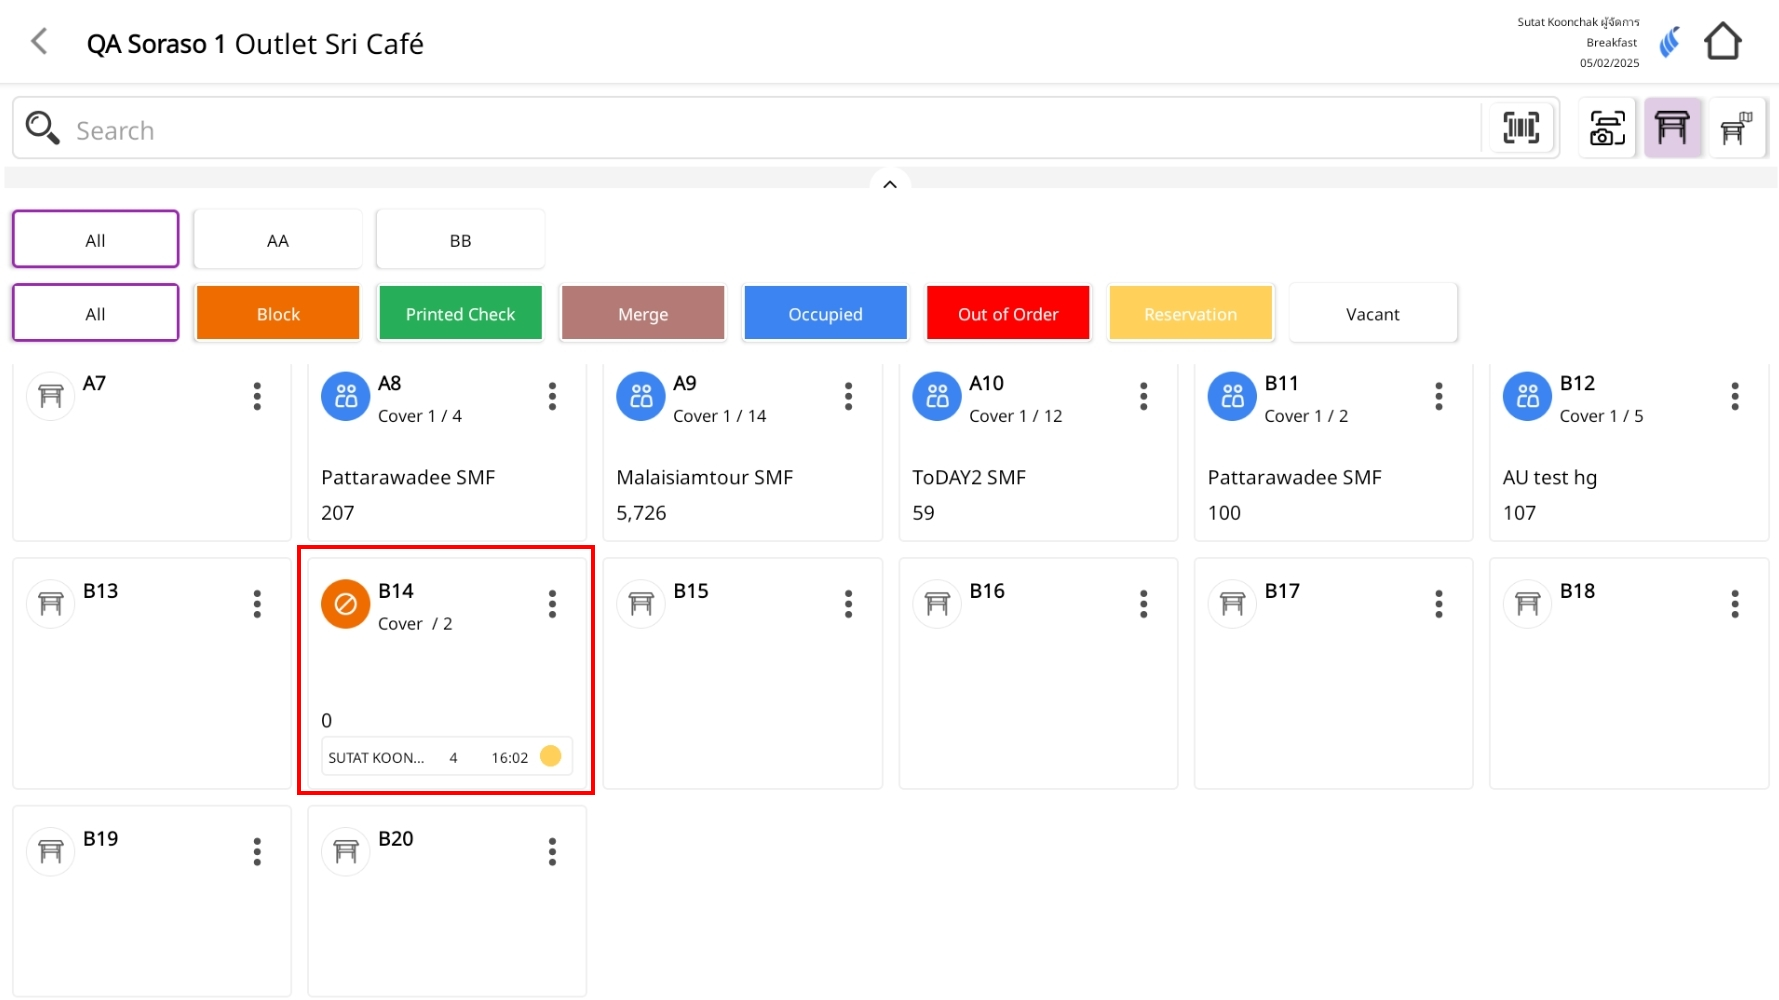
Result
- The table will show an orang e (Blocked) status in the Table Layout.
- The table will not be available for seating until it is unblocked.
4.2 Cancel Block Table
To perform the task:
-
Select the table to unblock
- Tap the blocked table you want to cancel.

-
Open the unblock confirmation window
- A popup message will appear: "Are you sure you want to cancel block table?"
- The popup will also display Arrival Time, Cover count, Guest Name, and Mobile No.

-
Confirm the unblock action
- Press Cancel Block to confirm unblocking.
- Press Cancel if you do not wish to proceed
-
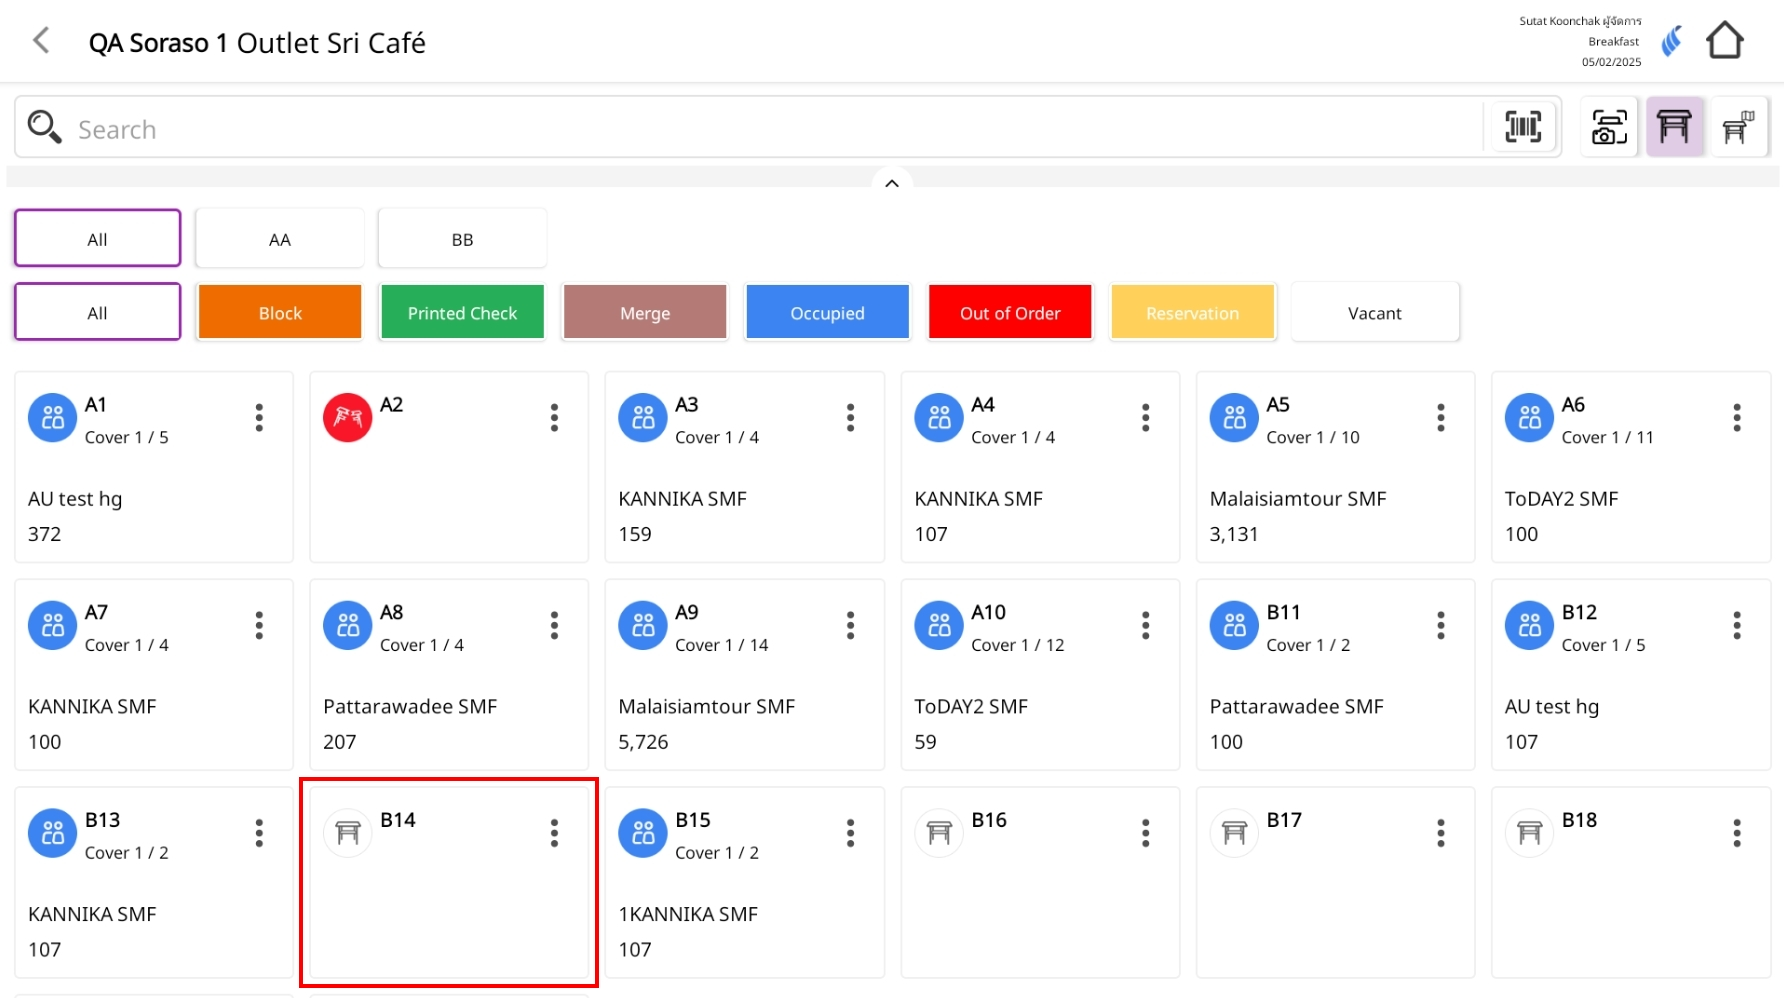
Result after unblocking
- The table status will chang e back to Vacant and will be available for seating immediately.
Note : Cancelling a block will remove the table’s block/reservation entirely, and this information cannot be restored.
Always confirm with the custom er before cancelling to avoid accidental removal.
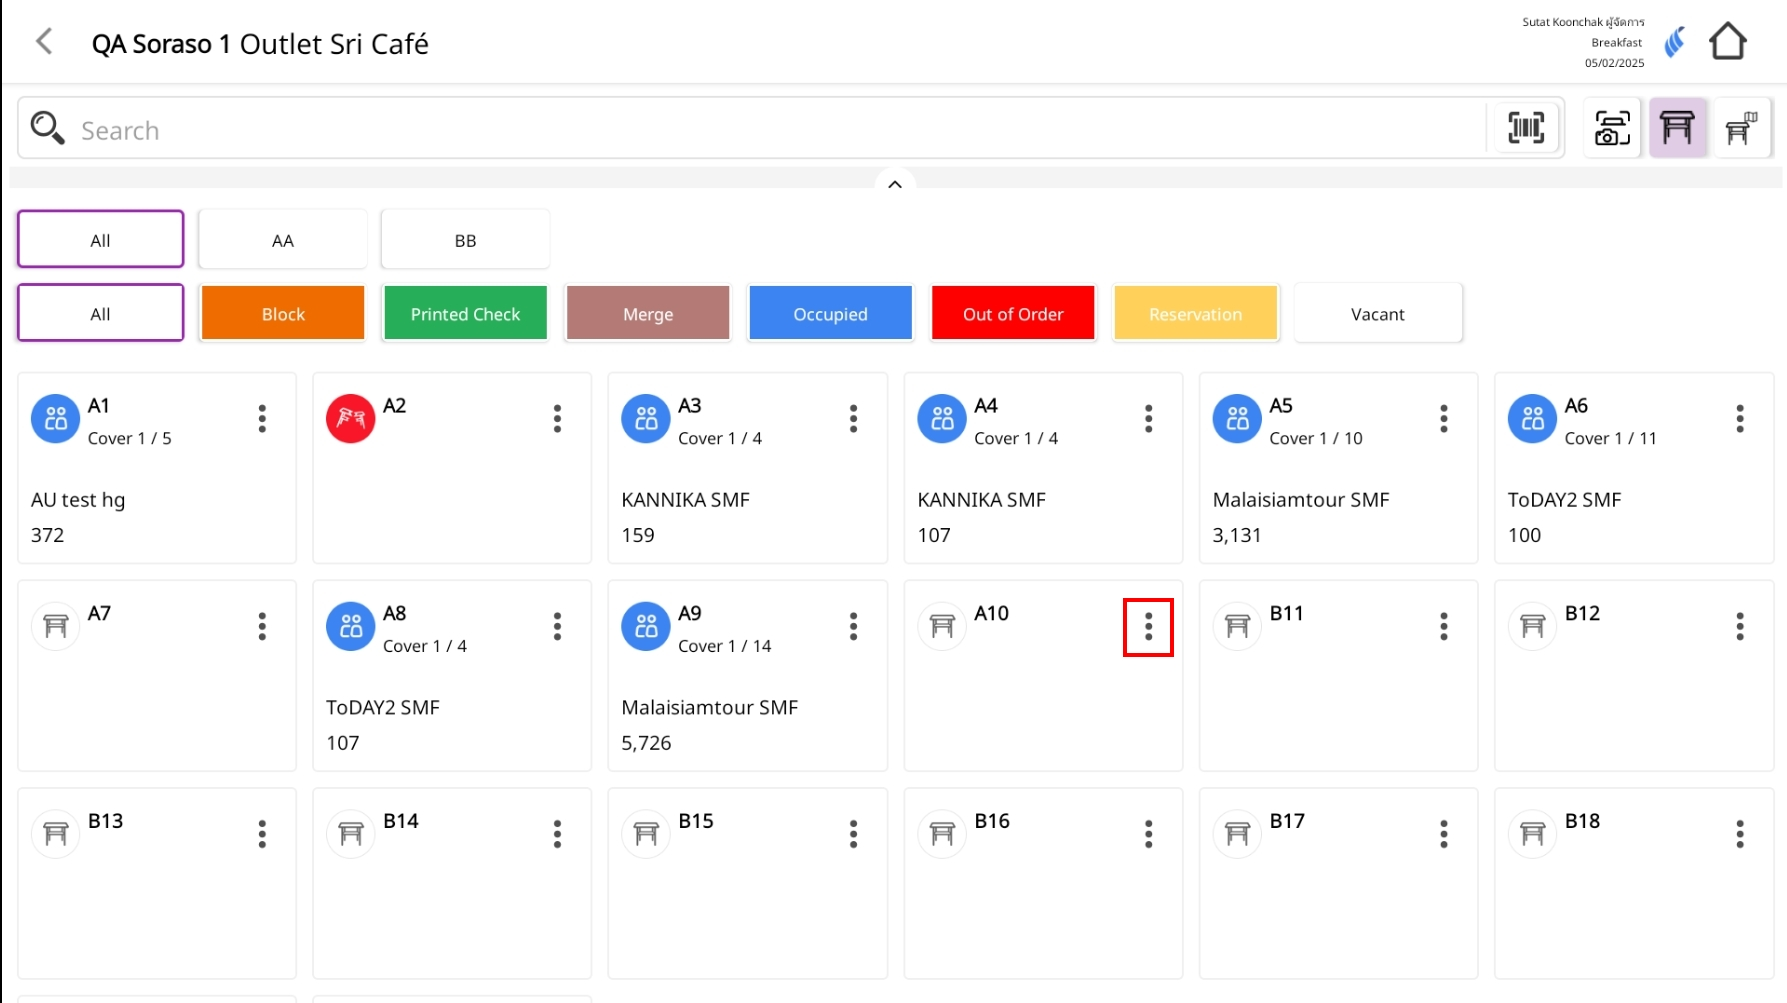
5. Out of Table
The Out of Table function allows you to temporarily m ark a table as unavailable, for situations such as damage, maintenance, or other issues. Once a table is set to Out of Table, it will be highlighted in red on the table layout, indicating that it cannot be assigned to customers. When the table is ready for use ag ain, you can switch its status back to Ready to Use immediately, allowing it to accept new orders and function normally.
5.1. Out of Table Process
To perform the task:
-
On the table layout screen, locate the table you want to mark as Out of Order.
- Click the three-dot icon on that table to open the action menu.
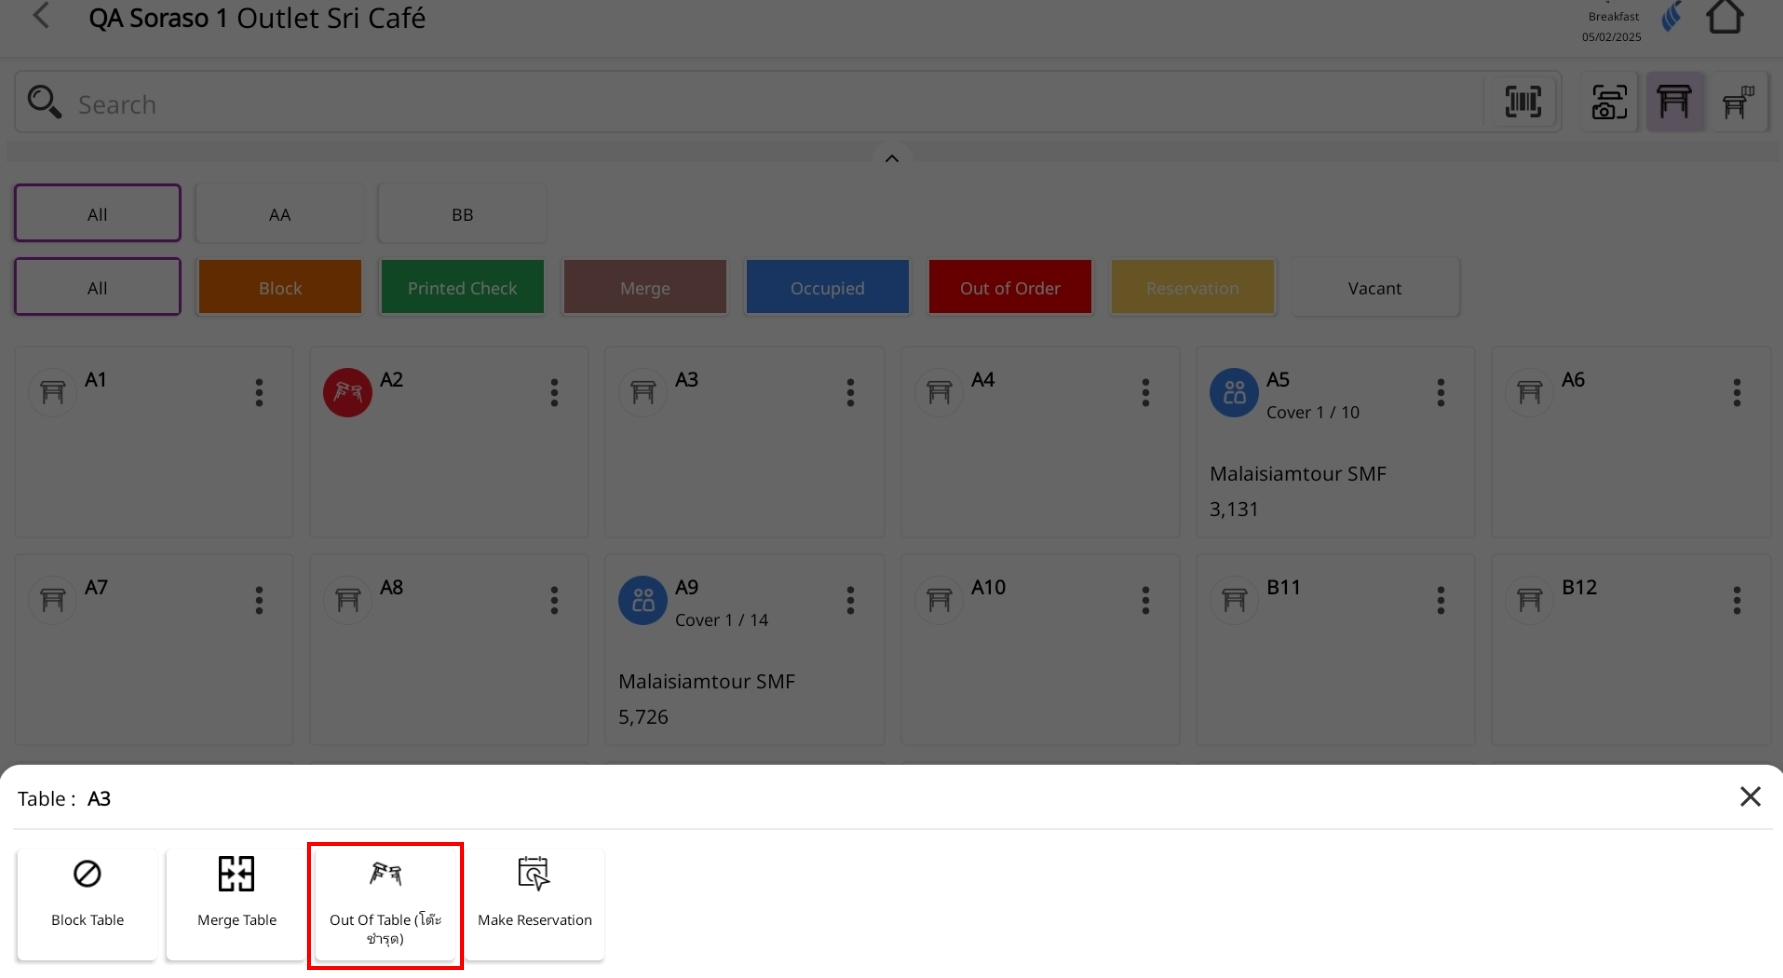
-
Select Out of Table
- In the pop-up menu, choose "Out of Table".
- This action is used when the table is temporarily unavailable for service.
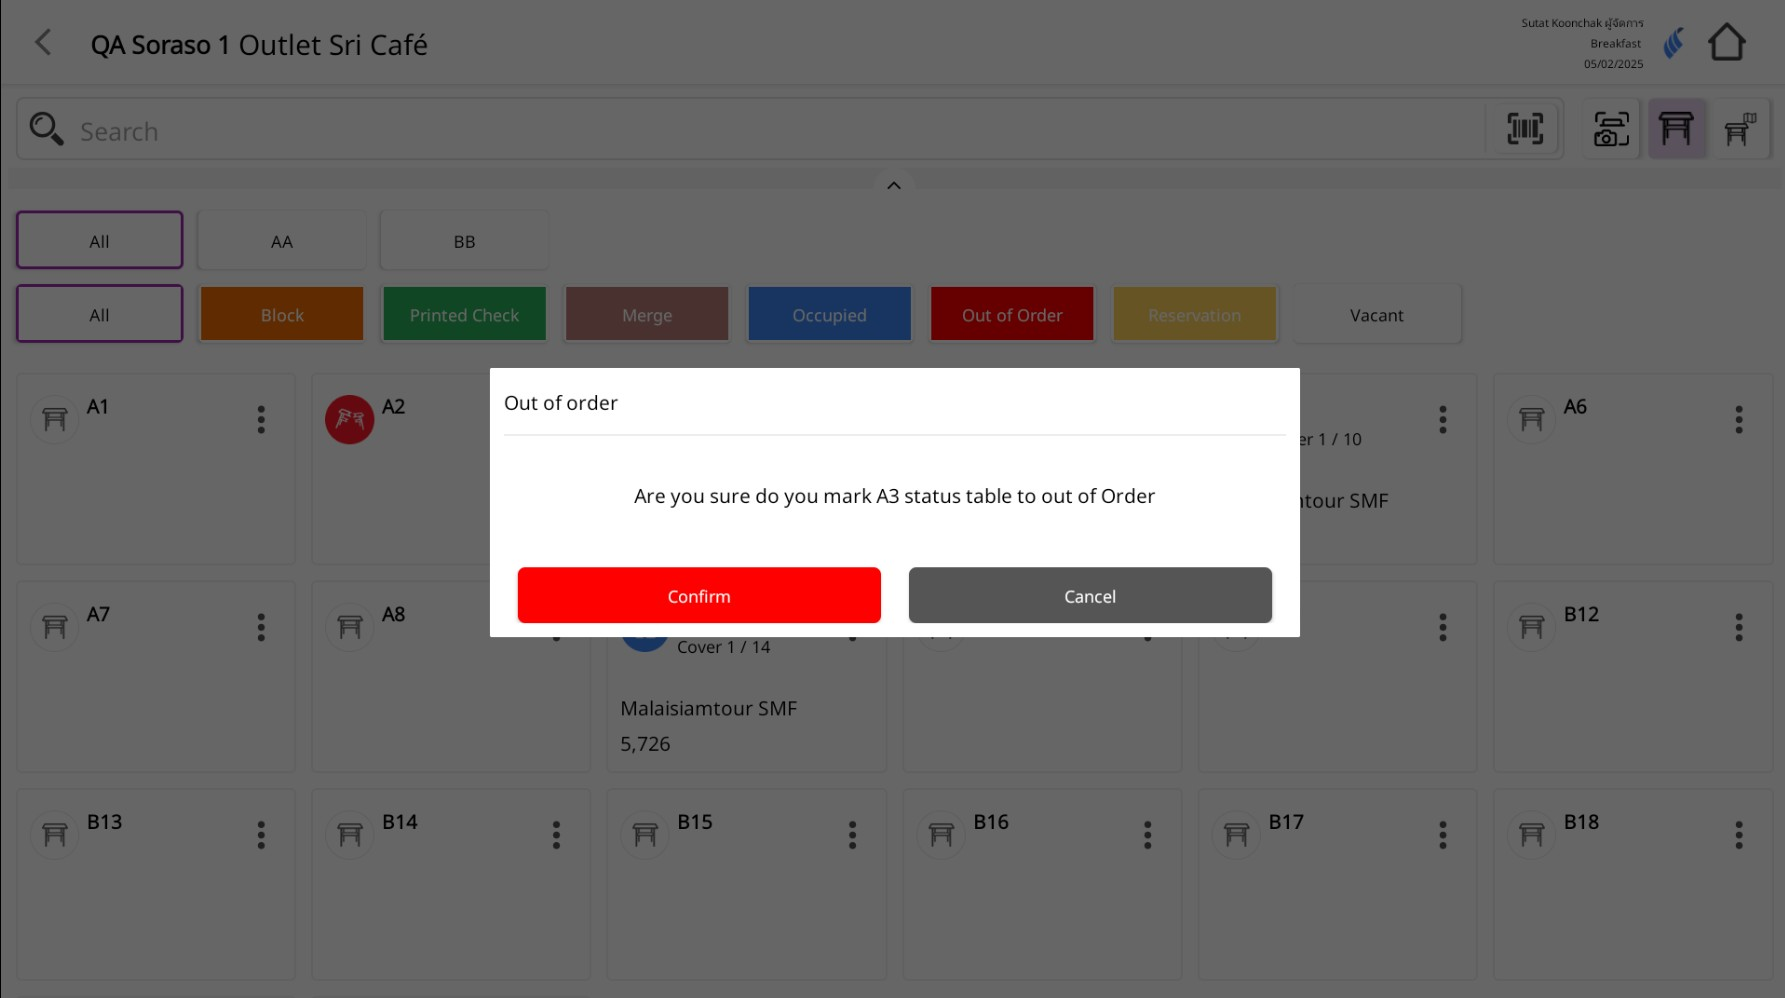
-
Confirm the Action
- A confirm action pop-up will appear asking if you are sure you want to mark the table as Out of Order.
- Click Confirm to proceed.
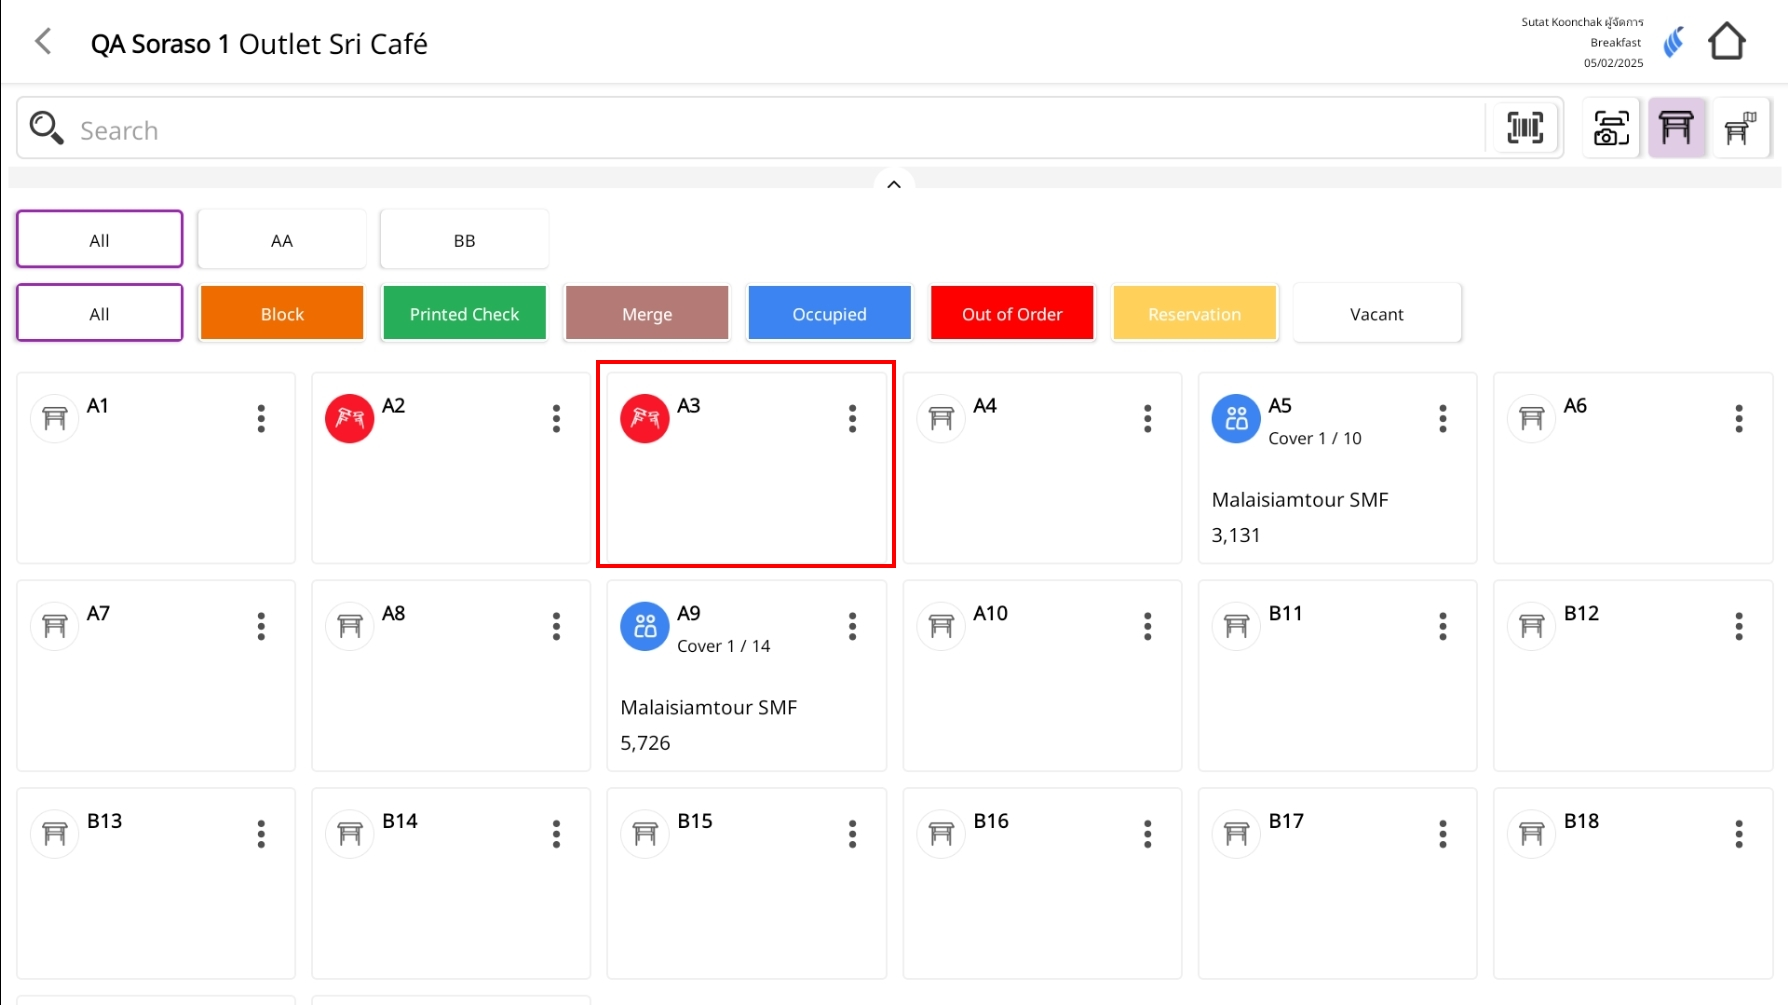
-
Table Status Changes
- Once confirmed, the table will change to red indicating it is Out of Order.
5.2. Returning the Table to Service
To perform the task:
-
Access the Table Menu Again
- Click the three-dot icon on the table marked as Out of Order.


-
Select Ready to Use Table
- From the menu, choose "Ready to Use Table".
- This will reset the table status back to normal.
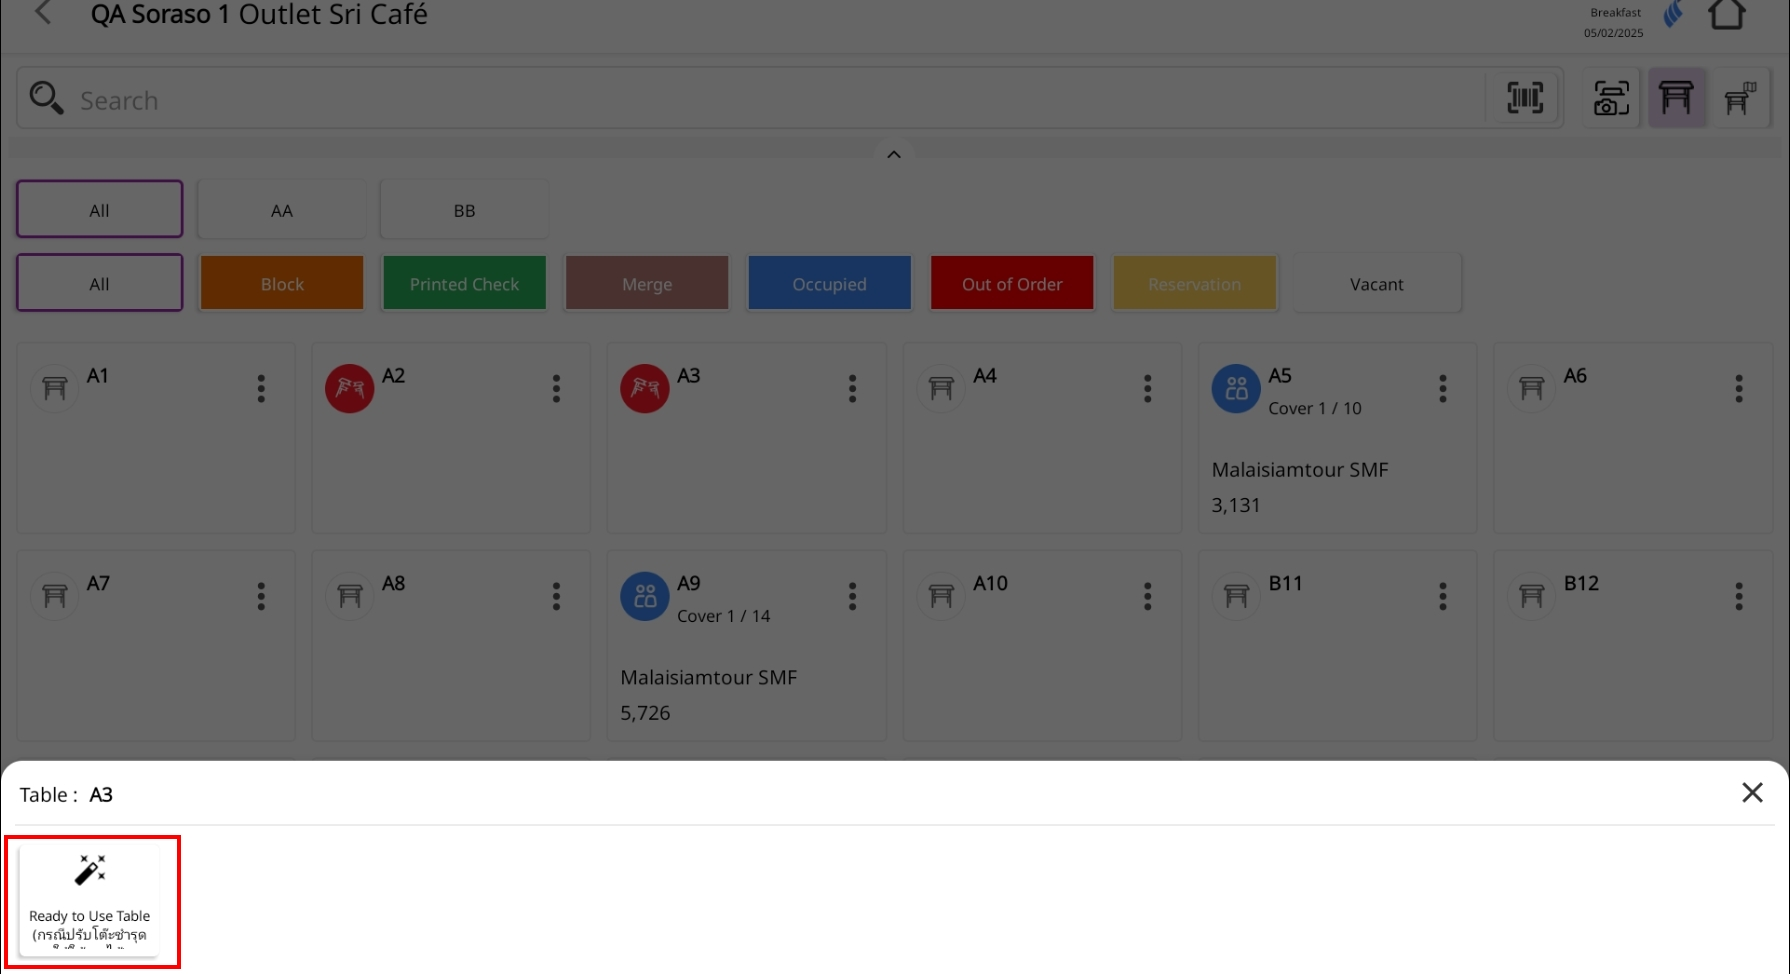
-
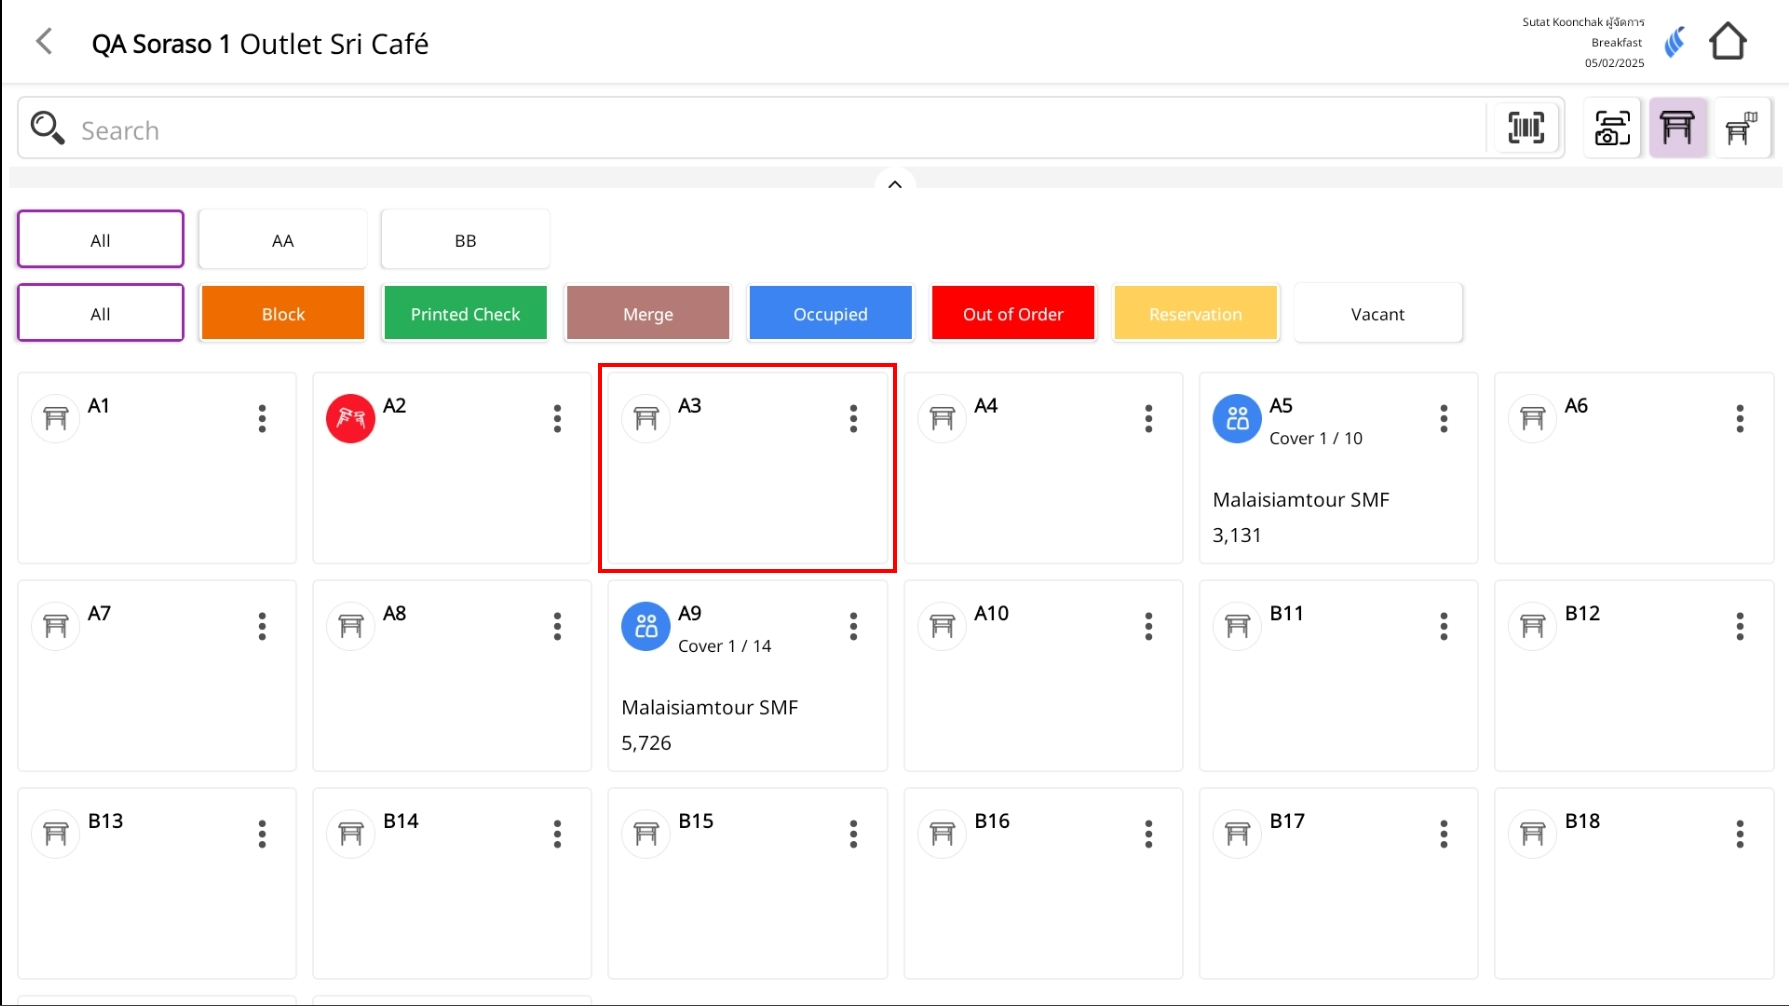
Table Becomes Available
- The table will now display in the normal state (available for new orders).
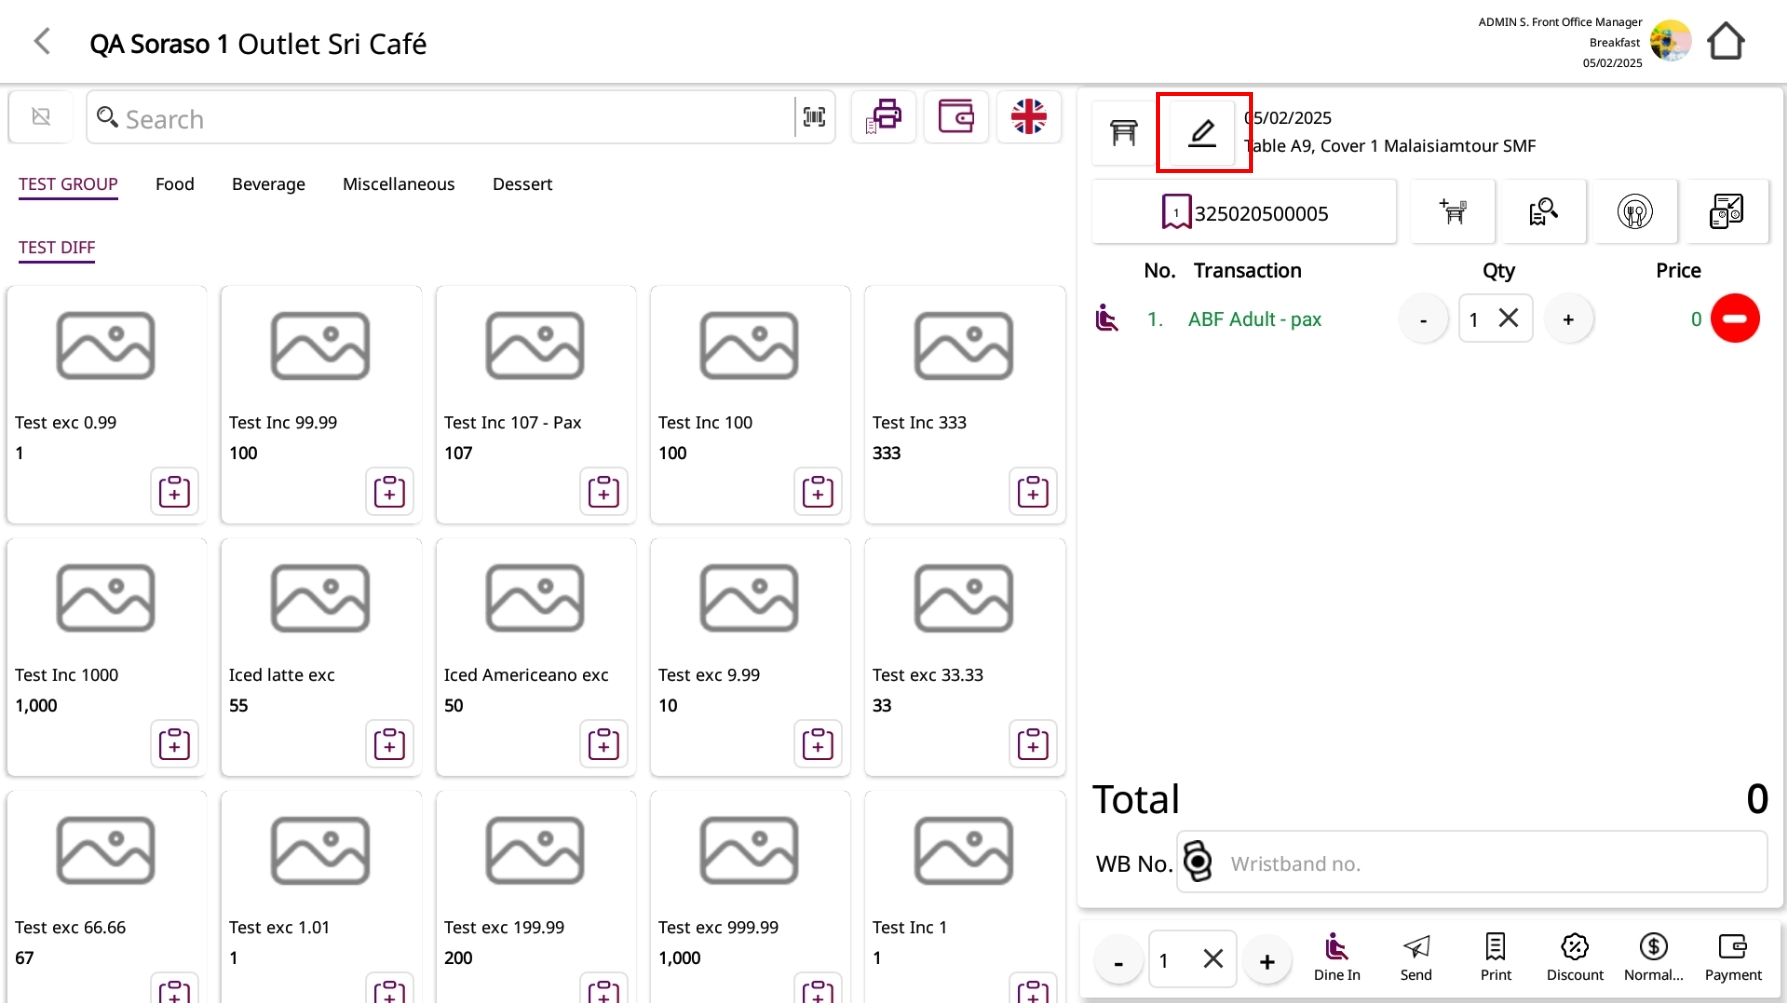
6. Edit information of guest
The Edit Check function allows you to update table and guest details after an order has been created. This is useful for correcting information such as the number of guests, guest type, or customer details.
To perform the task:
- Go to the table list and select the table you want to edit.


- Click the pencil icon (Edit Check) at the top of the screen.
-
Click the pencil icon (Edit Check) at the top of the screen.
-
To search for names by guest type, click the magnifying glass icon in the First Name or Agent field
- A search window will appear.
- You can filter and find names based on Guest Type for faster selection.
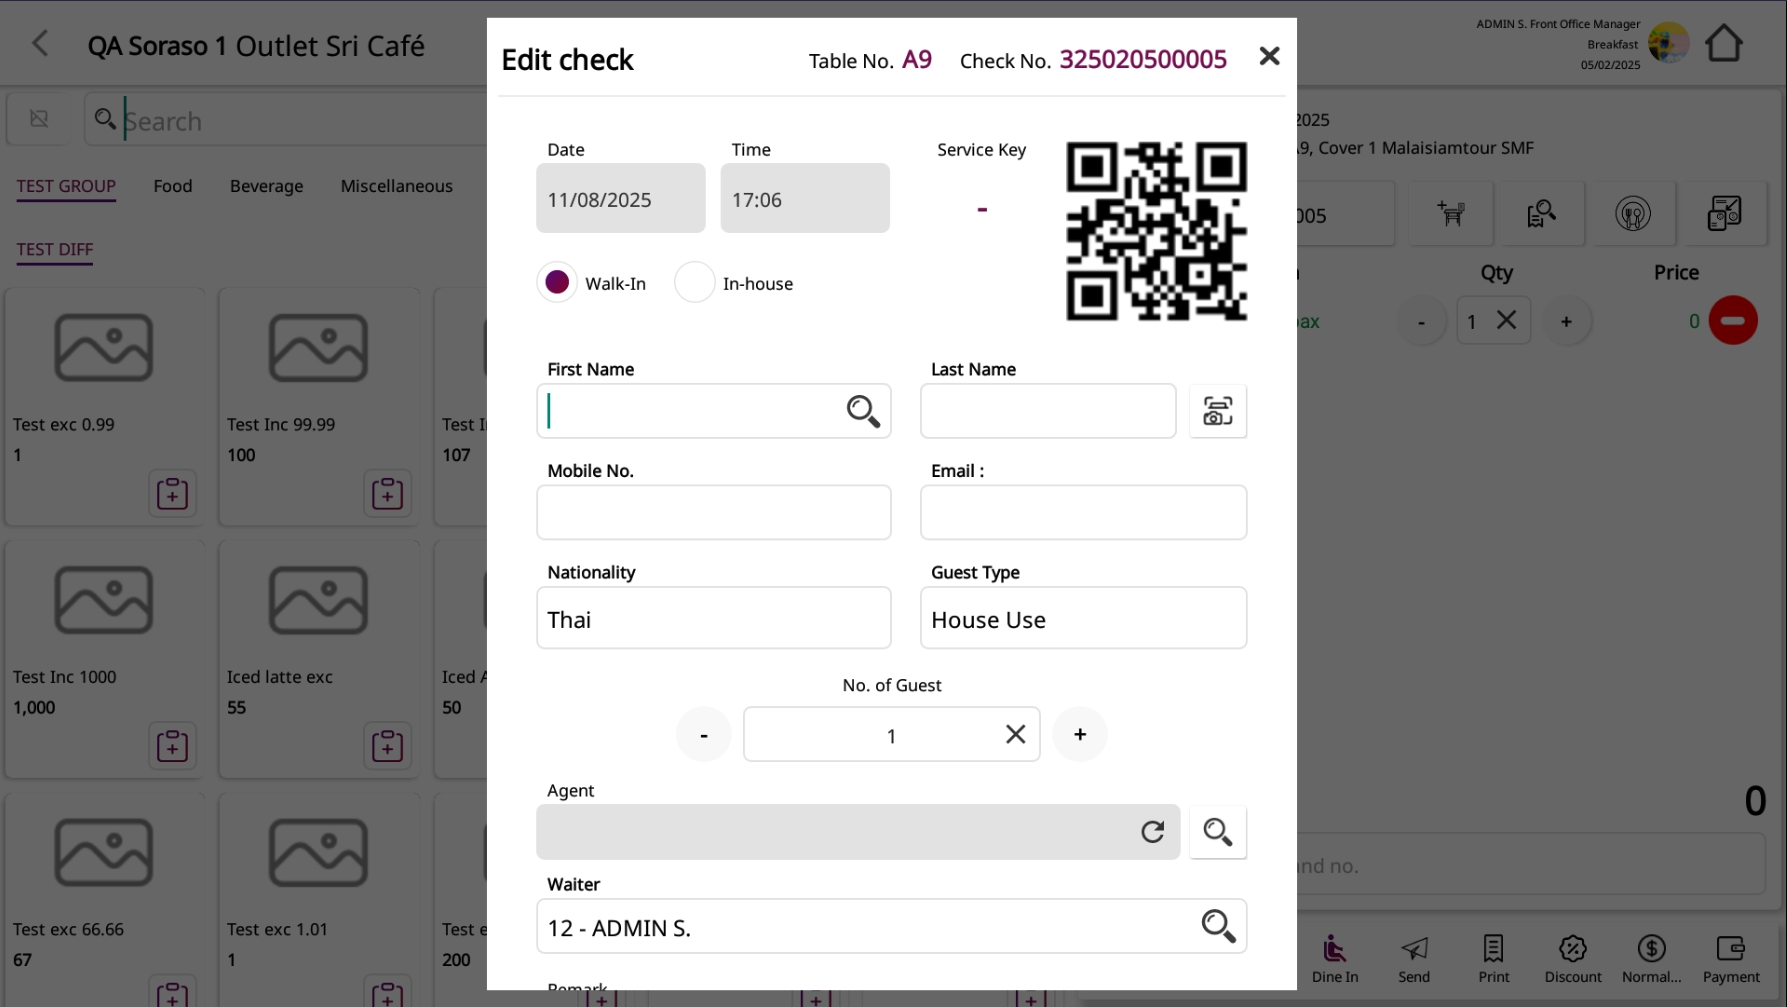
- Once changes are complete, click Confirm to apply the updates.
- Once changes are complete, click Confirm to apply the updates.
7. Resend Order
The Resend Order function is used to send previously sent items to the kitchen again — for example, to reprint a kitchen slip or notify the kitchen to prepare again.
To perform the task:
- Go to the table’s order screen (a table must be selected first)

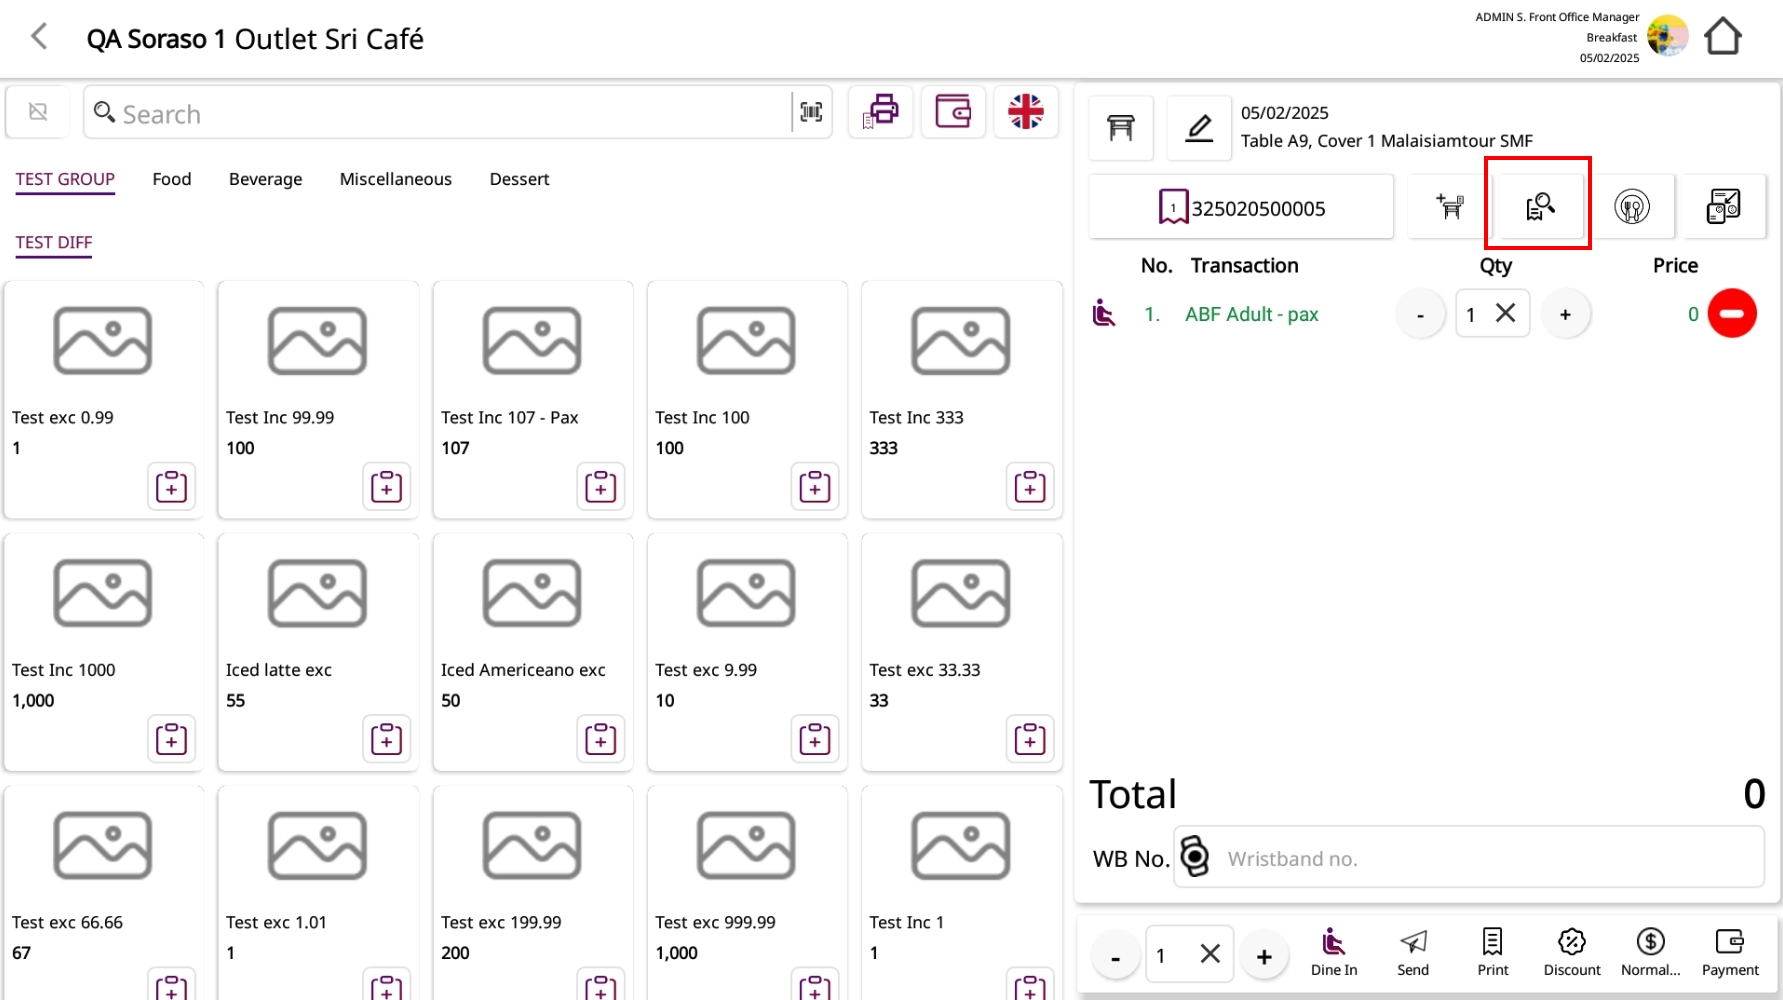
- Click the View Check button to review the order
- Select the items you want to resend (only items already sent to the kitchen are eligible)
- Click the Resend Order button in the bottom action menu
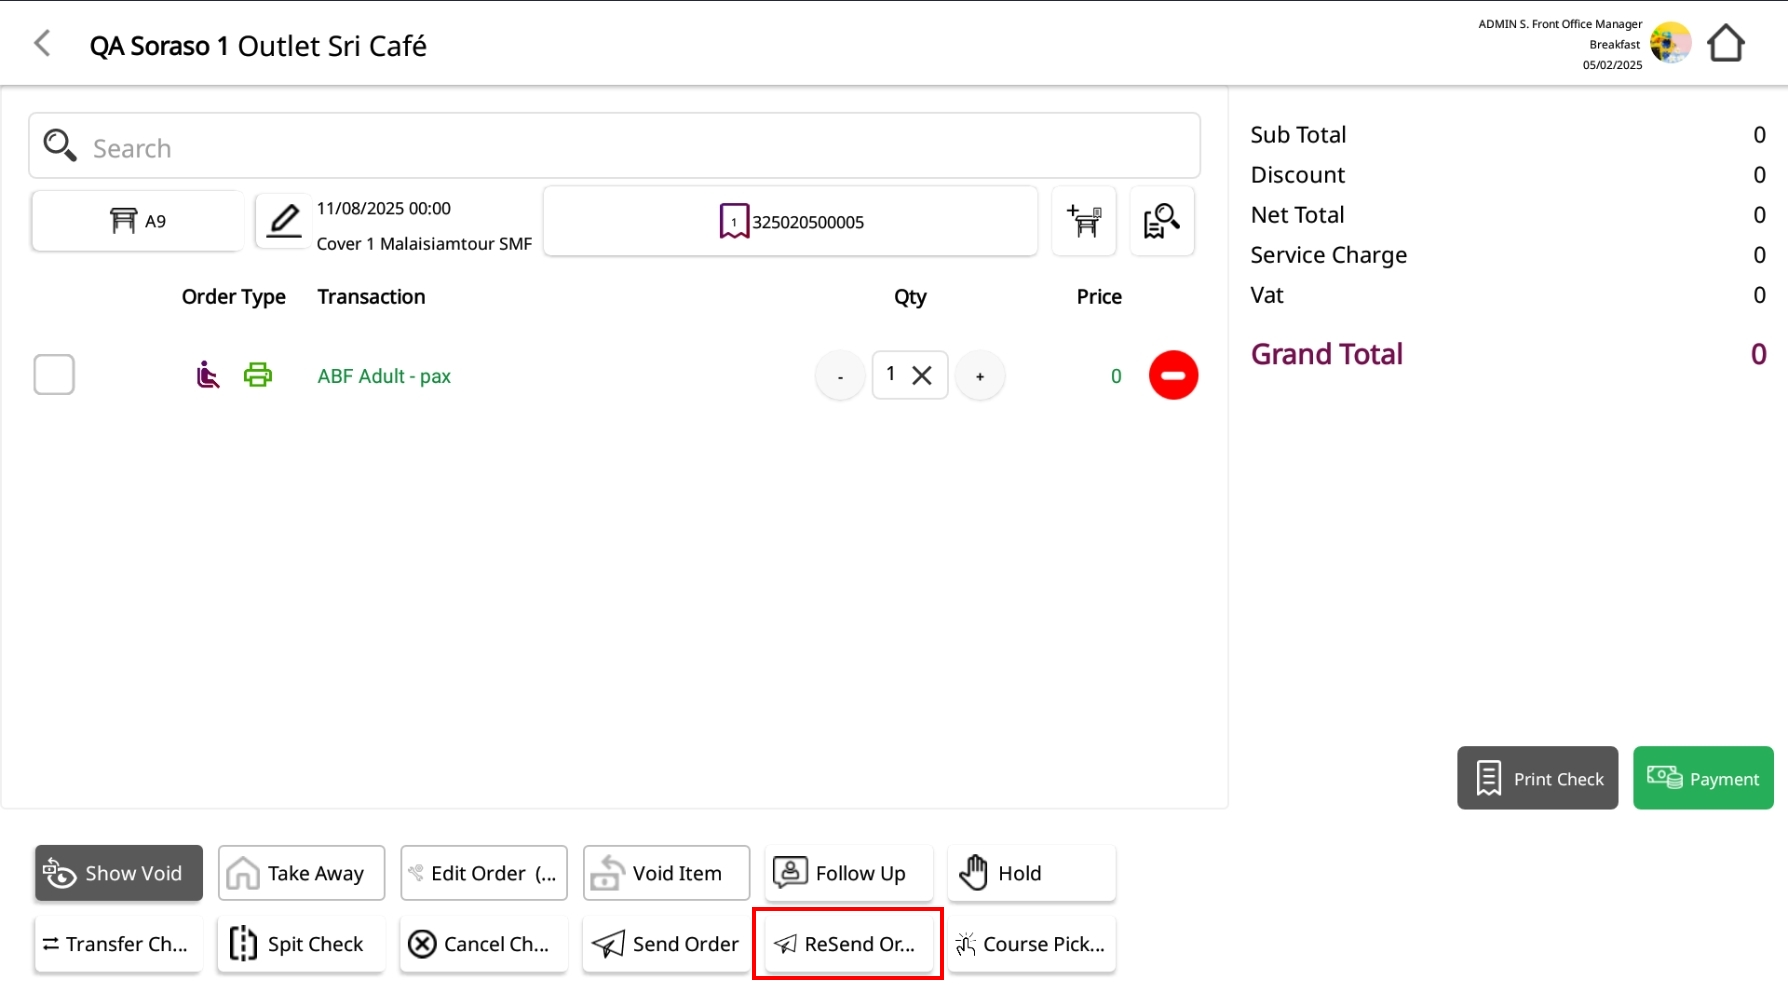
- A kitchen slip will be printed again for the selected items
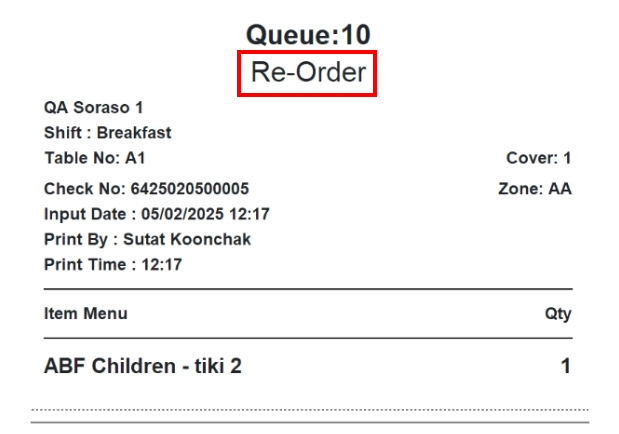
Note: Only items that have already been sent to the kitchen can be resent.
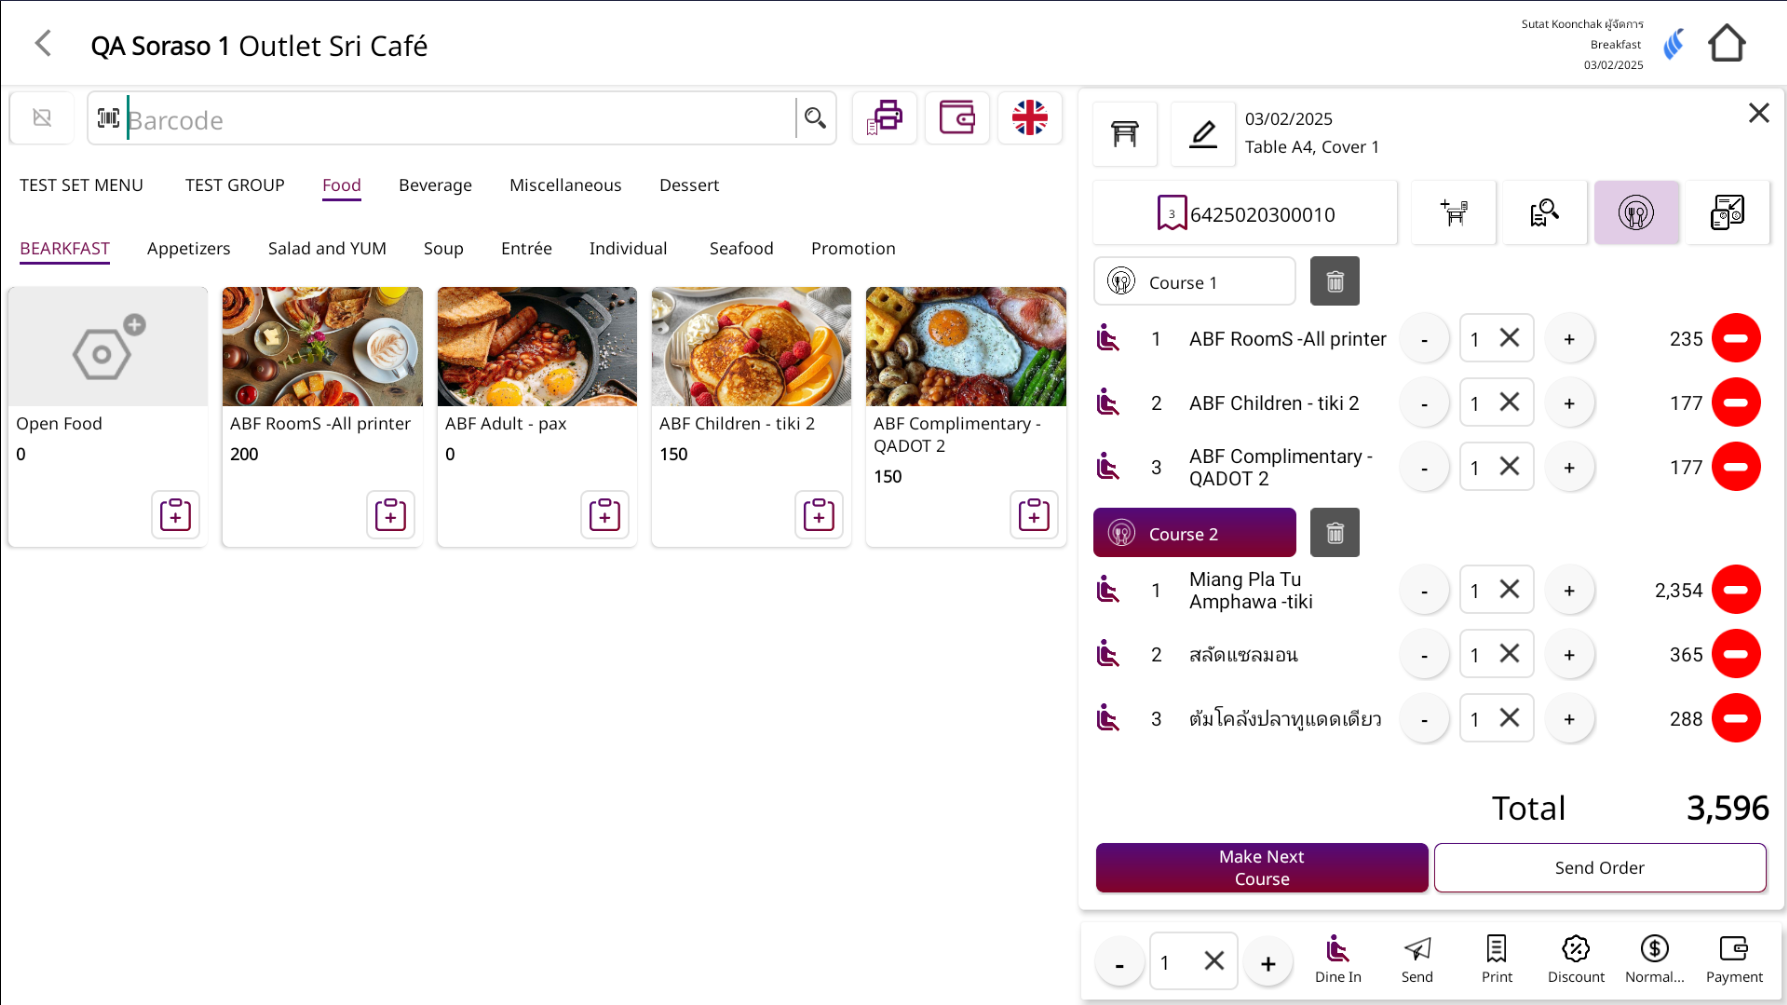
8. Make Course
The Make Course feature allows staff to organize ordered menu items into meal courses (e.g., appetizer, main course, dessert) for better sequence control during service.
To perform the task:
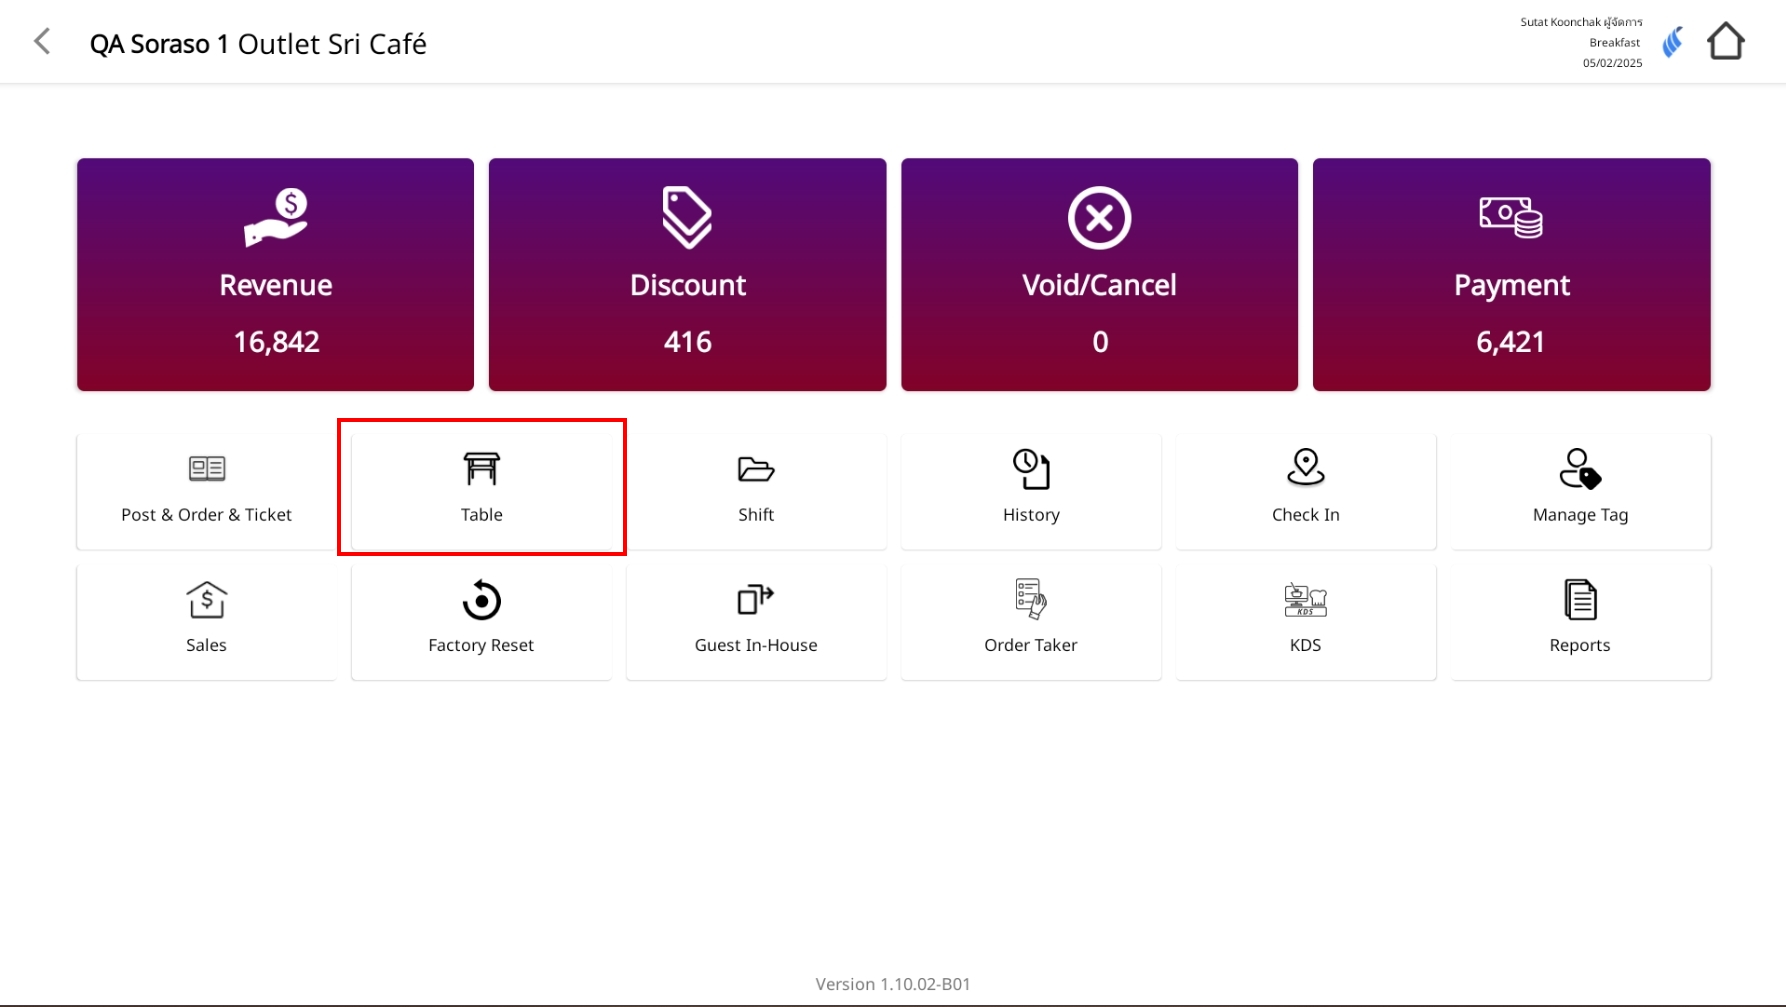
- Go to the Table View and select a table that you want to place the order for.

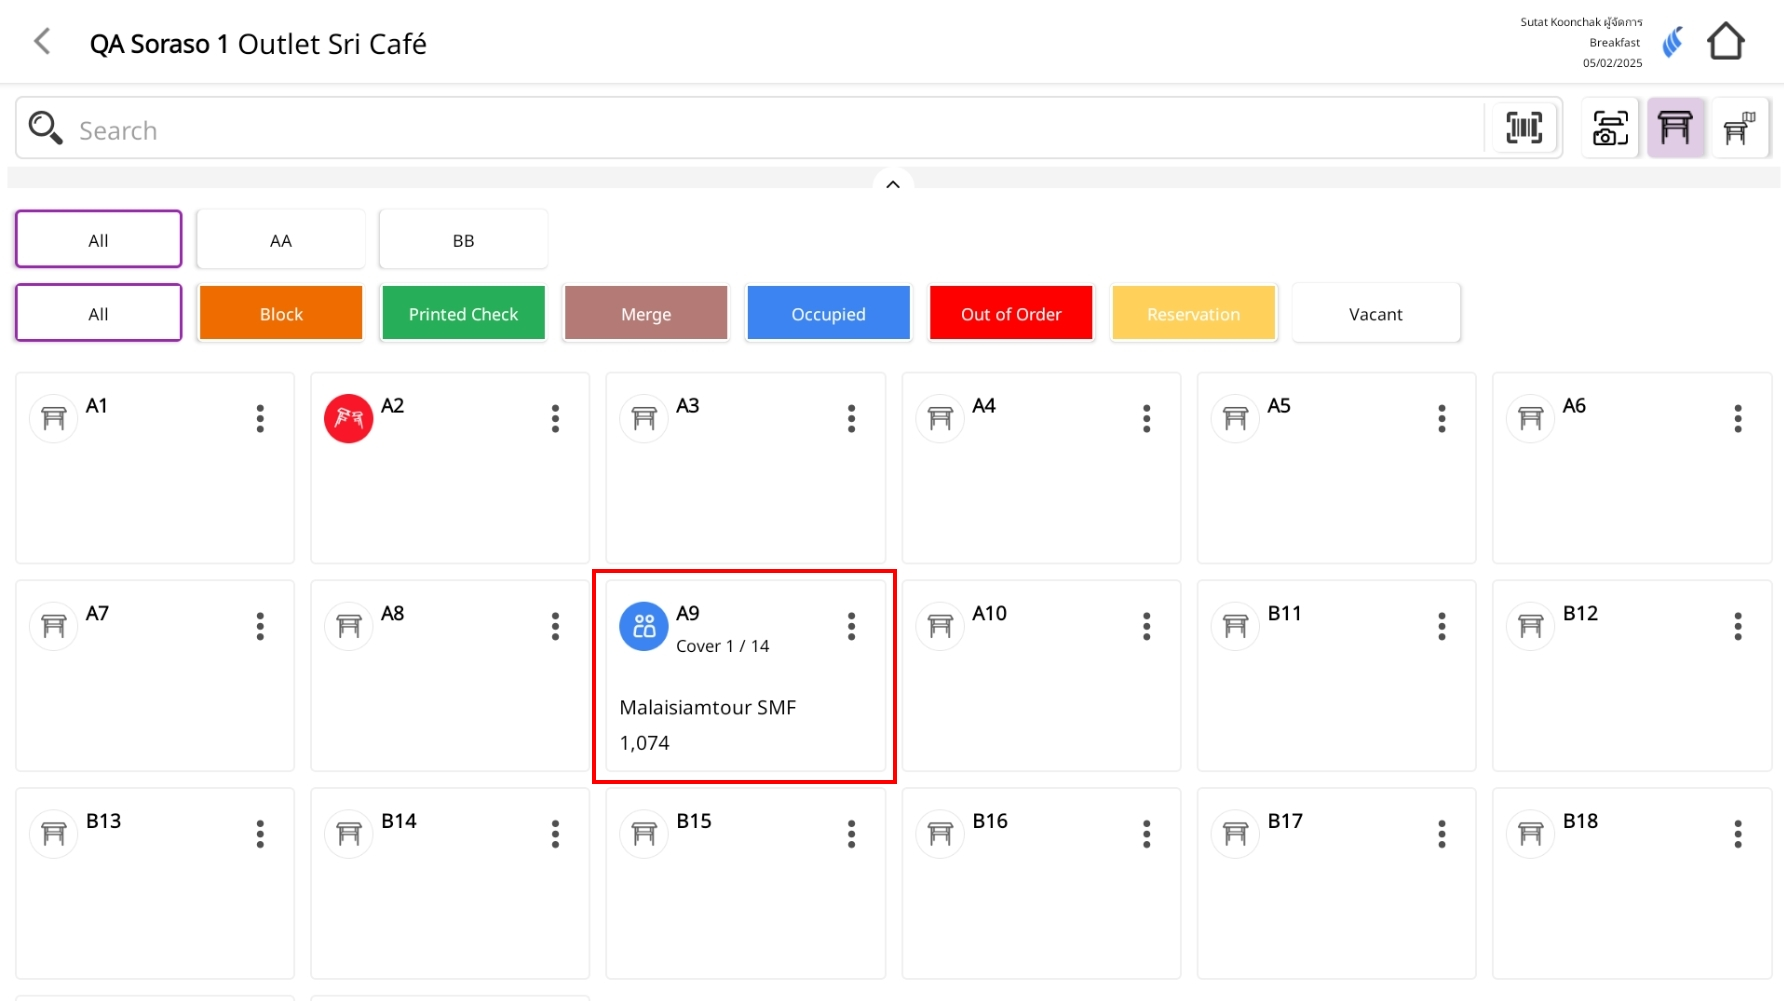
- Once inside the selected table, click the Spoon and Fork icon at the top-right of the order panel.
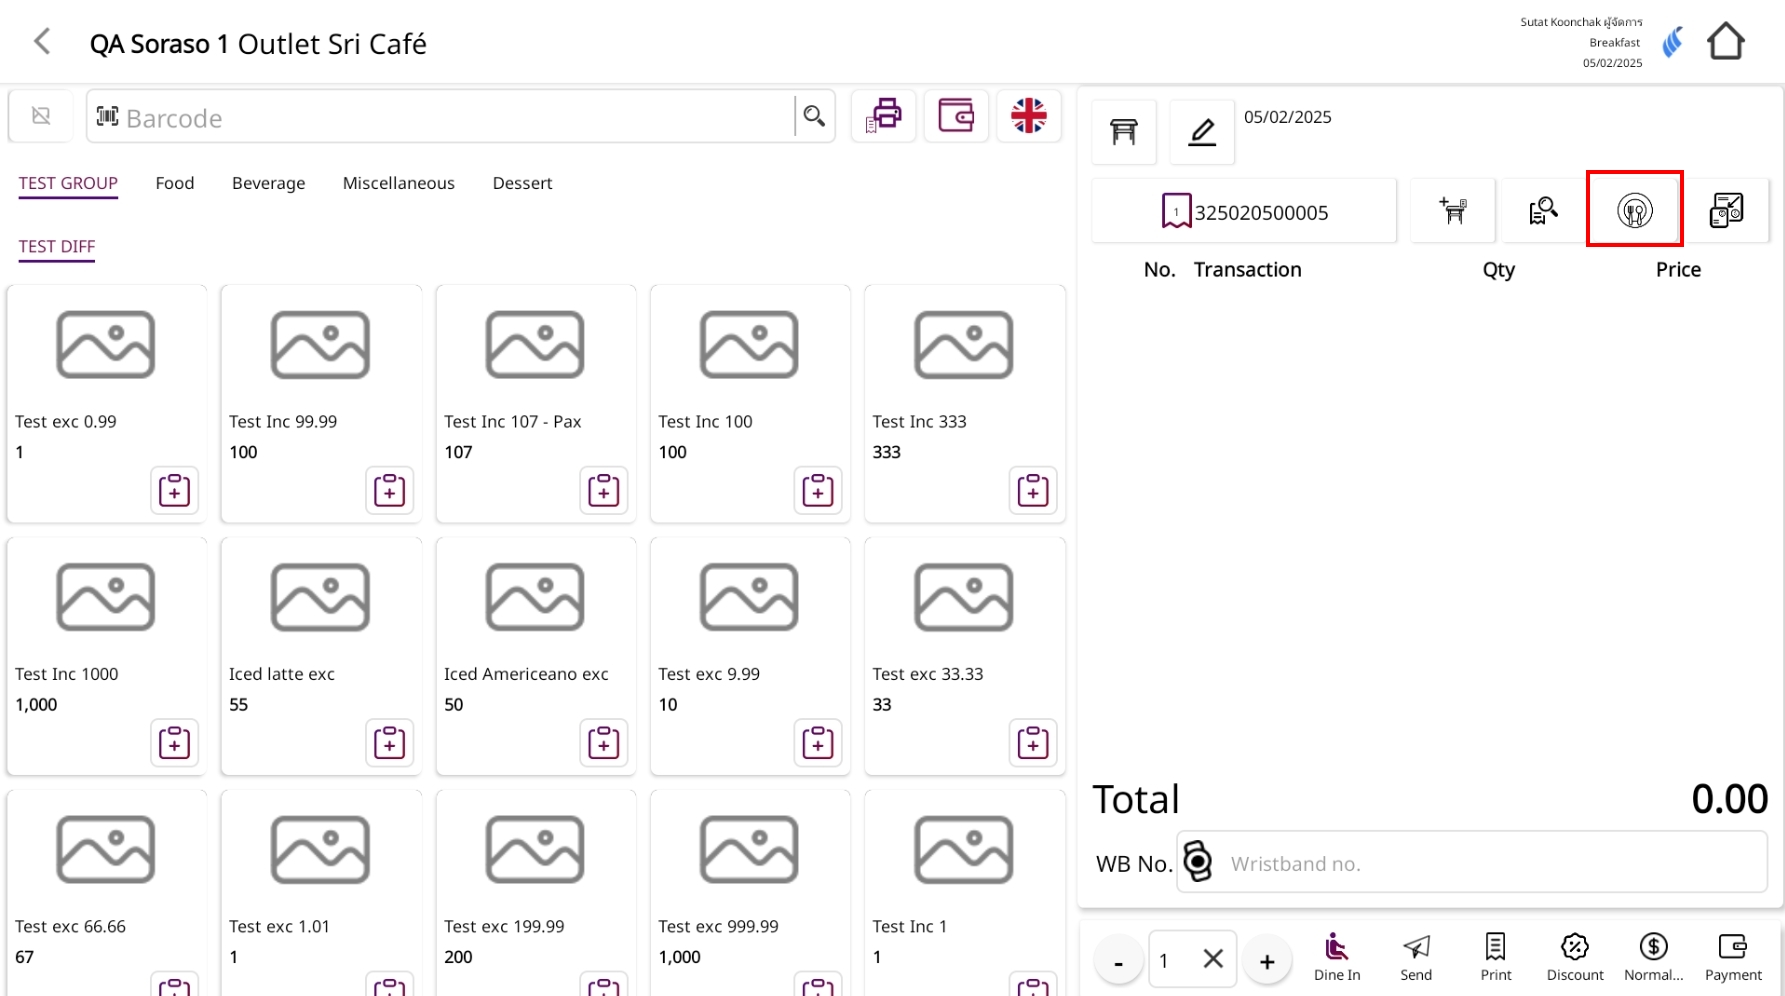
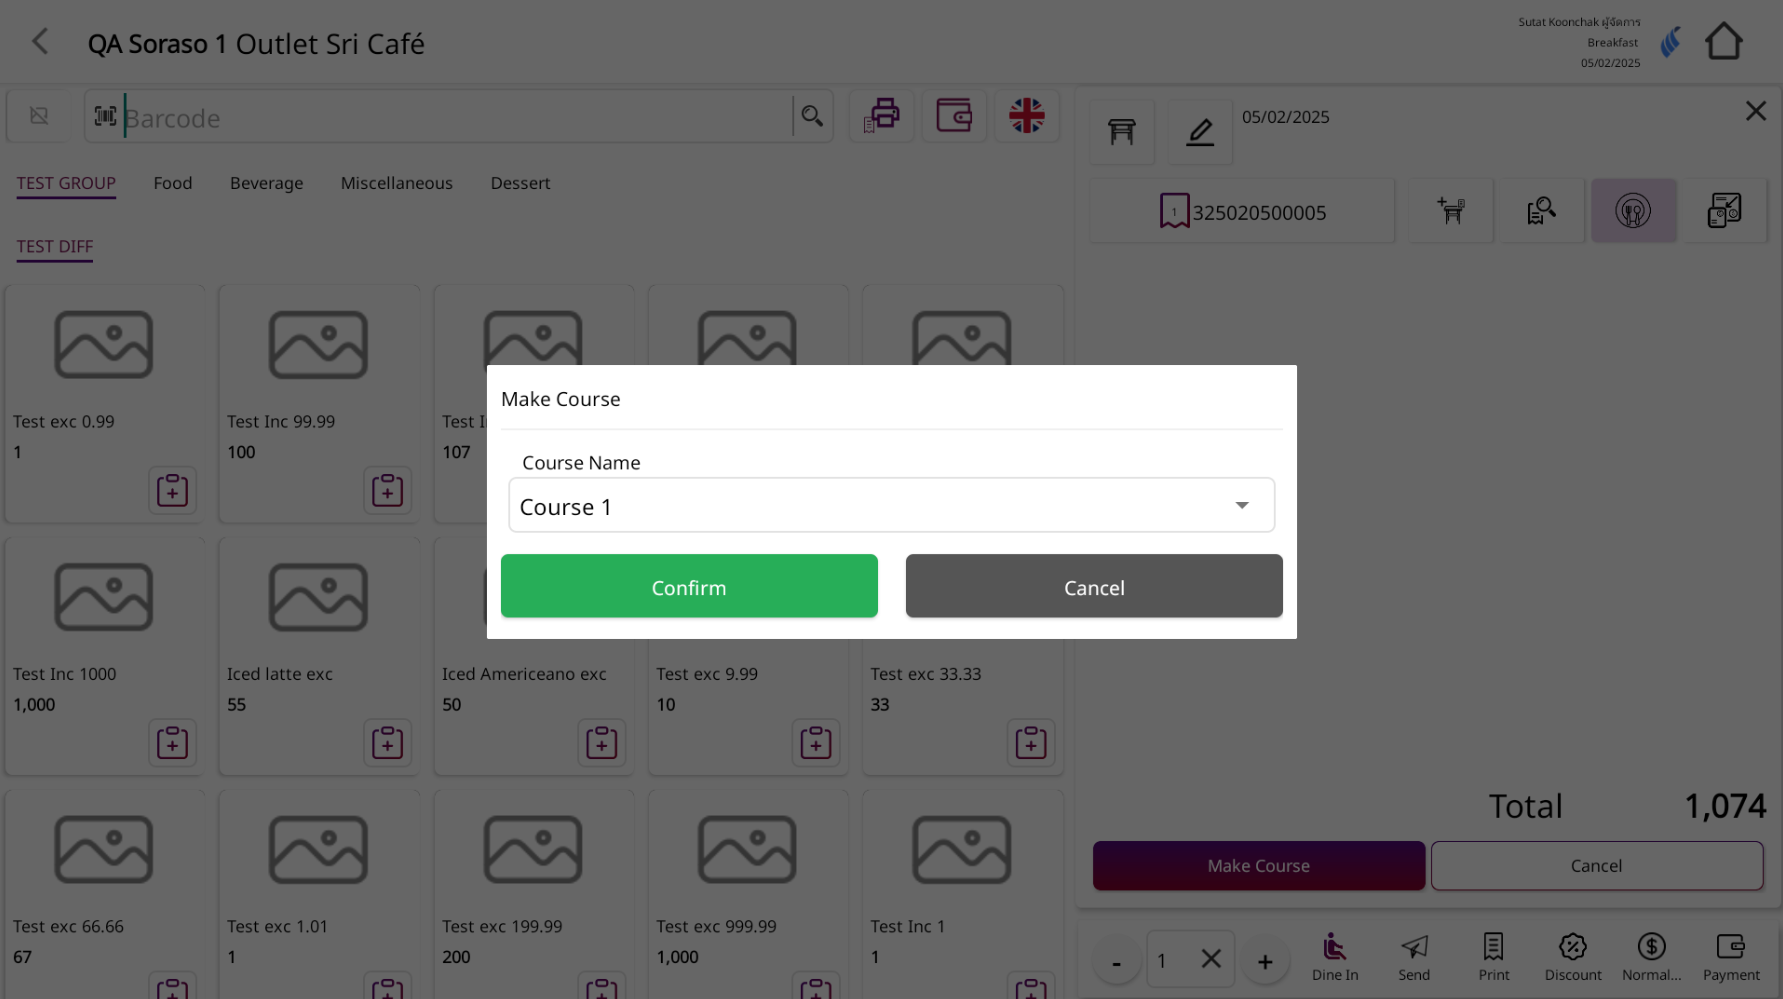
-
Click the Make Course button shown at the bottom of the screen.
-
In the popup window:
- Choose or enter the desired Course Name (e.g., Course 1, Course 2)
- Click Confirm
-
Start placing menu orders as usual.
- All items ordered during this period will be automatically grouped under the selected course.
-
To create the next course, click Make Next Course
Note: Using the course function helps organize food service timing and improves the overall workflow between service and kitchen.
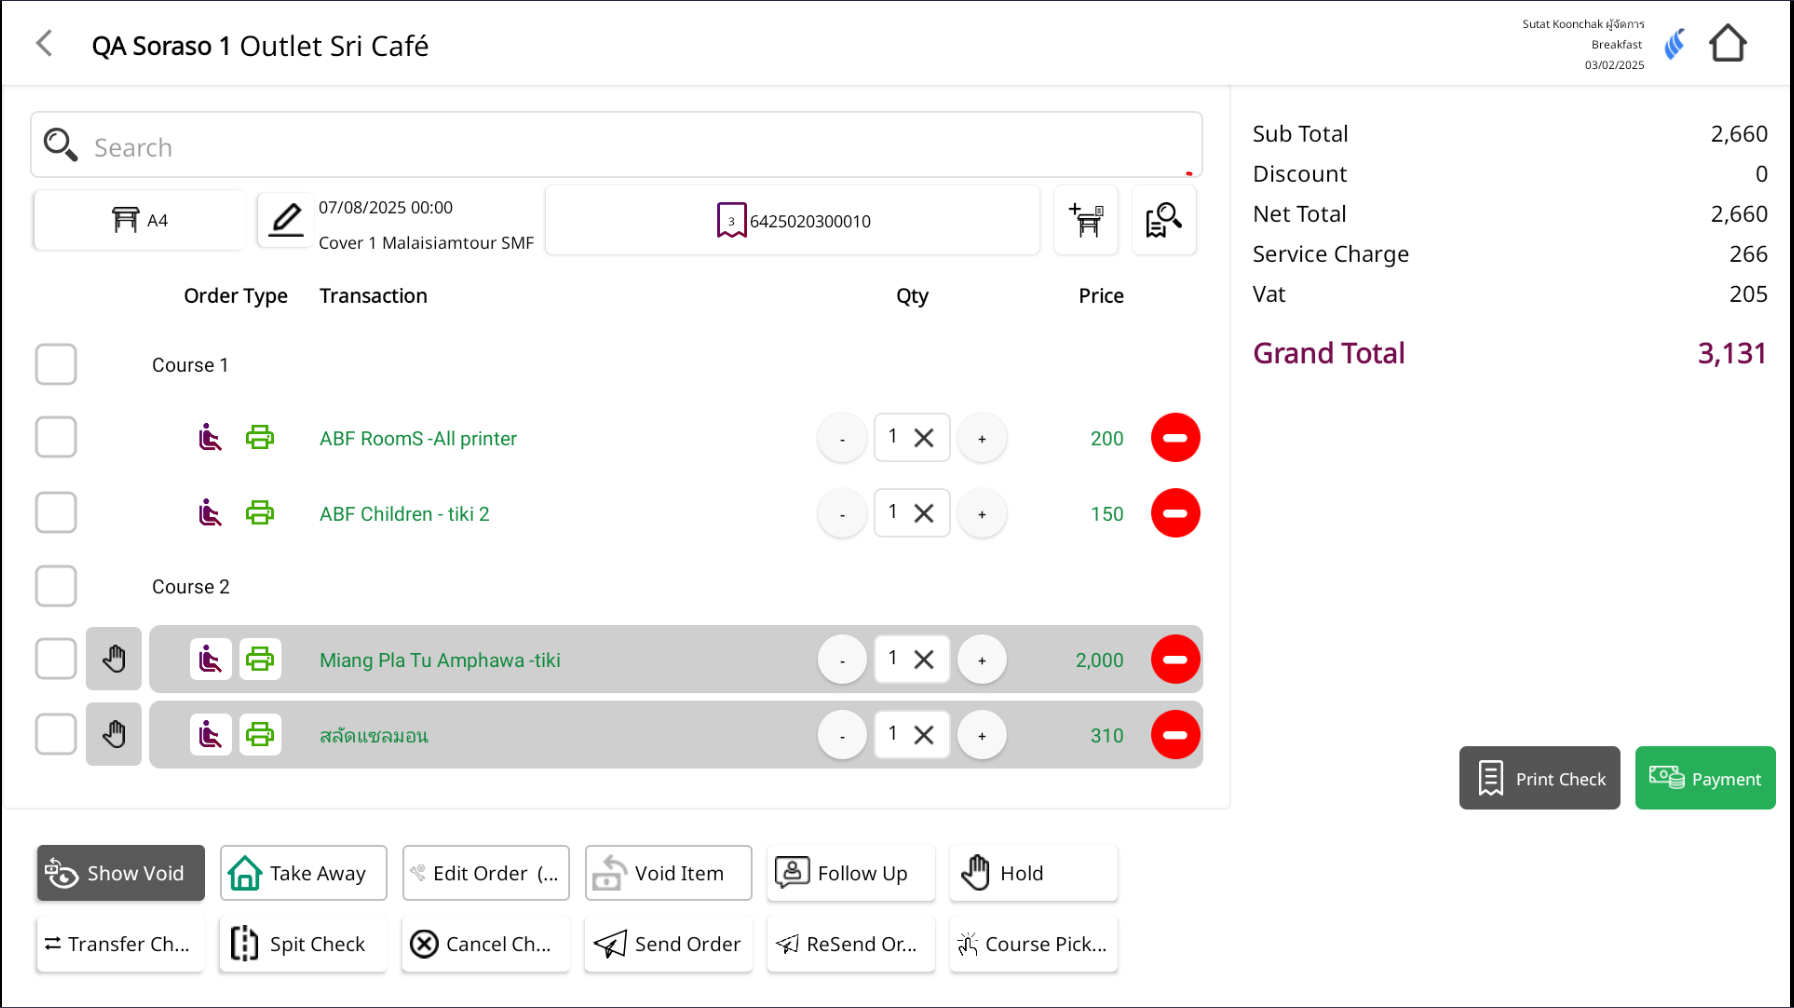
8.1 Send Order Course
The Send Order function is used to send the current list of ordered items to the kitchen or respective station to begin preparation.
To perform the task:
- Review the ordered items on the right-hand side of the screen
- If using Courses, items will be grouped accordingly
- Click the Send Order button at the bottom-right corner
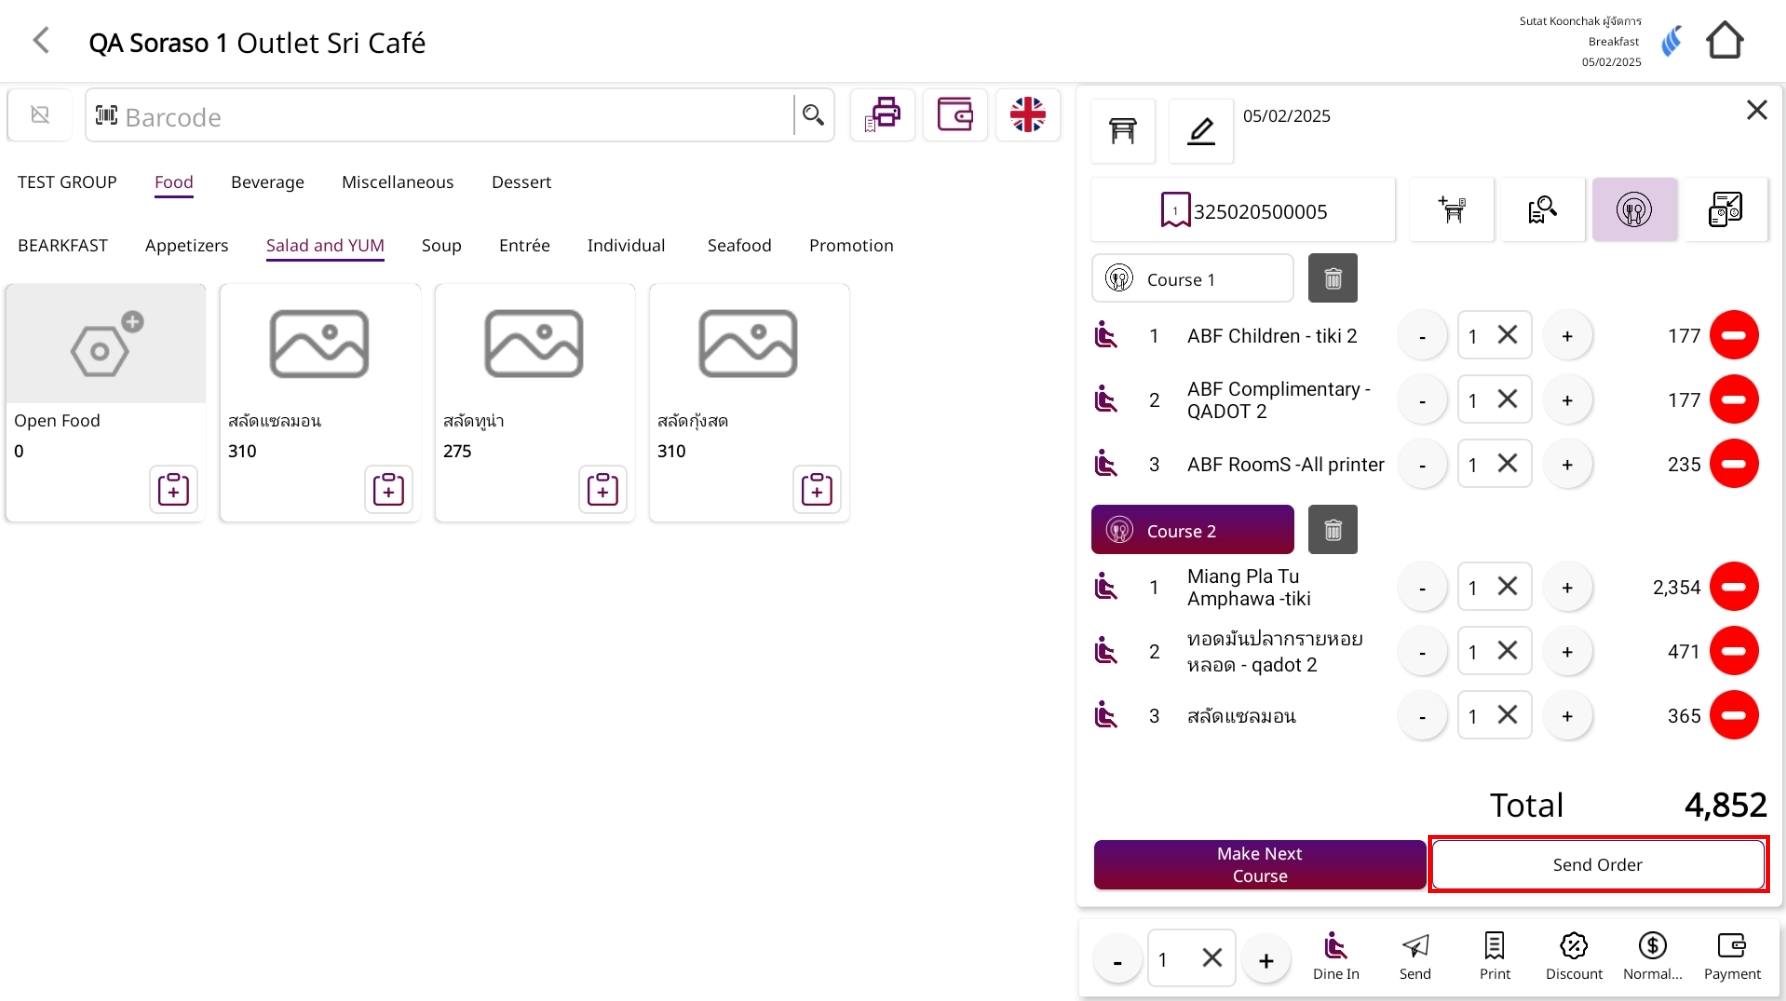
- The system will send all unsent items to the kitchen printer based on system configuration

Note: “To void a menu item, click the red button next to the item”
“If the item has already been sent to the kitchen, the system will print a Void Order slip”
“If the item has not been sent, it can be deleted immediately without printing a void slip”
8.2 Follow up
The Follow Up function is used to notify the kitchen or service station that selected food items are delayed or still pending, prompting them to check or expedite the preparation.
To perform the task:
- Go to the table's order screen (a table must be selected first)
- Select the items you want to follow up by checking the boxes next to each item
- Click the Follow Up button at the bottom action menu
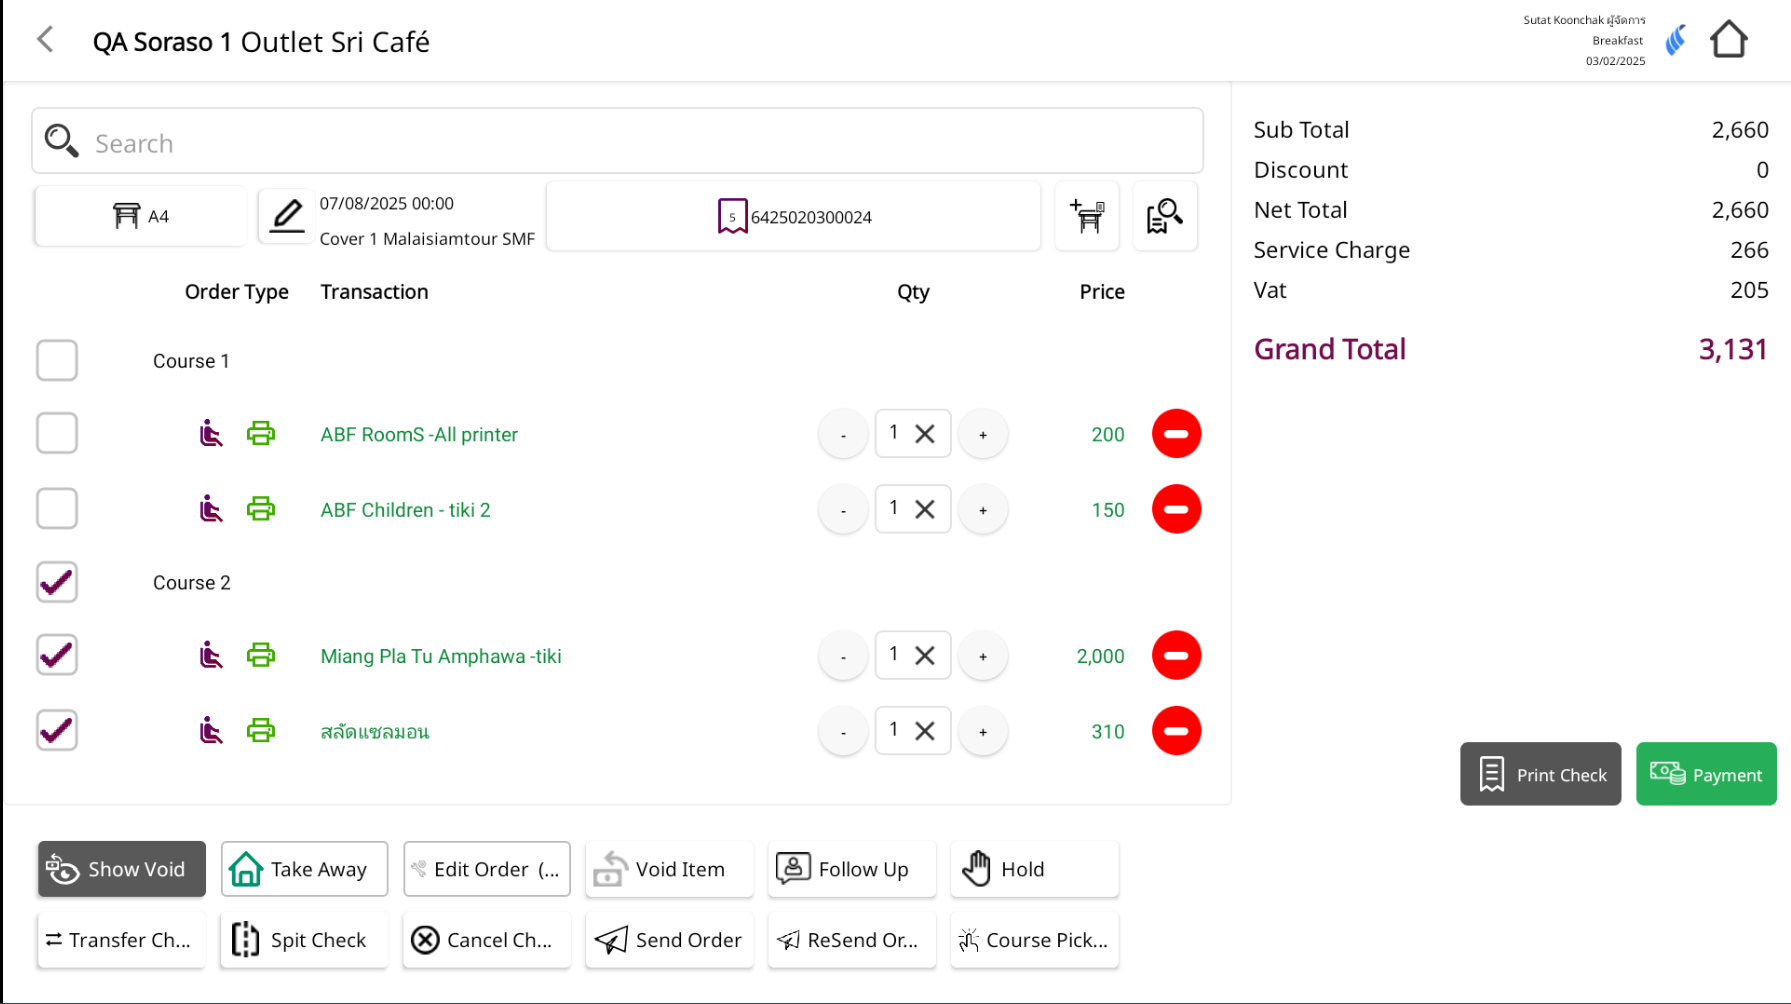
- The system will:
- Send a follow-up notification to the kitchen printer (as configured)
- Highlight the followed-up items with a red background to visually indicate they have been followed up
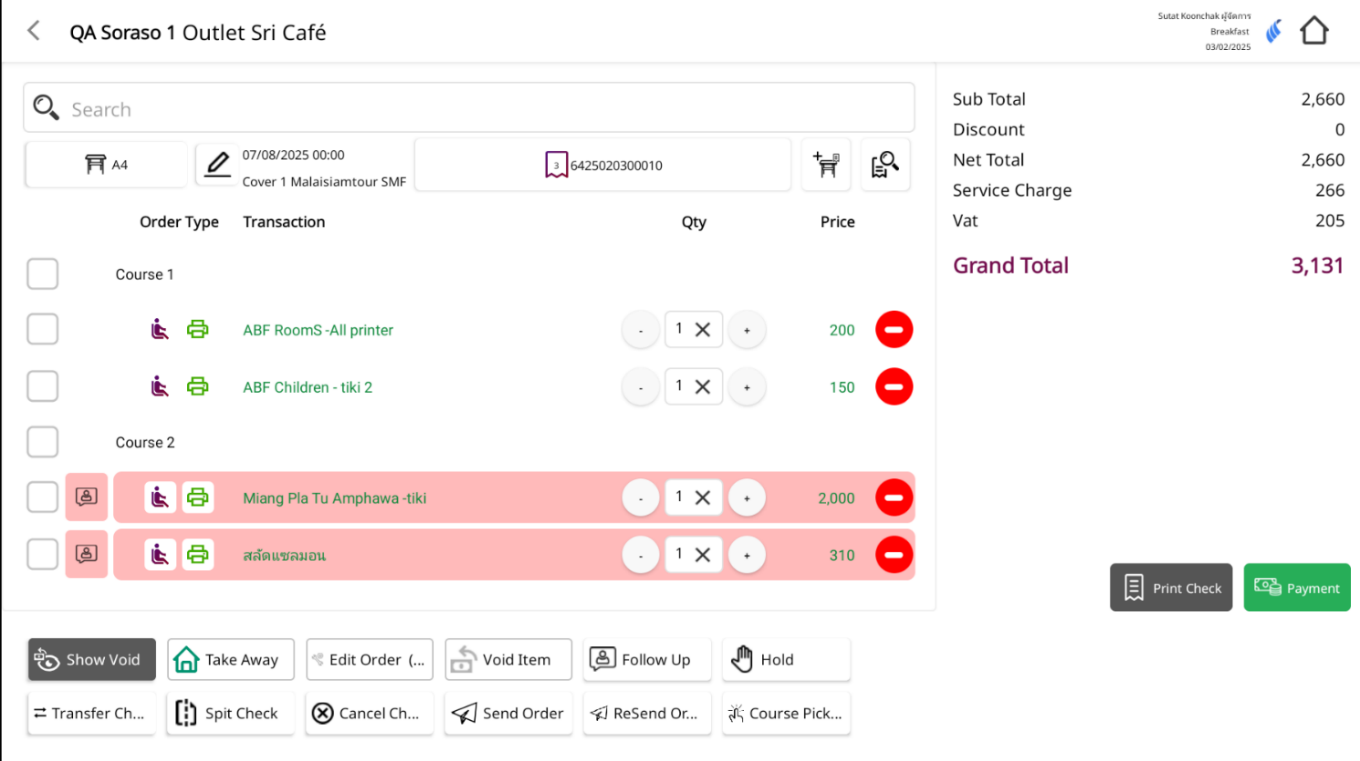
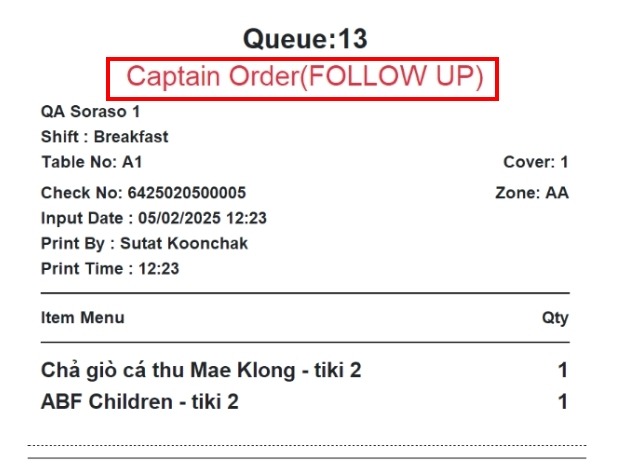
Note: The Follow Up function does not change the order status; it serves purely as a visual and operational reminder that the items are pending or delayed. Followed-up items are highlighted with a red background for easy identification.
8.3 Hold
The Hold function is used to mark certain items as "not to be prepared yet" or "to be made later", typically when waiting for customer confirmation or grouping with other items.
To perform the task:
- Go to the table’s order screen (a table must be selected first)
- Select the items you want to Hold
- Click the Hold button in the bottom action menu
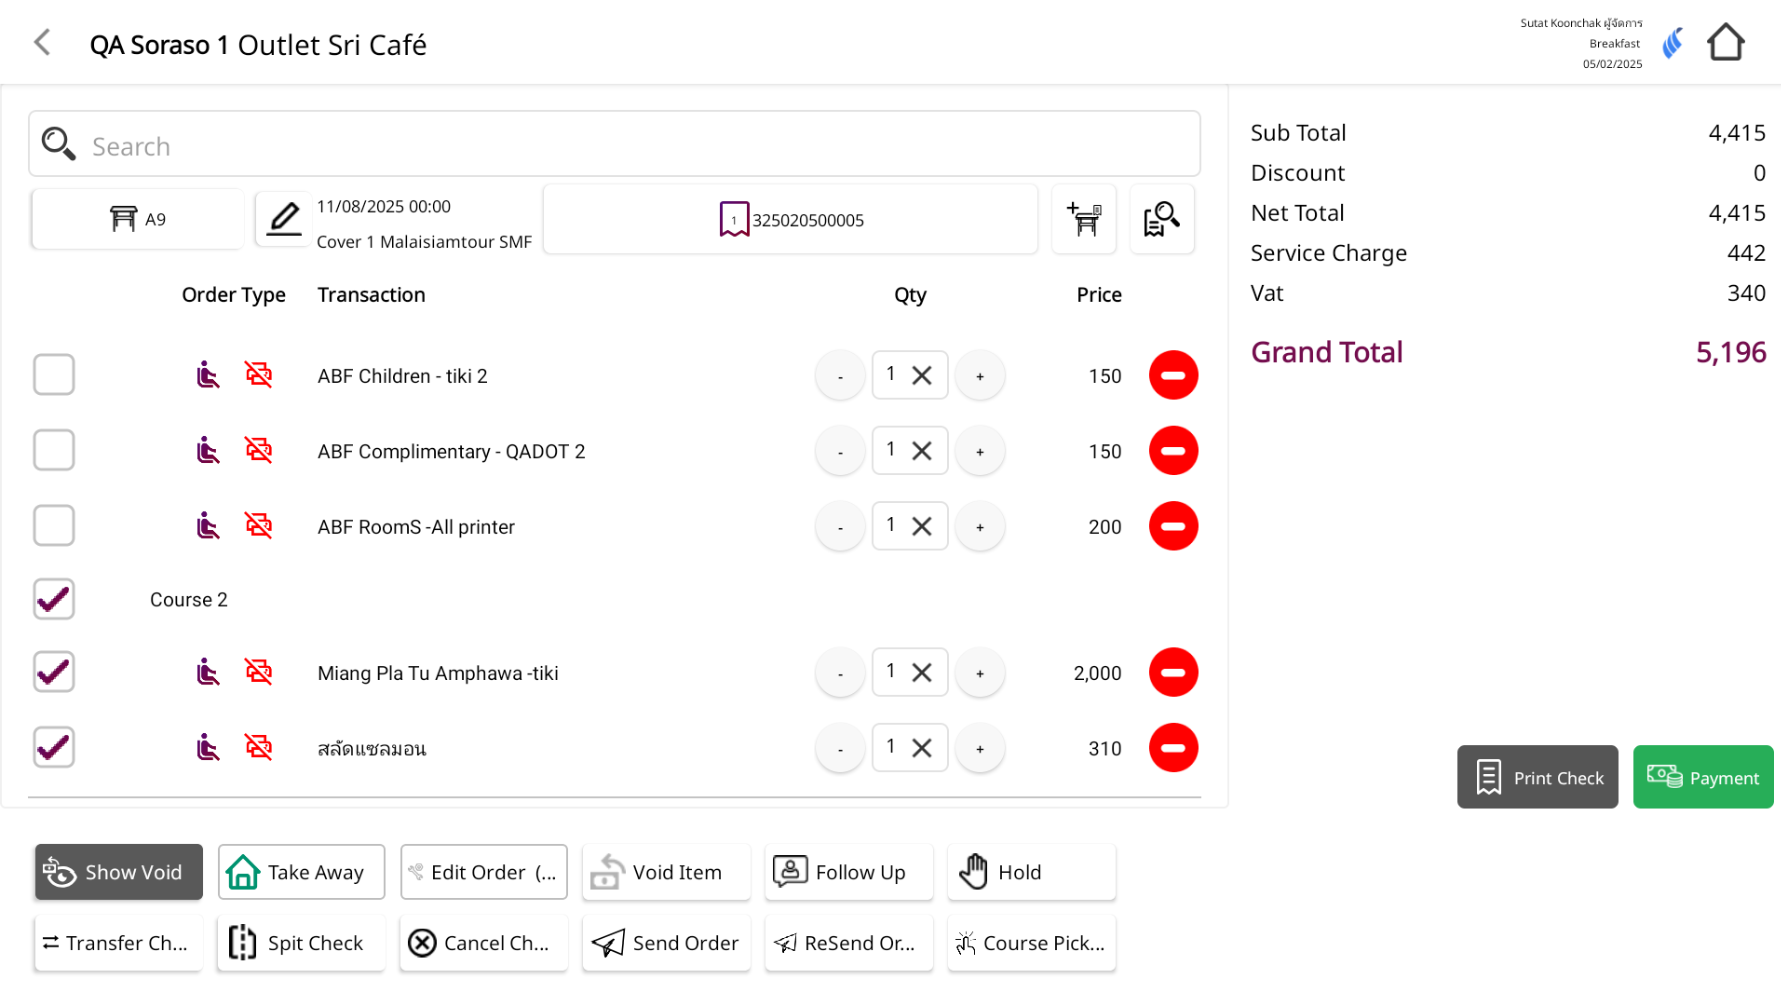
- Held items will be shown with a gray background and a hold icon to indicate they are on hold for later preparation
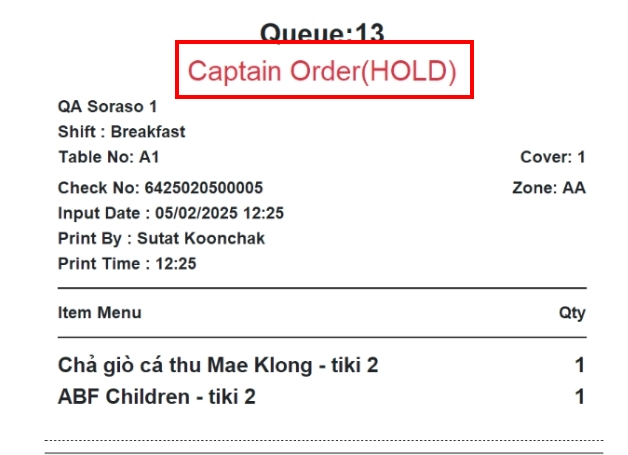
Note: When Hold is used, a Hold slip is printed to the kitchen to tell them not to prepare the item yet
8.4 Pick up
Purpose: Print a pick-up slip for a course that has already been sent to the kitchen.
Prerequisite: Items in the course must have been sent to the kitchen (only sent items are eligible).
To perform the task:
- Open the table’s order screen.
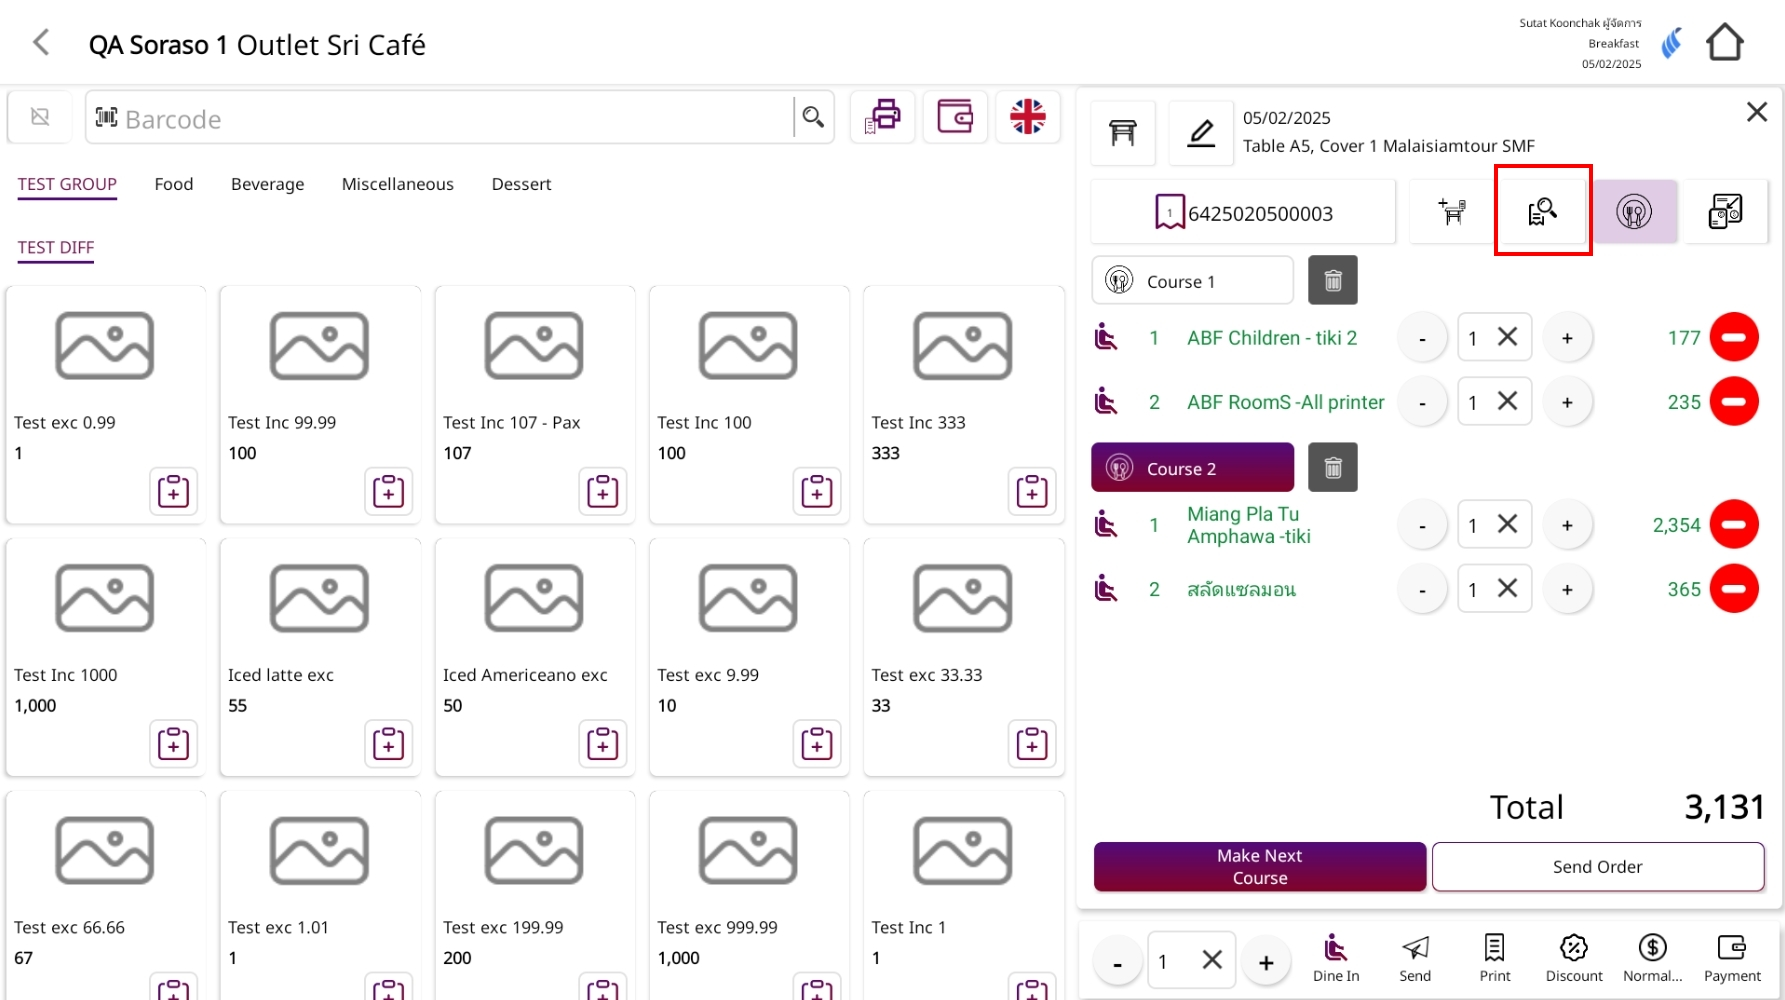
- Click View Check then tap Course Pick

-
In the Course panel, choose the course you want to pick up.
- To pick up Course 2, select it first so it becomes the active course.
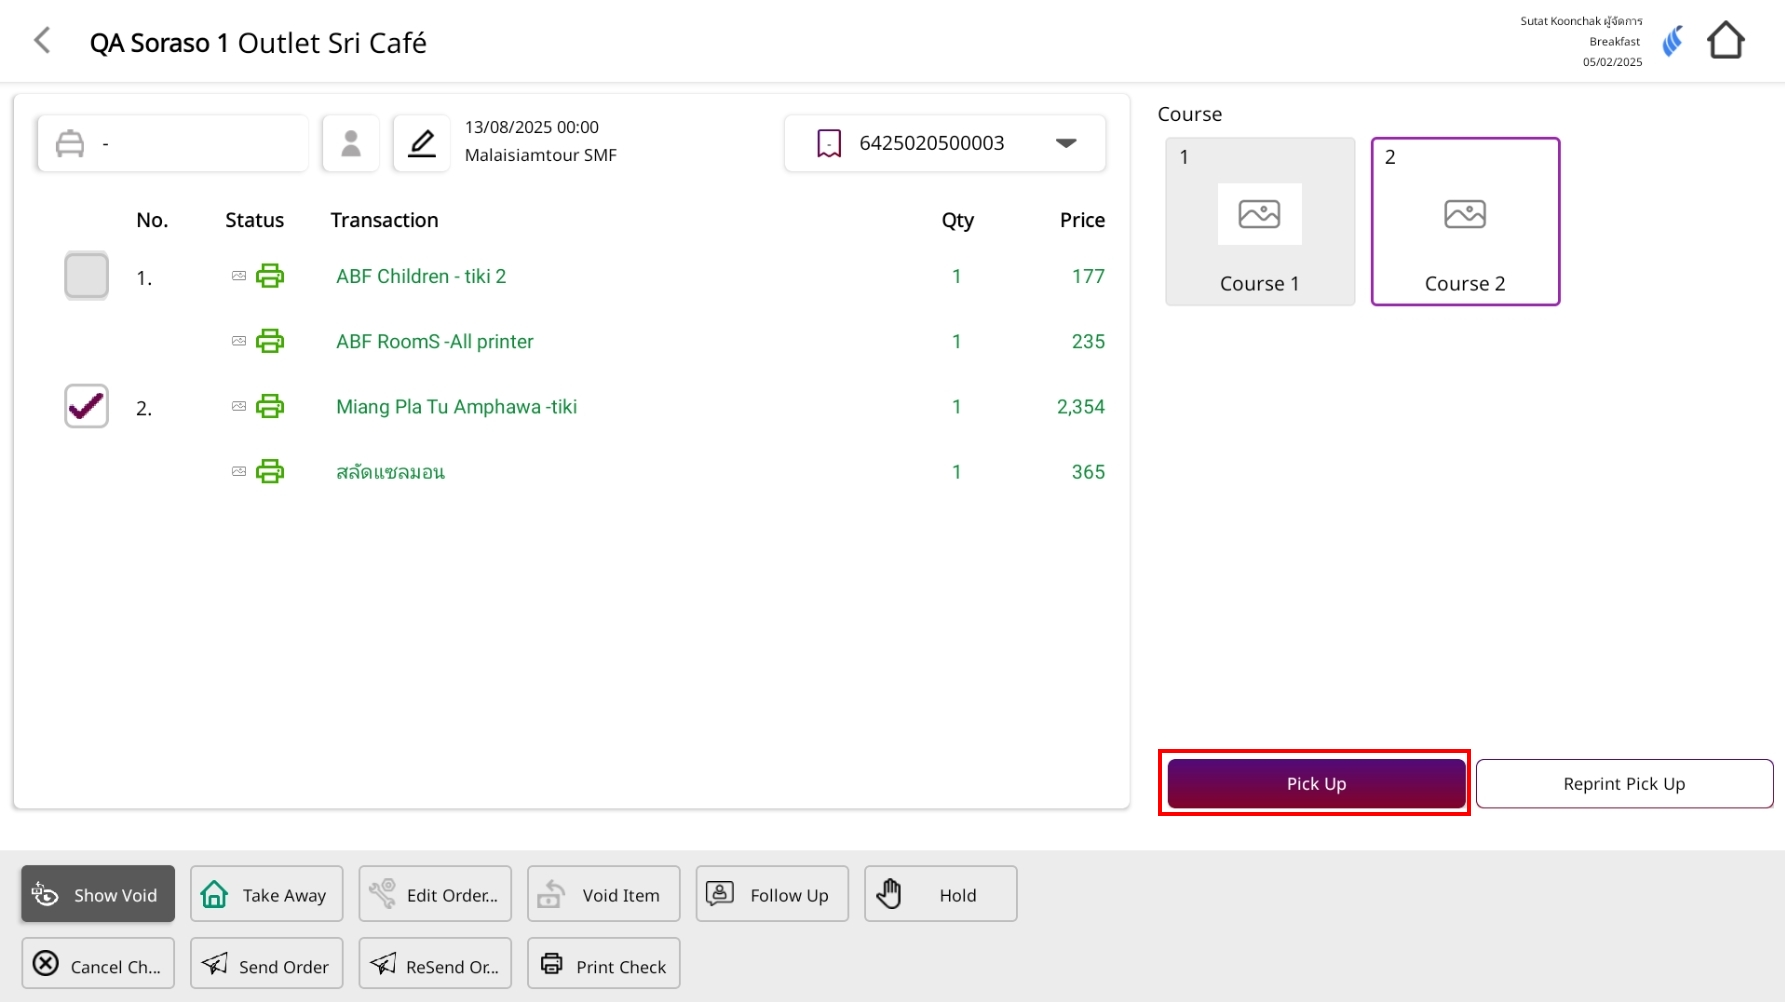
- Click Pick Up.
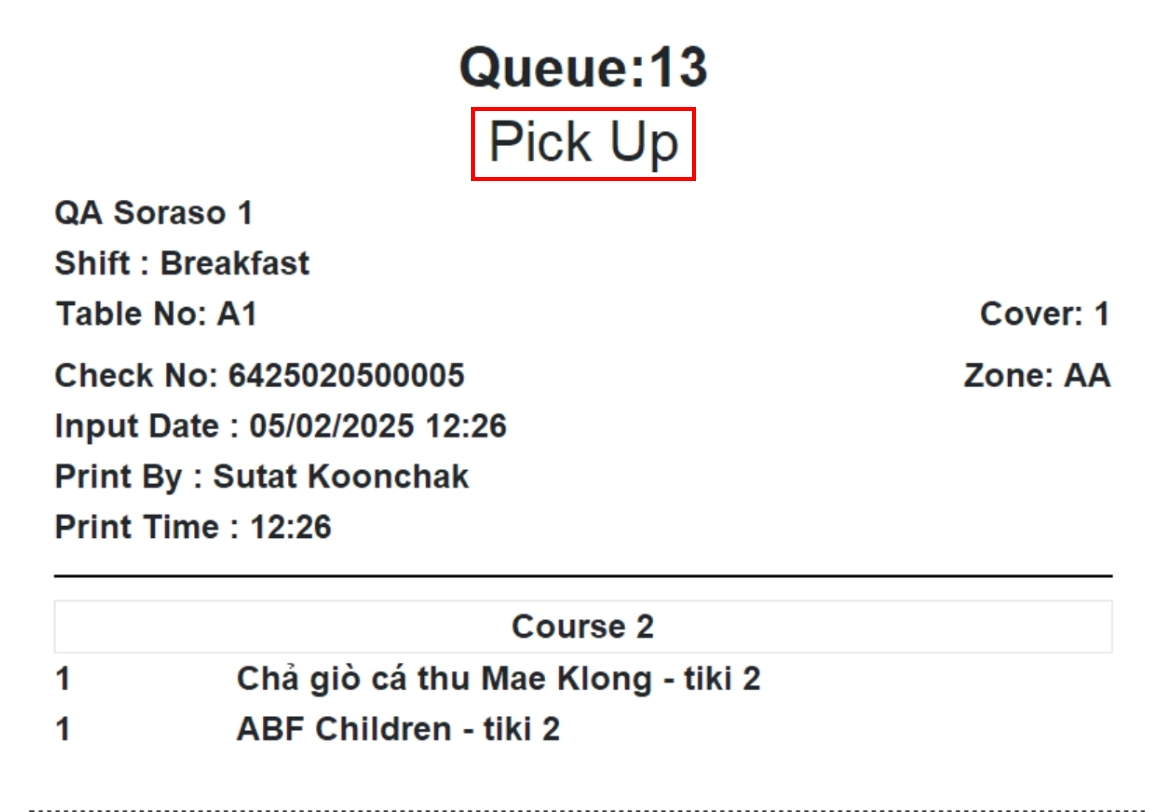
- If the outlet has Auto Pick-Up Print enabled in configuration, the system will automatically print the Pick Up slip.
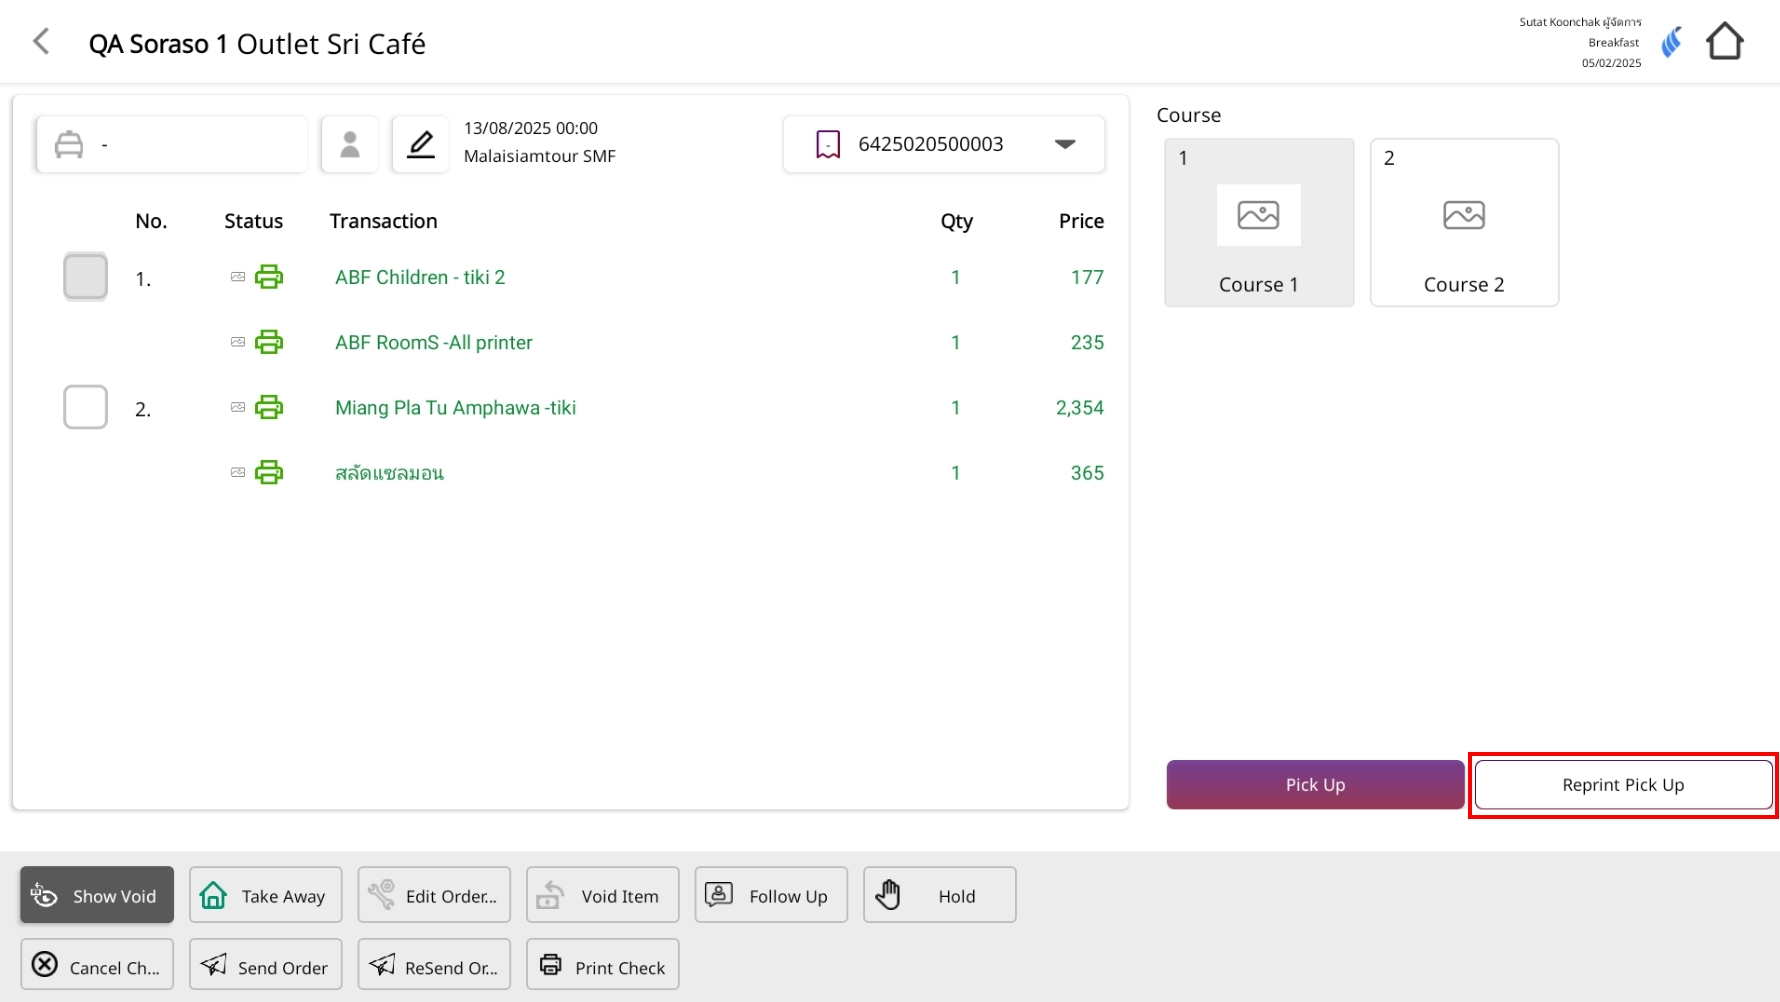
Note: If the Pick Up slip is lost, use Reprint Pick Up to print it again.
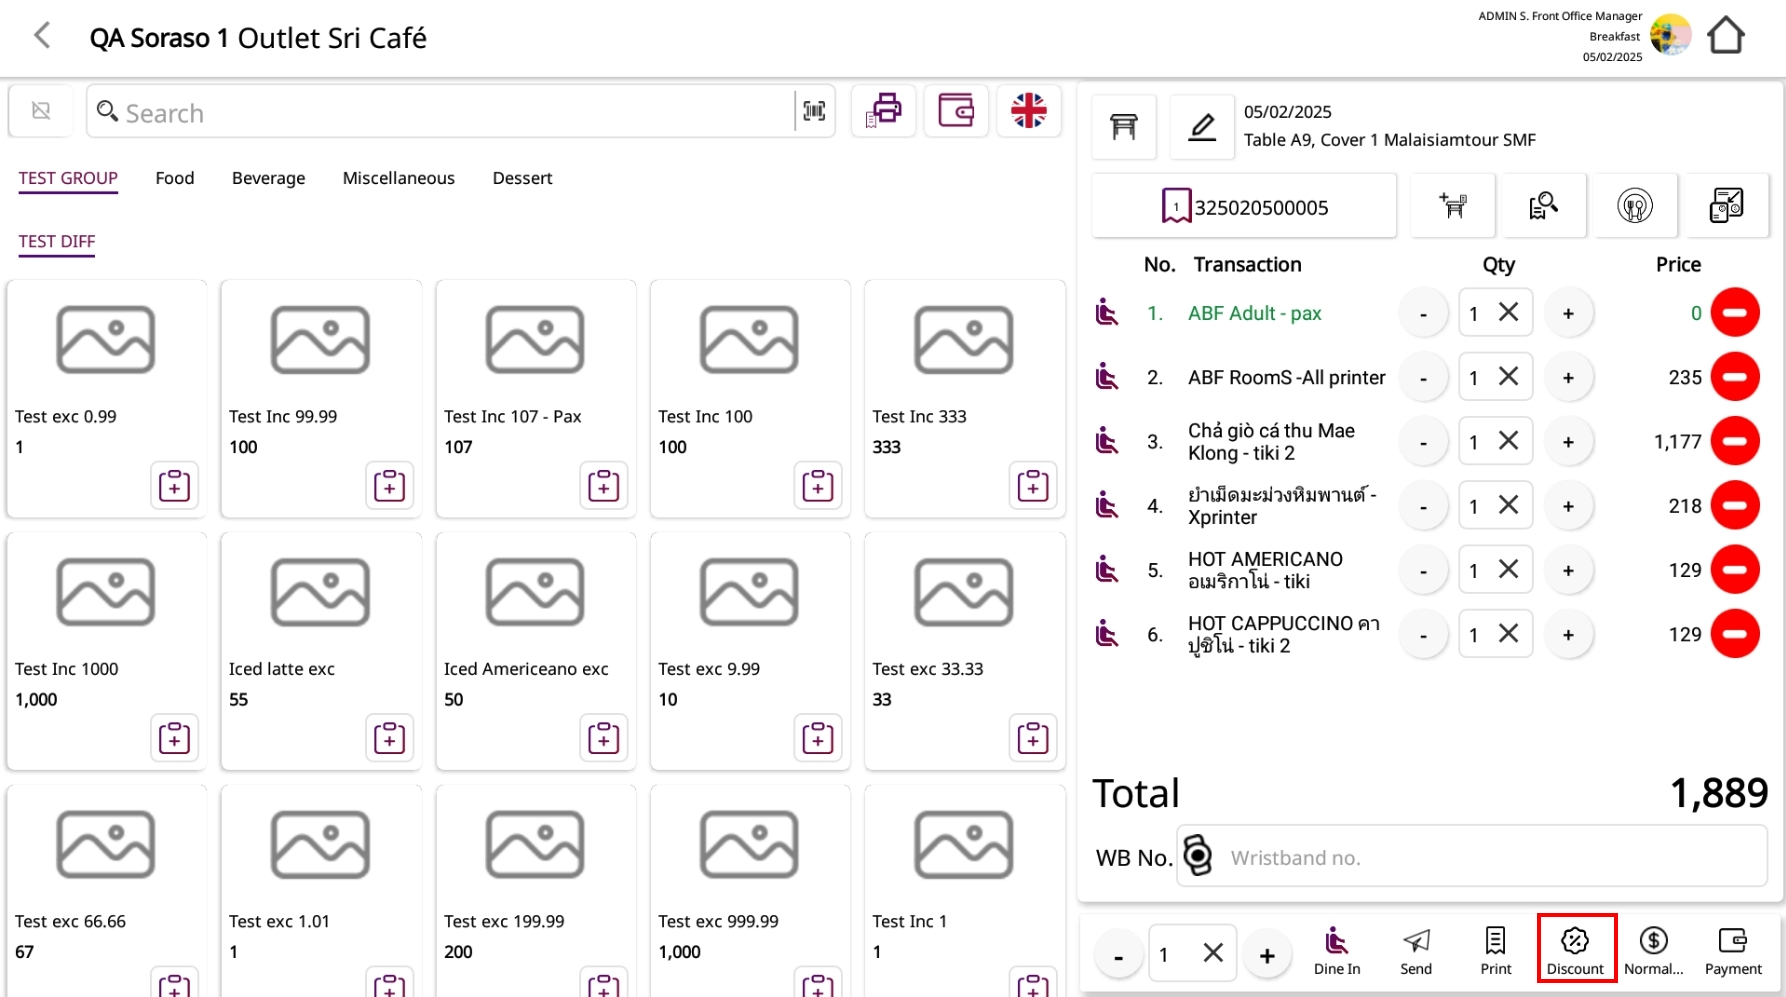
9. Discount by item, By Group
This function is used to apply discounts to products or services. You can choose to discount specific items, a group/category of items, or the entire bill.
9.1 Discount by Item
To perform the task:
- Go to the order screen for the selected table.

- Tap the Discount Icon button.

- Select the specific items you want to discount (tick only the desired items).
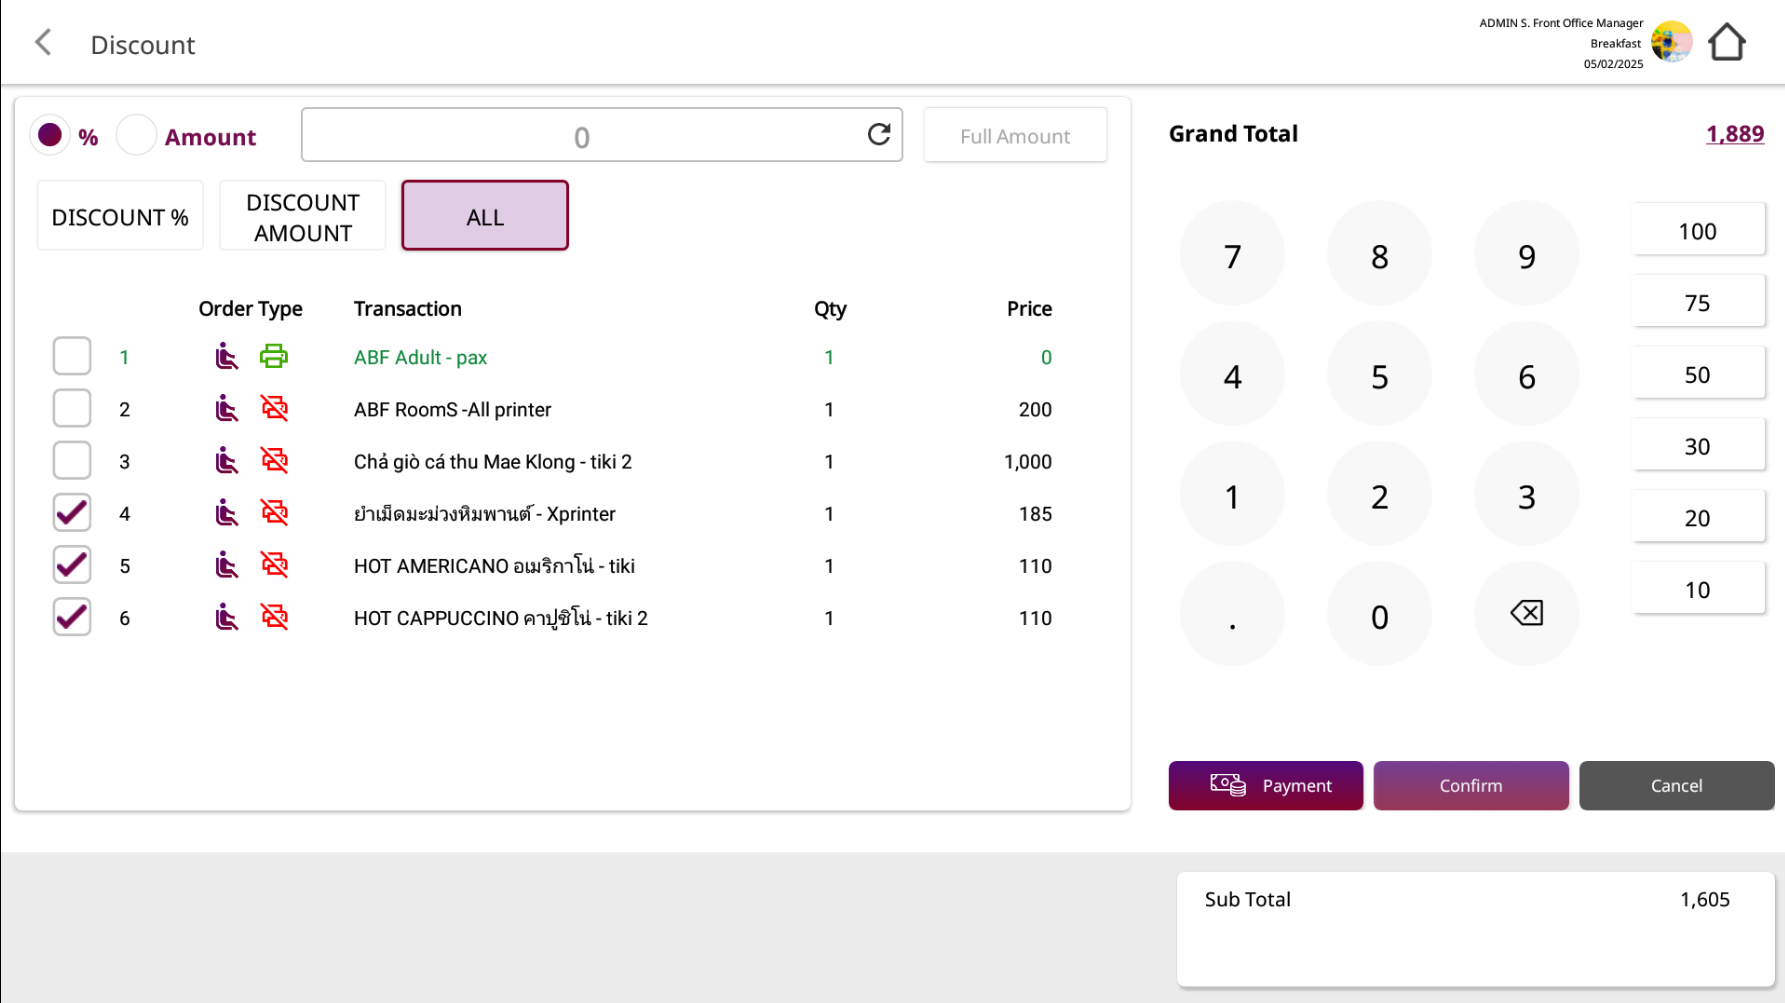
- Choose discount type: % (percentage) or Amount (fixed value).
- Enter the percentage or amount to be discounted.
- Tap Confirm to apply the discount.
Note: If you apply Discount By Item, the discount will be shown individually for each item.
If you use Discount Amount for selected items, the discount value will be distributed proportionally to those items.
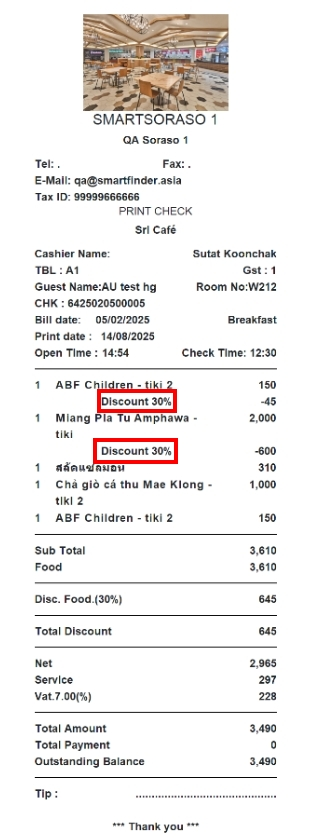
9.2 Discount by Group
To perform the task:
- Go to the order screen for the selected table.
- Tap the Discount button.
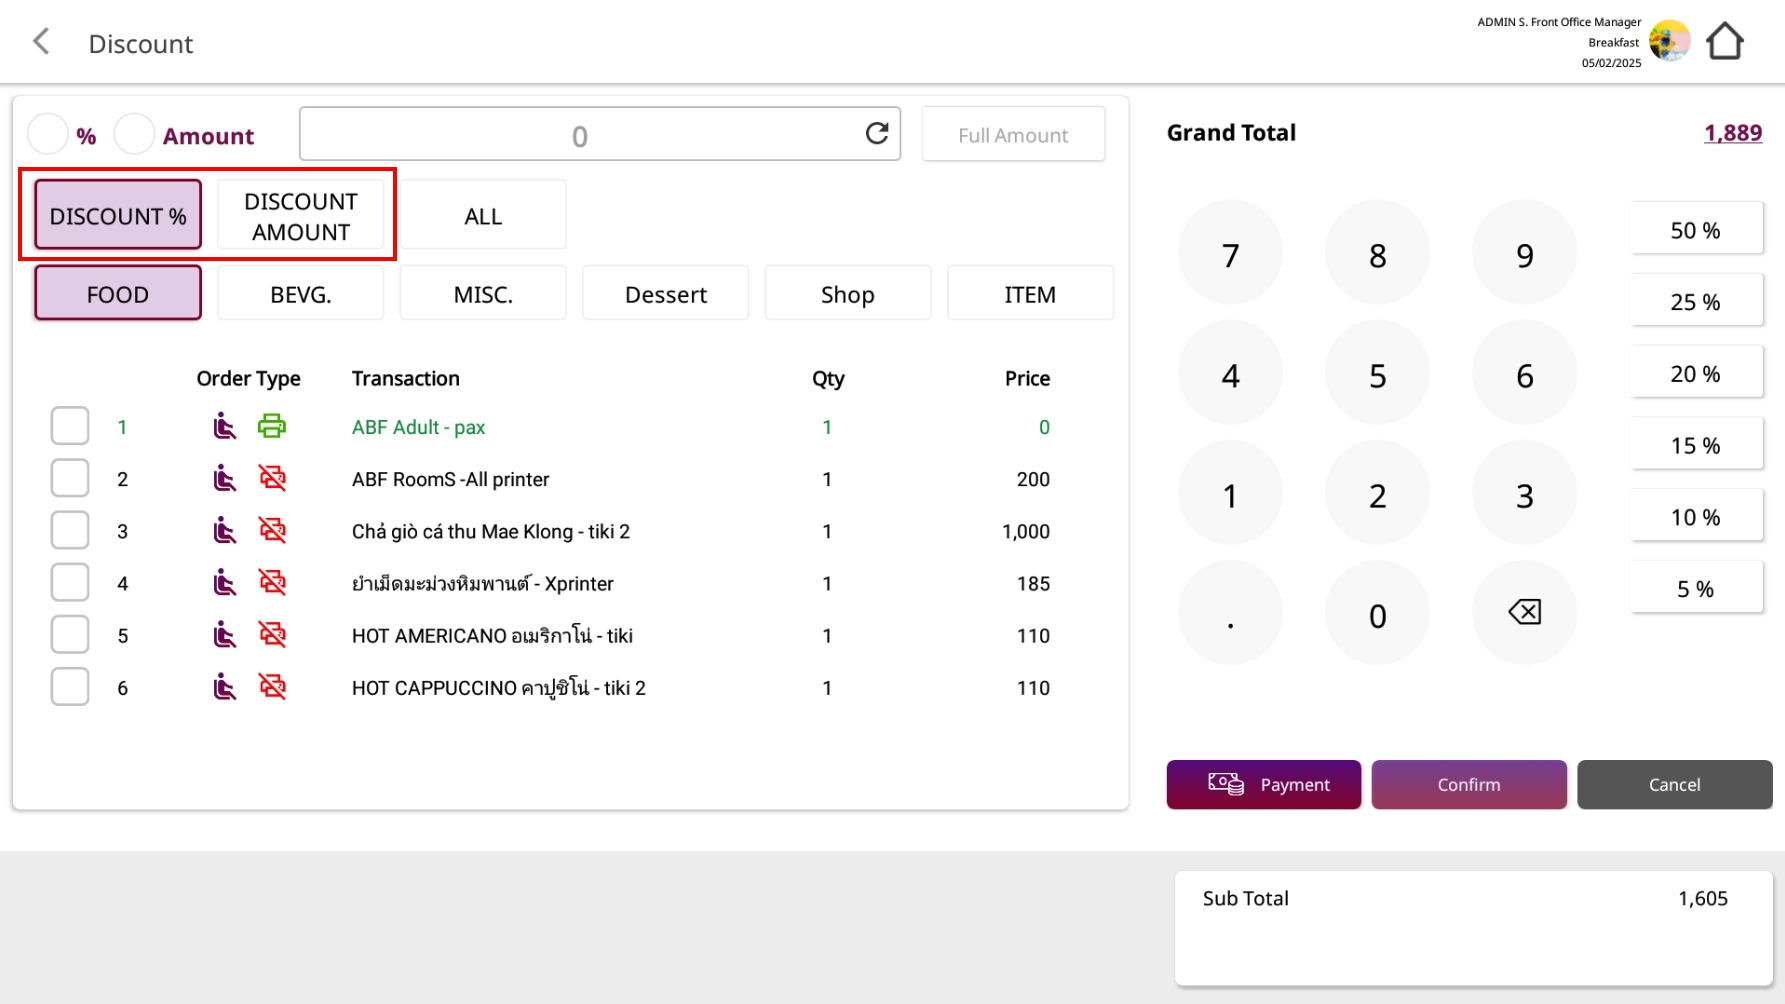
- Choose the category to be discounted, such as FOOD, BEVG., MISC., Dessert
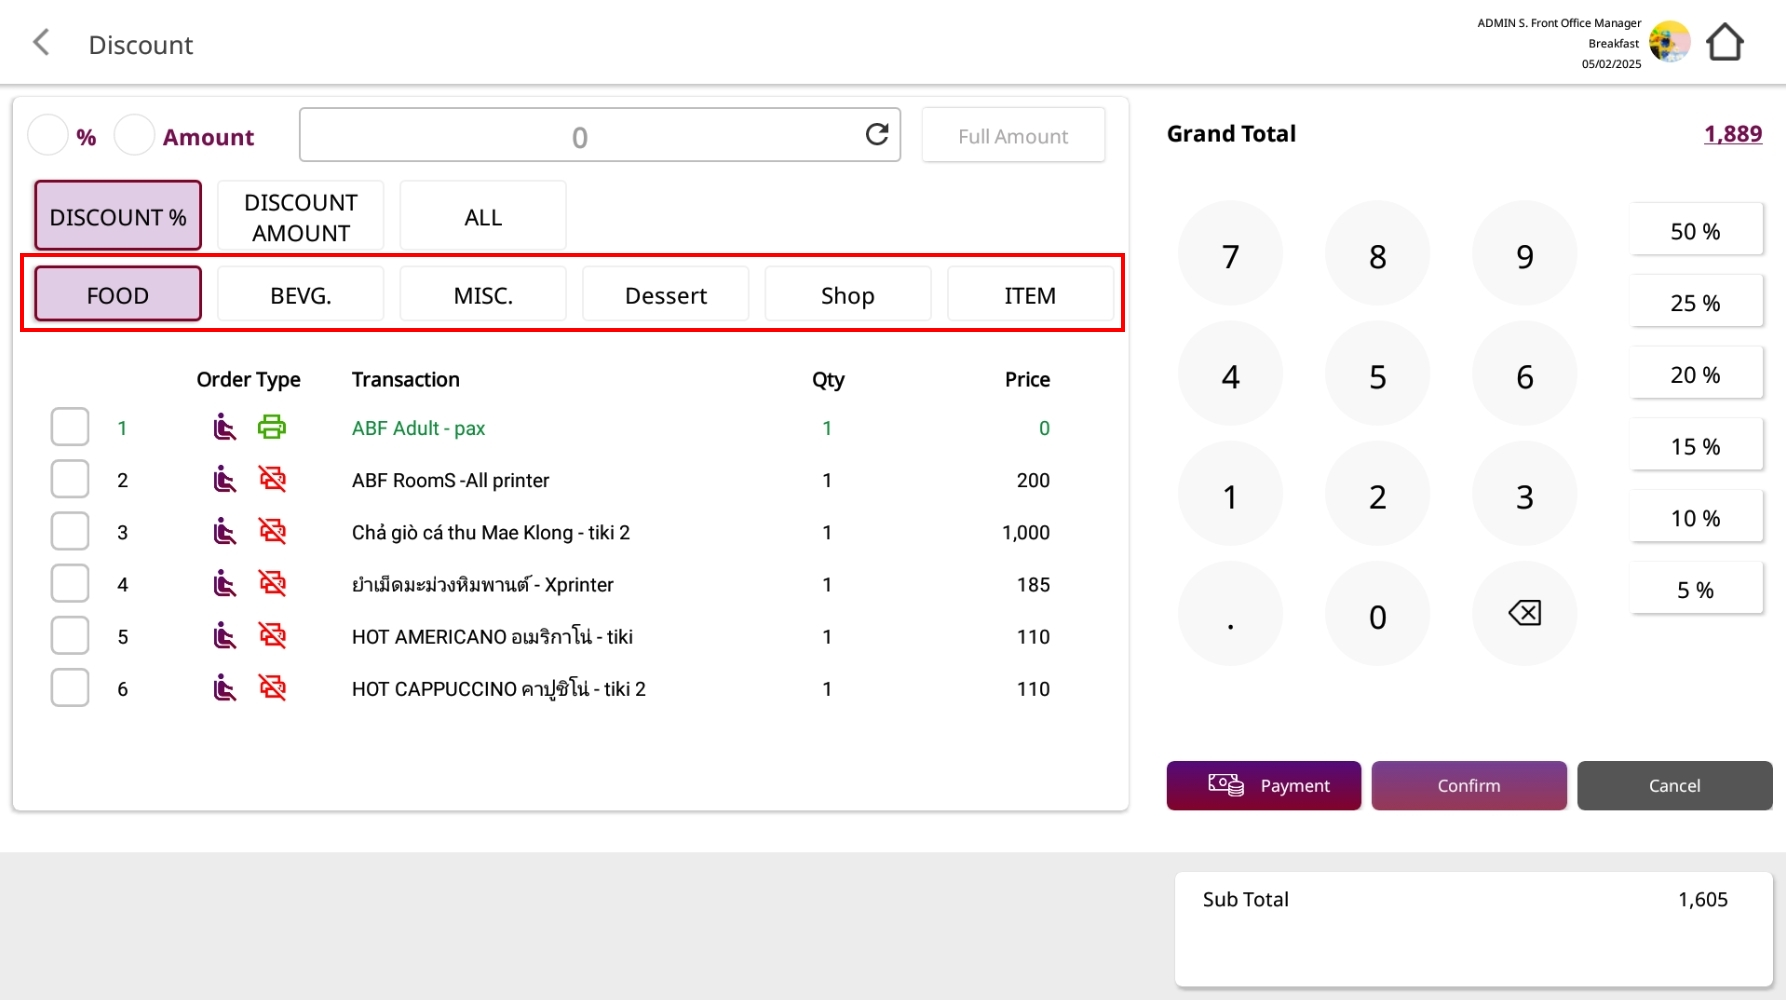
- Choose discount type: % or Amount.
- Enter the percentage or amount to be discounted.
- Tap Confirm to apply the discount.
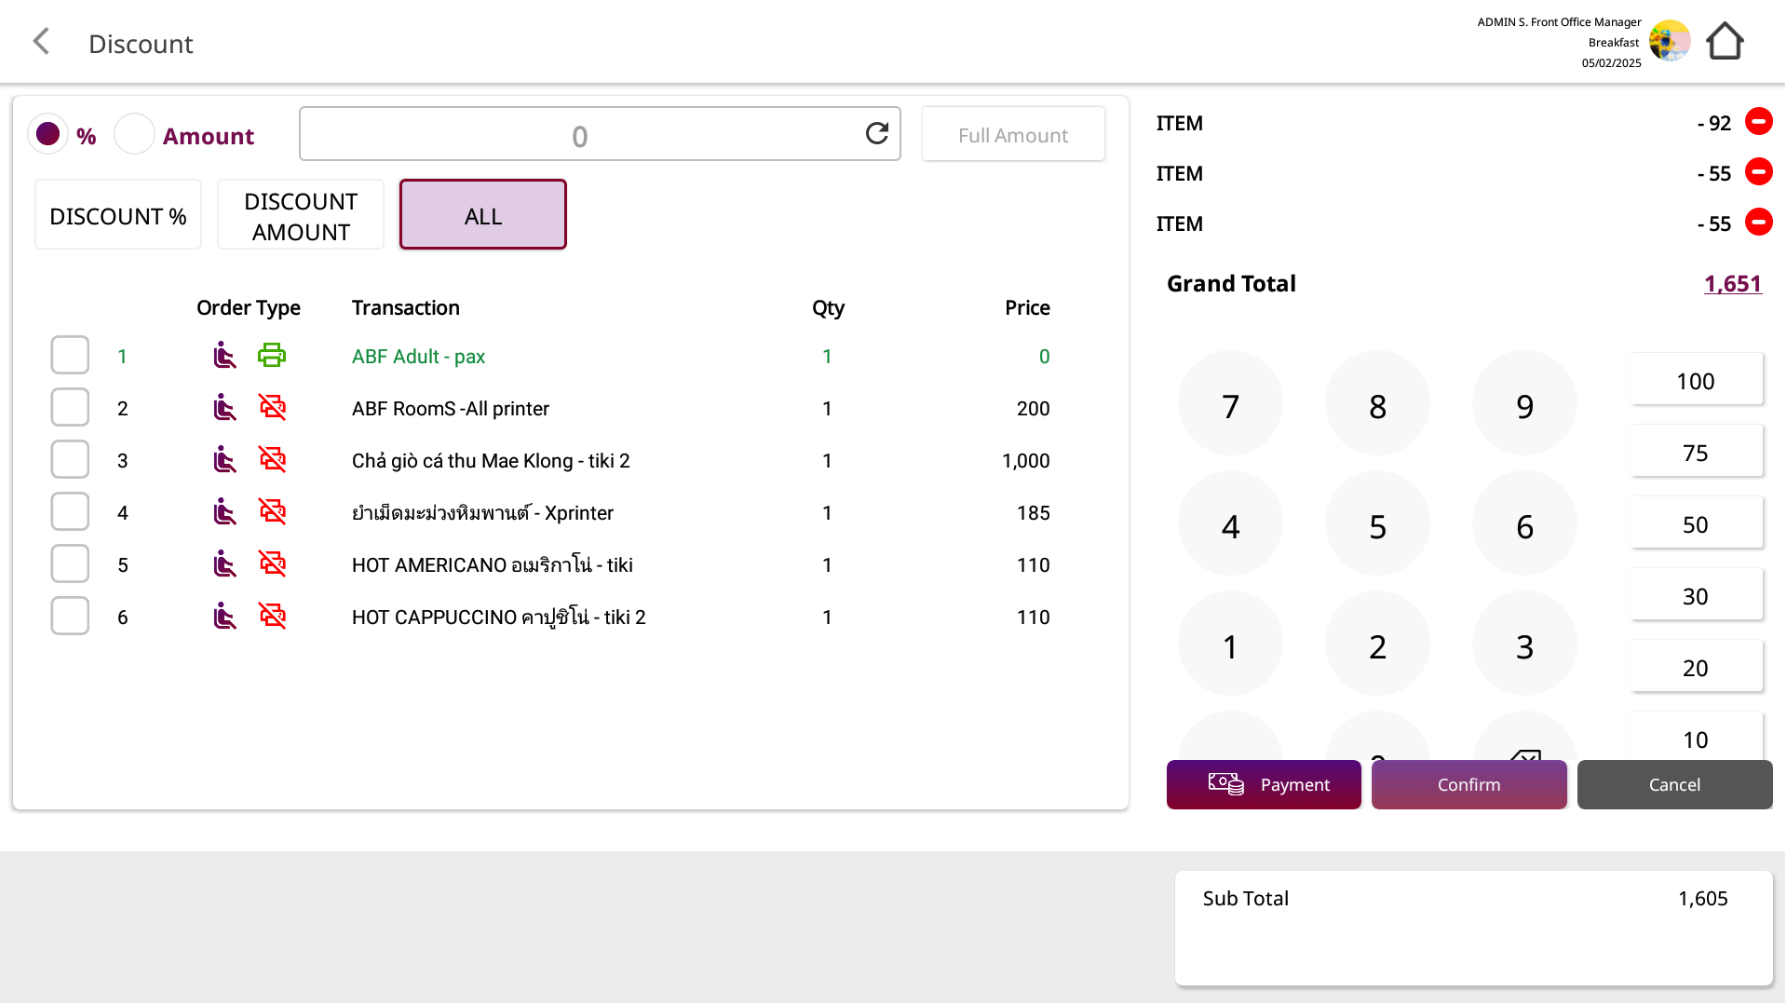
10. Cancel Discount
Remove existing discounts from the check.
To perform the task:
- Go table > Select table


- From the order screen, tap Discount.

- On the Discount screen, look at the right panel where active discounts appear (e.g., Food 50%).
- Tap the red remove/cancel icon next to the discount to clear it.
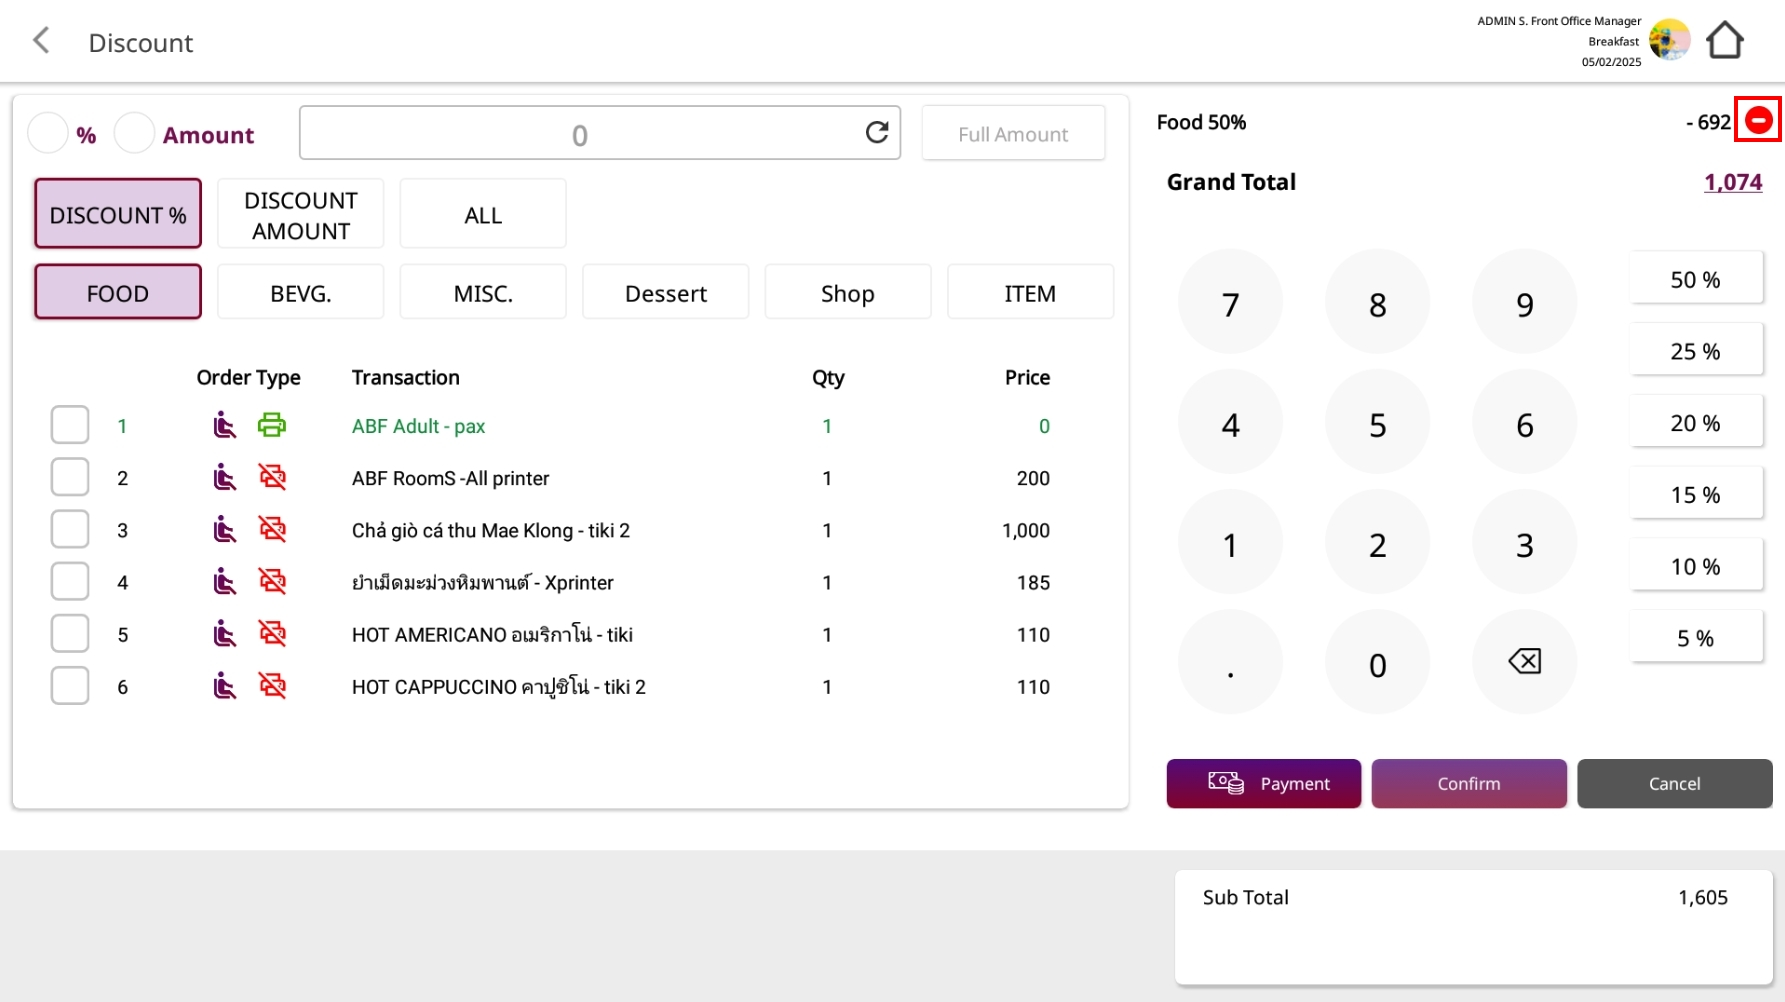
- If prompted, confirm. The Grand Total will update immediately.
Note: Canceling a discount clears all active discounts on the check (By Item, By Group, and All Bill).
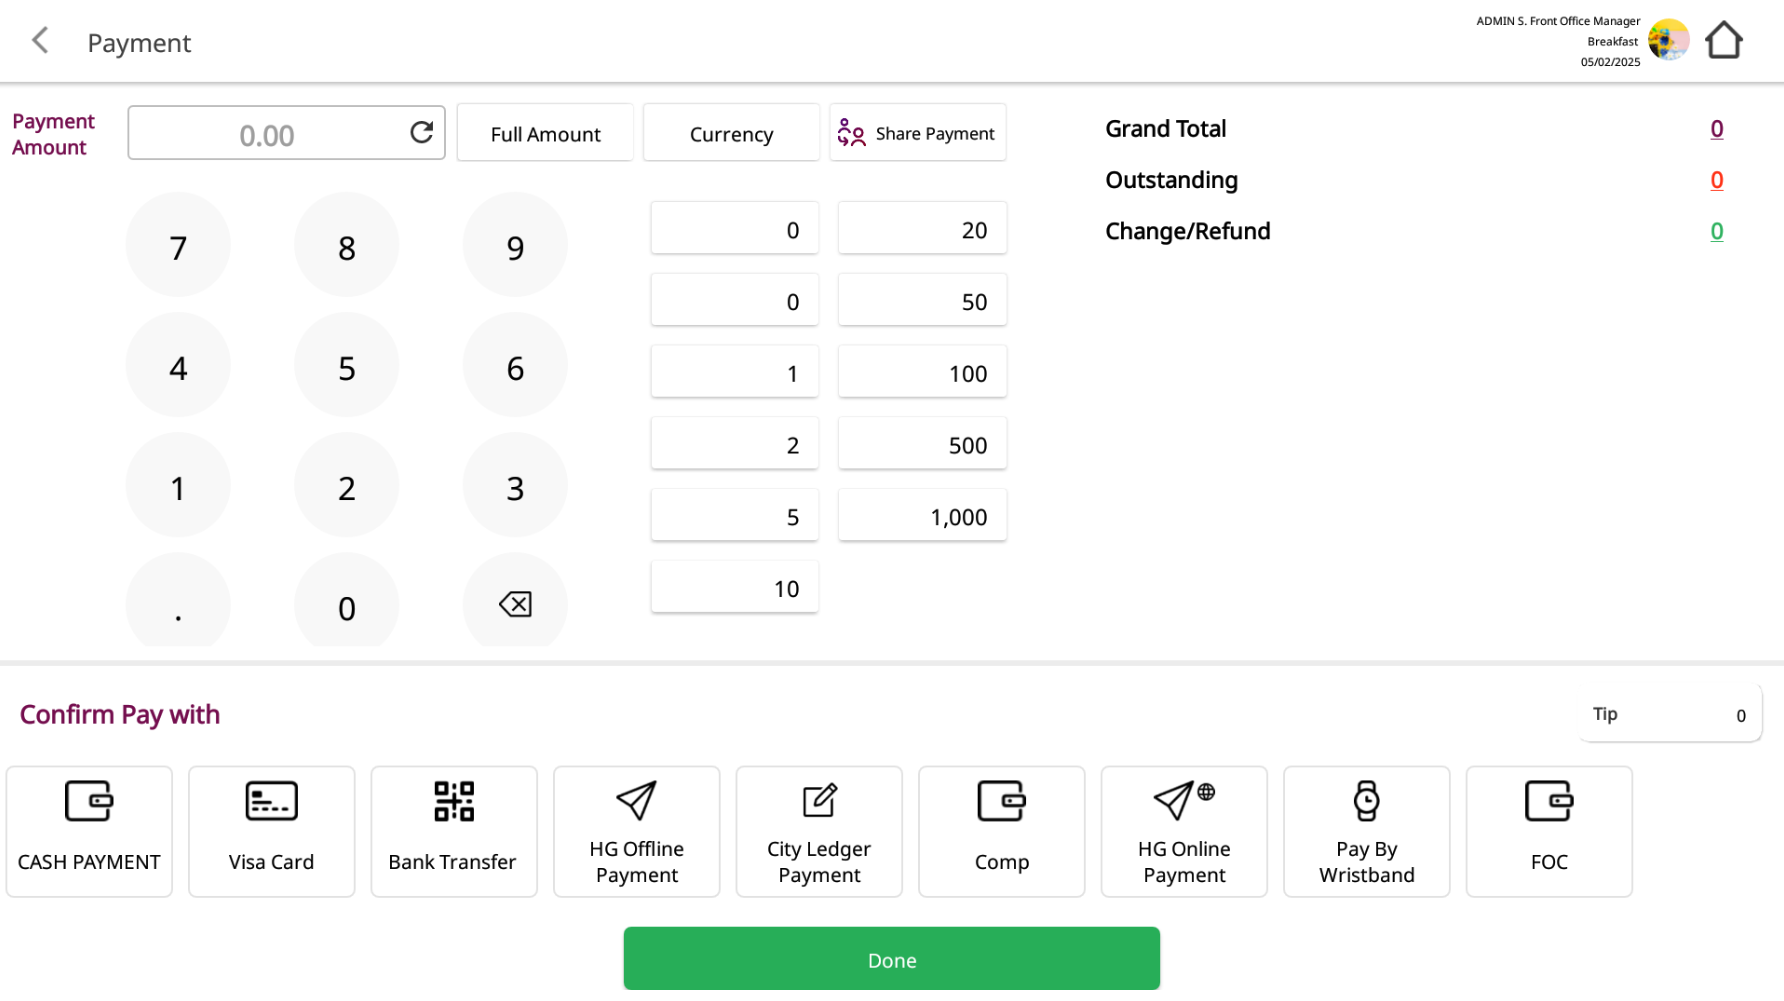
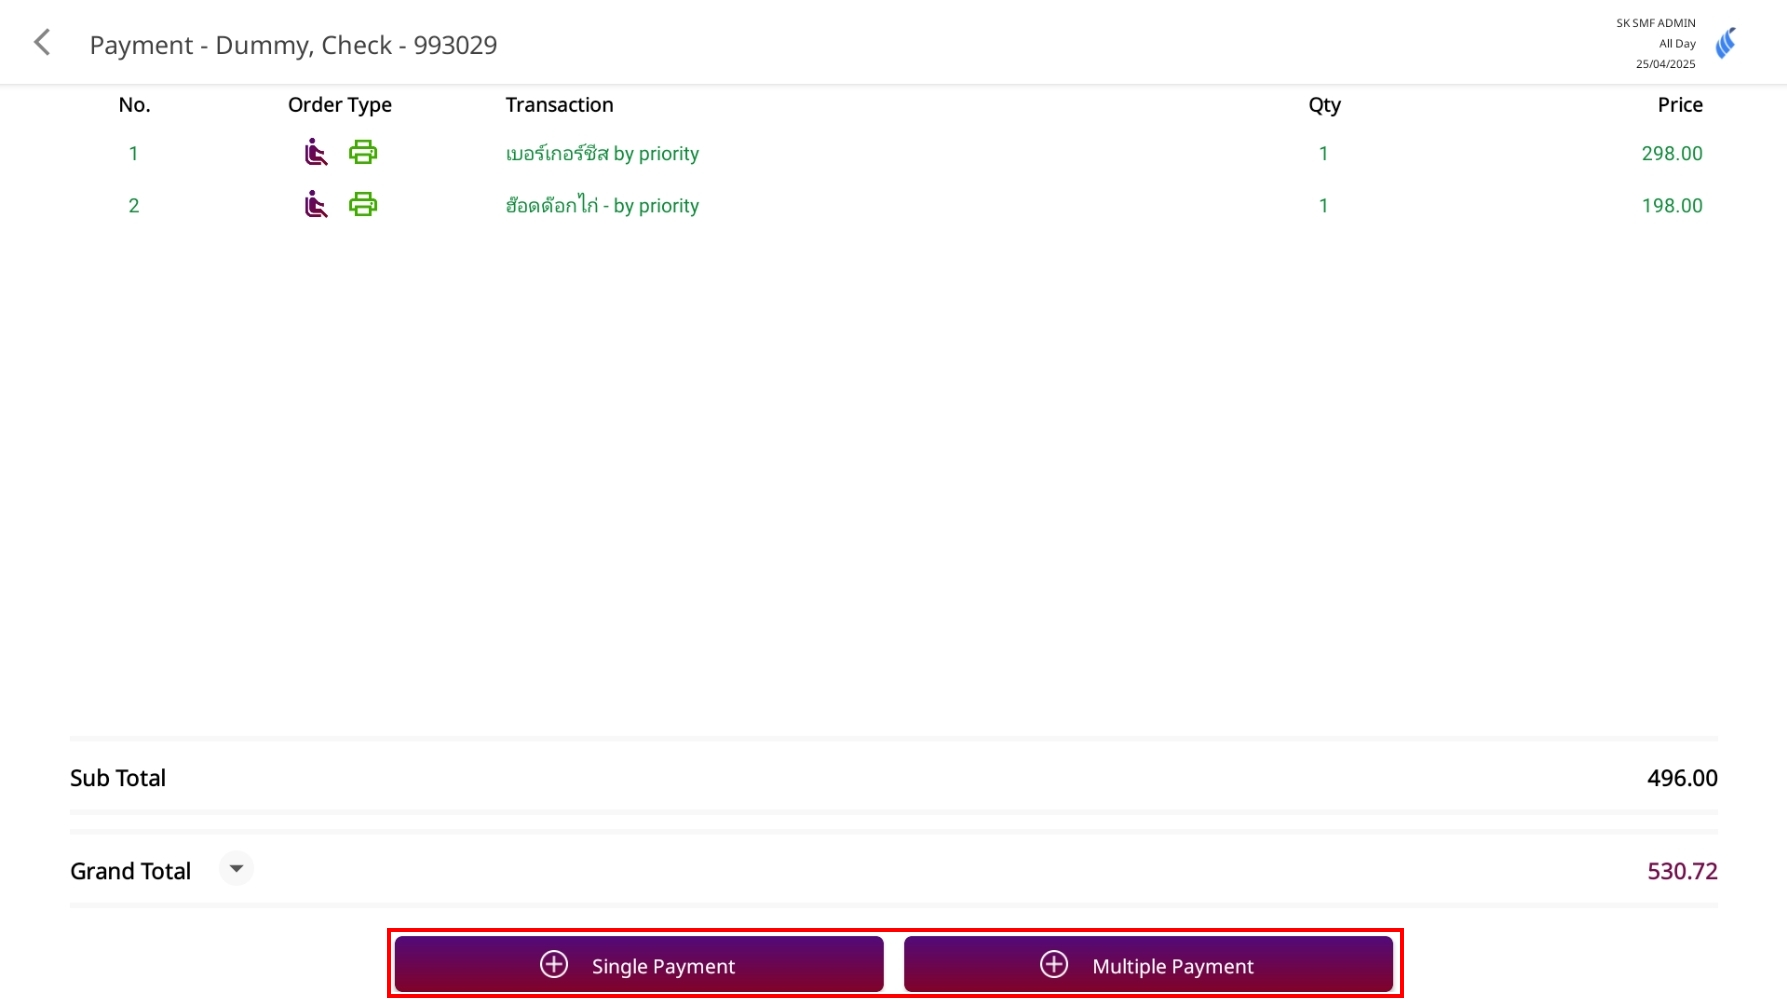
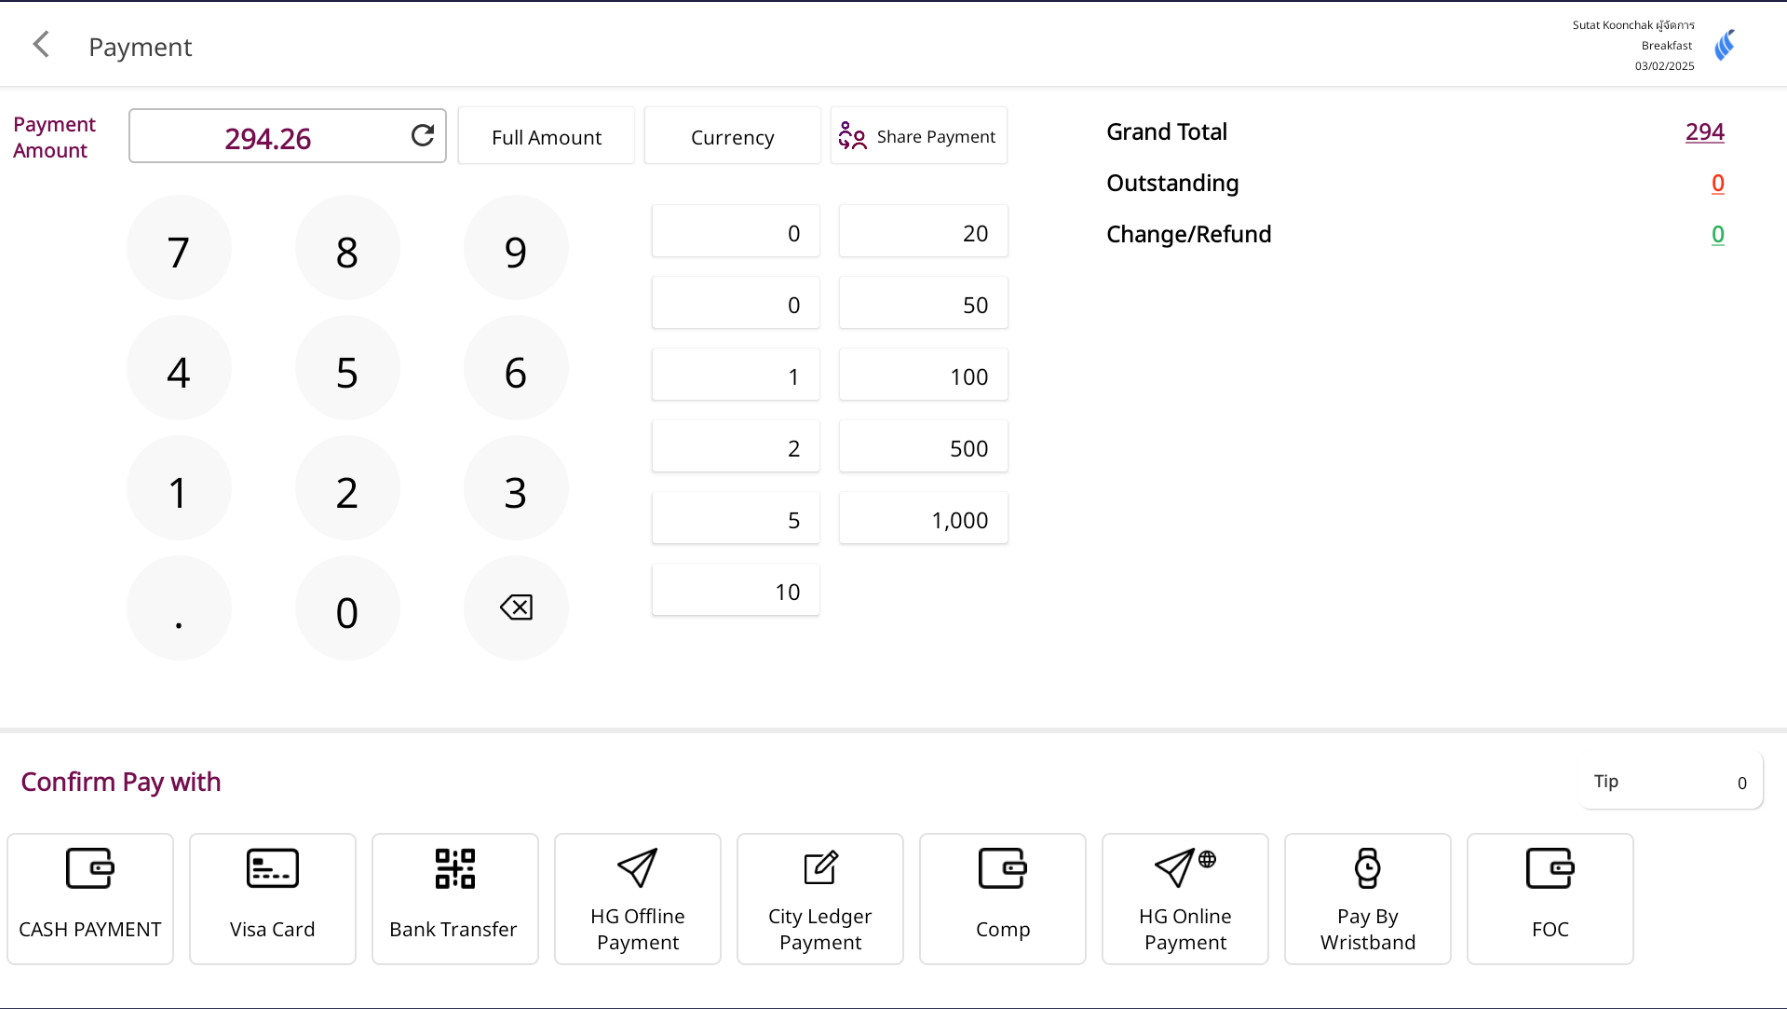
11. Single Payment / Multiple Payment
These functions allow you to settle a bill in one payment or split it into multiple payments.
To perform the task:
- Go table > Select table

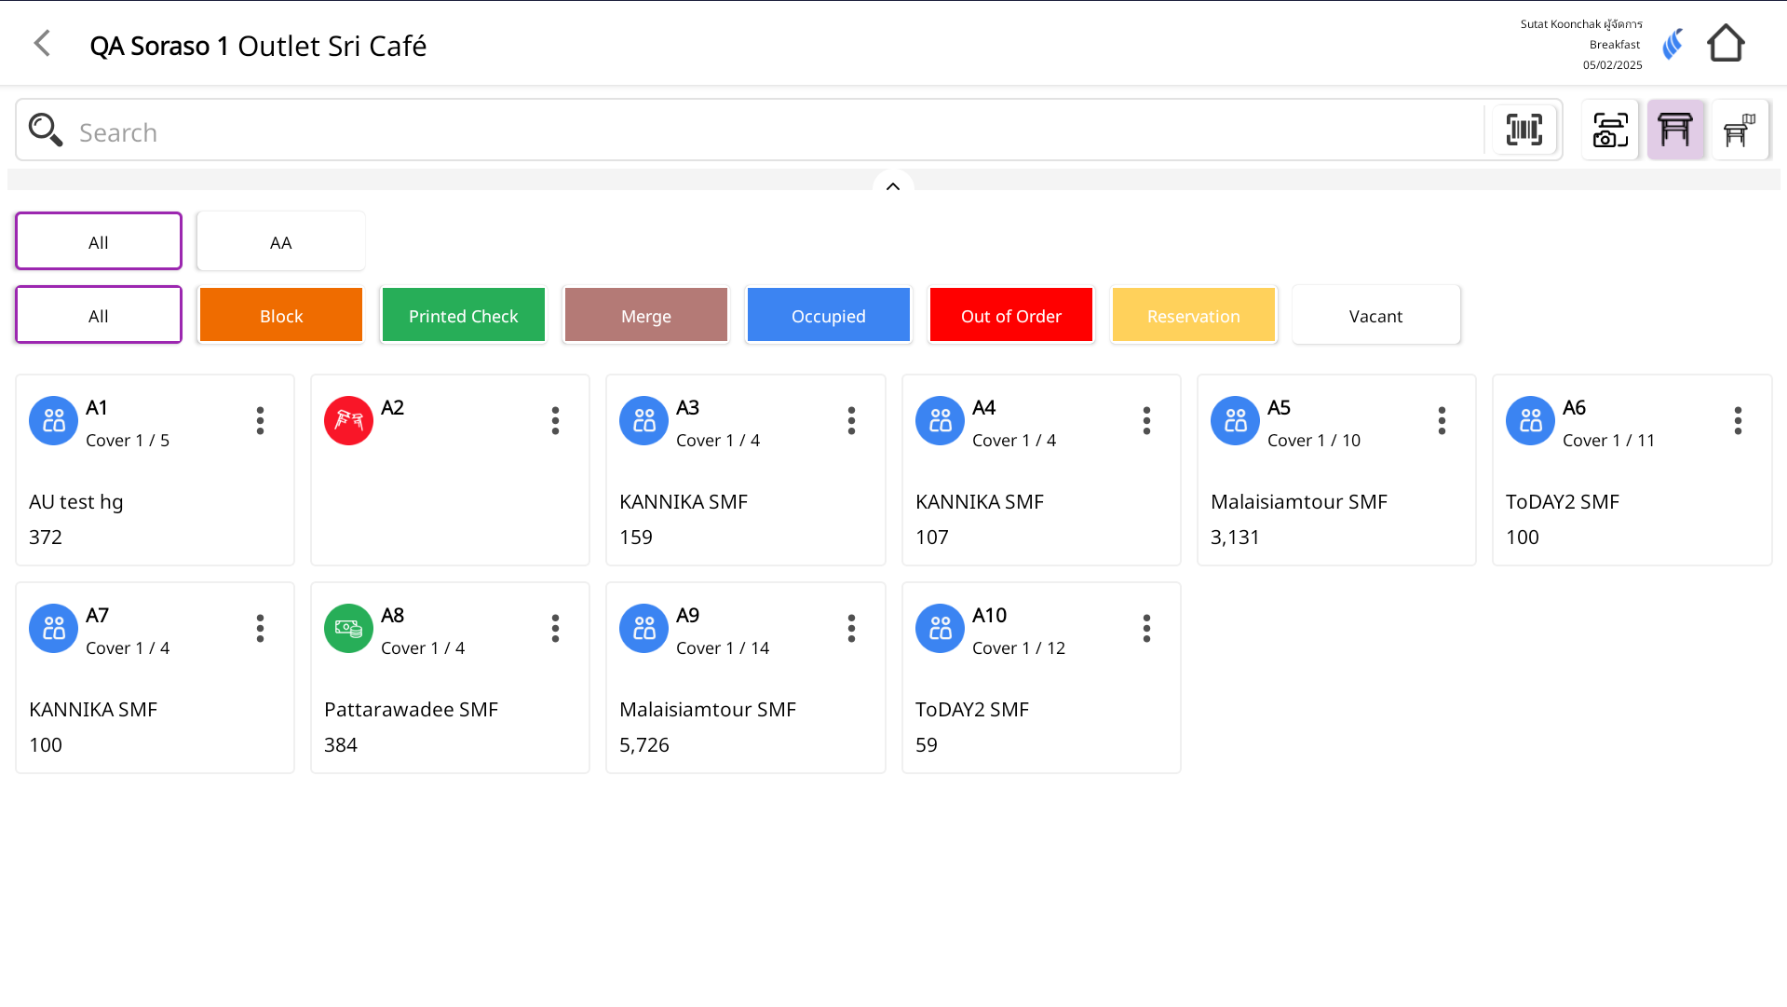
-
Open the check for payment
- From the order screen, click the View Check icon search to see the full bill details.
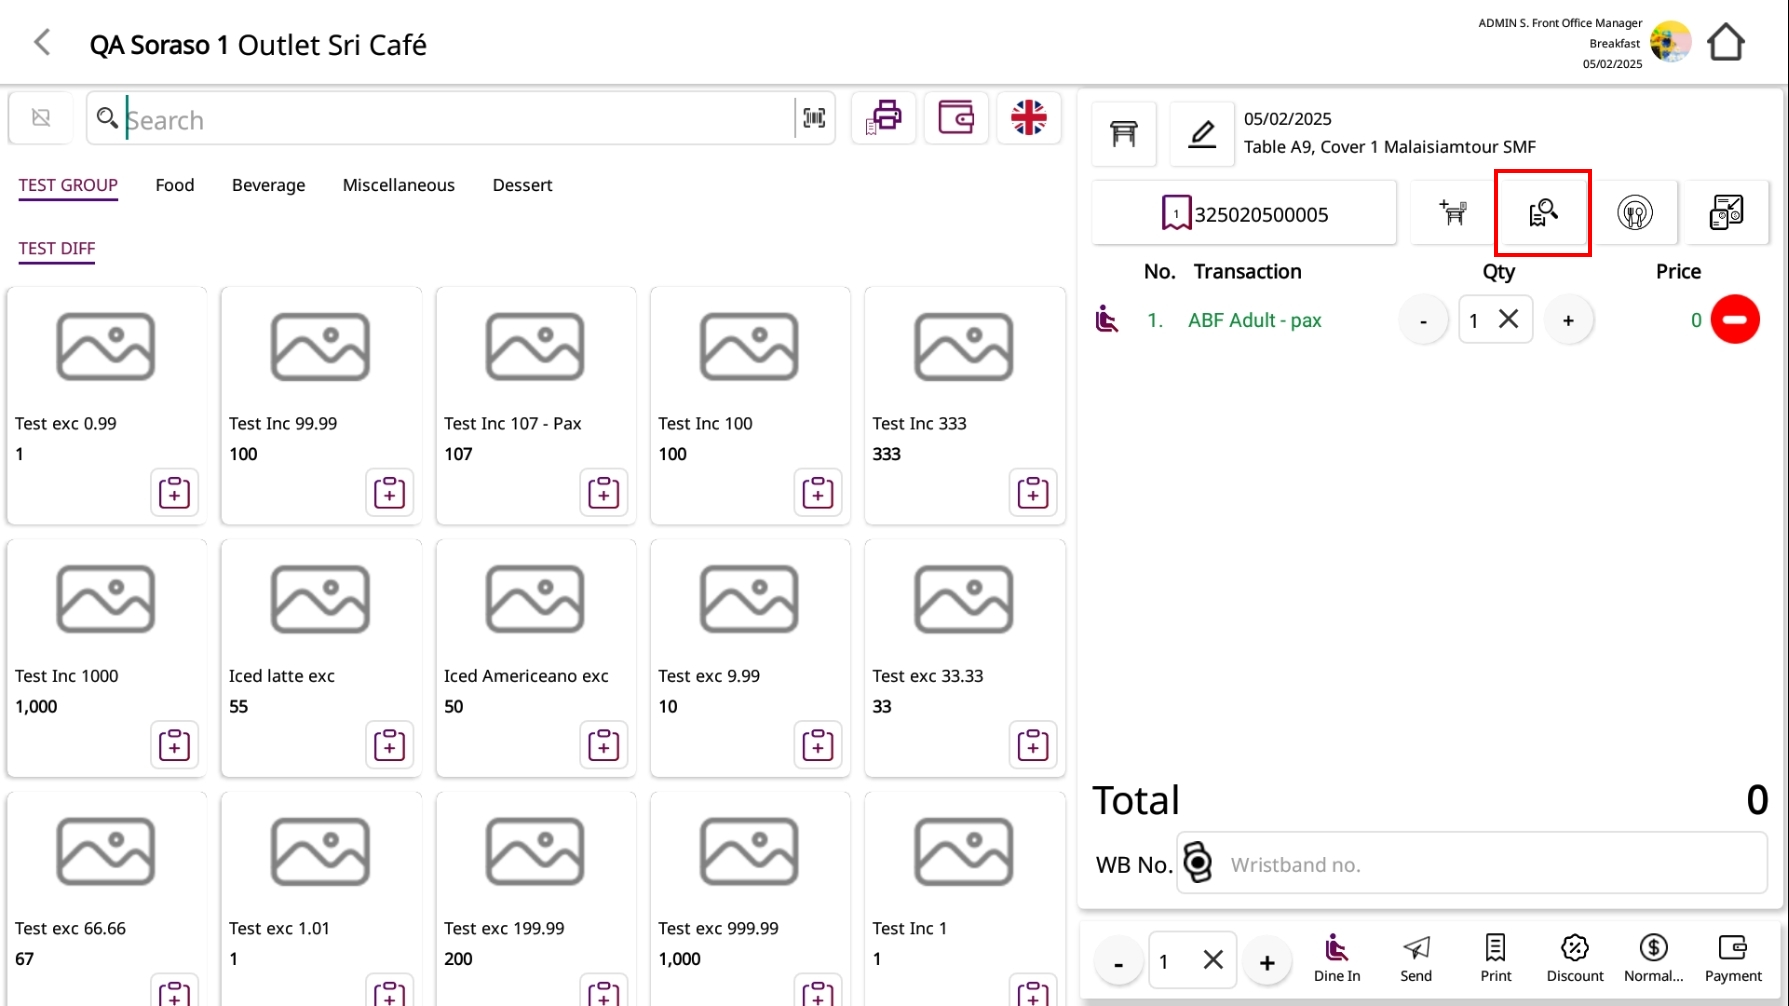
-
Click the Payment button
- In the check detail screen, click the Payment button (green) to proceed.
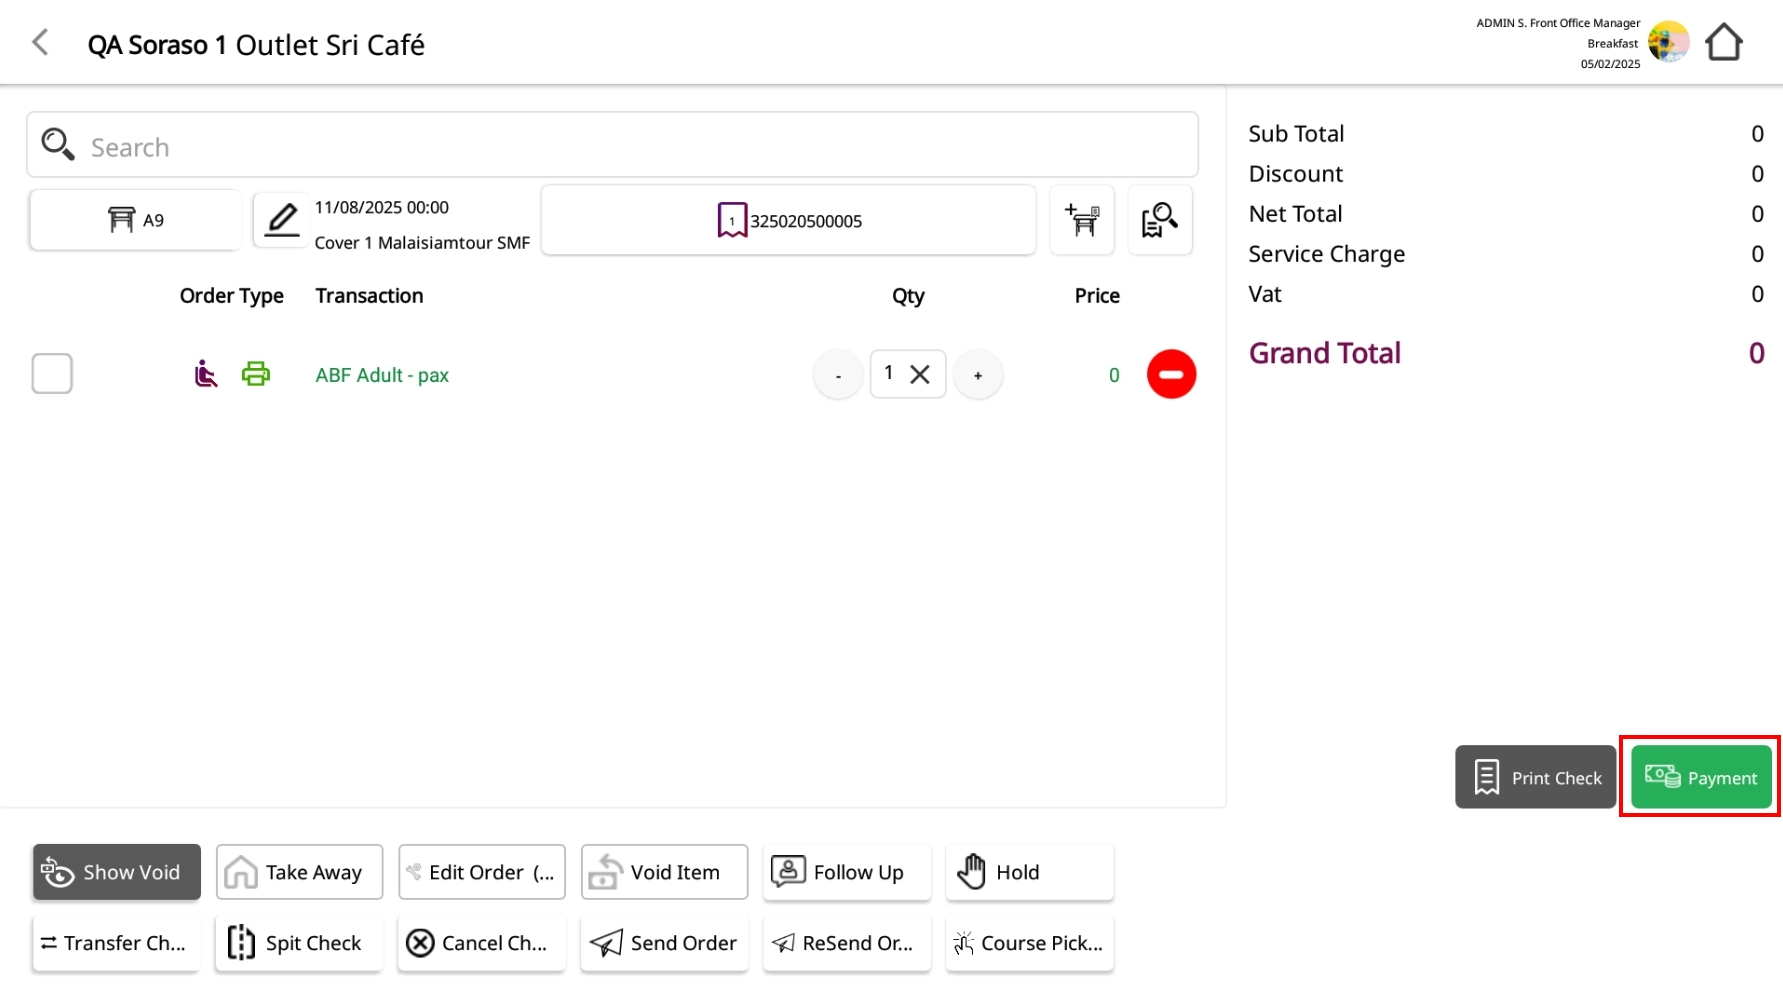
-
Choose your payment option
- Single Payment Use when the total amount is paid in one transaction with a single payment method.
- Multiple Payment Use when the bill will be split into two or more payment methods (e.g., part cash, part credit card).
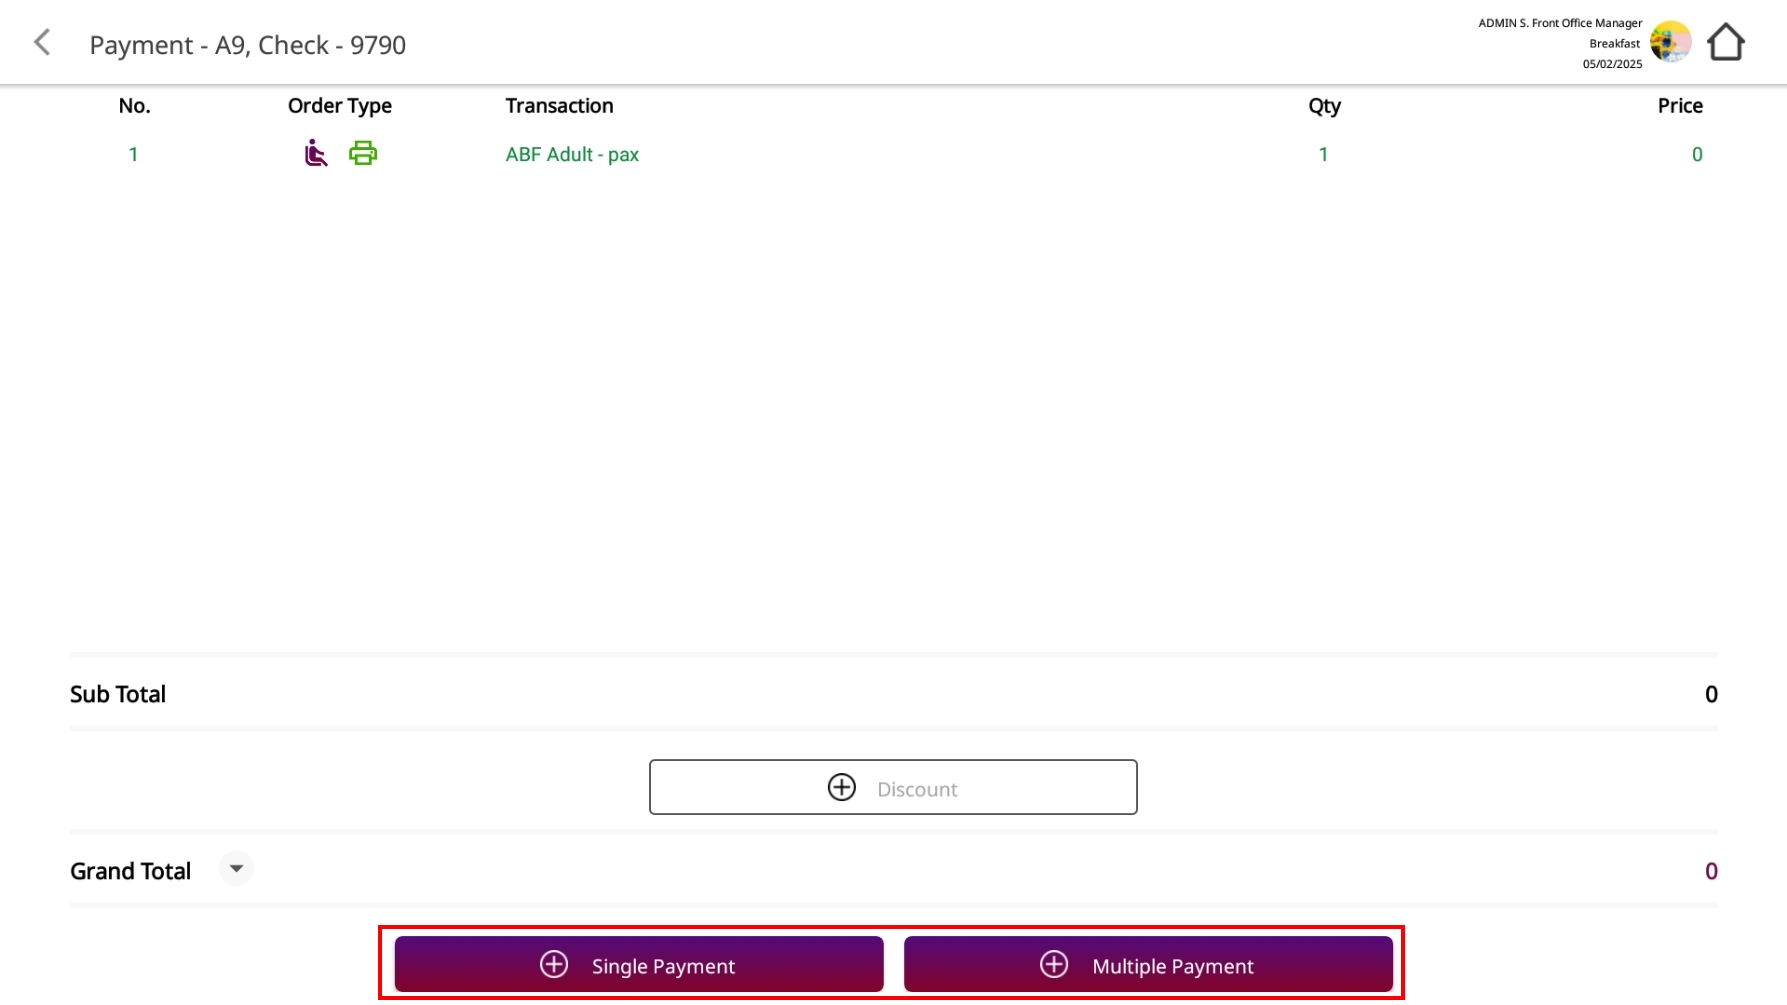
-
Complete the transaction
- Select payment method(s), enter the amount(s), and confirm to finalize the payment.
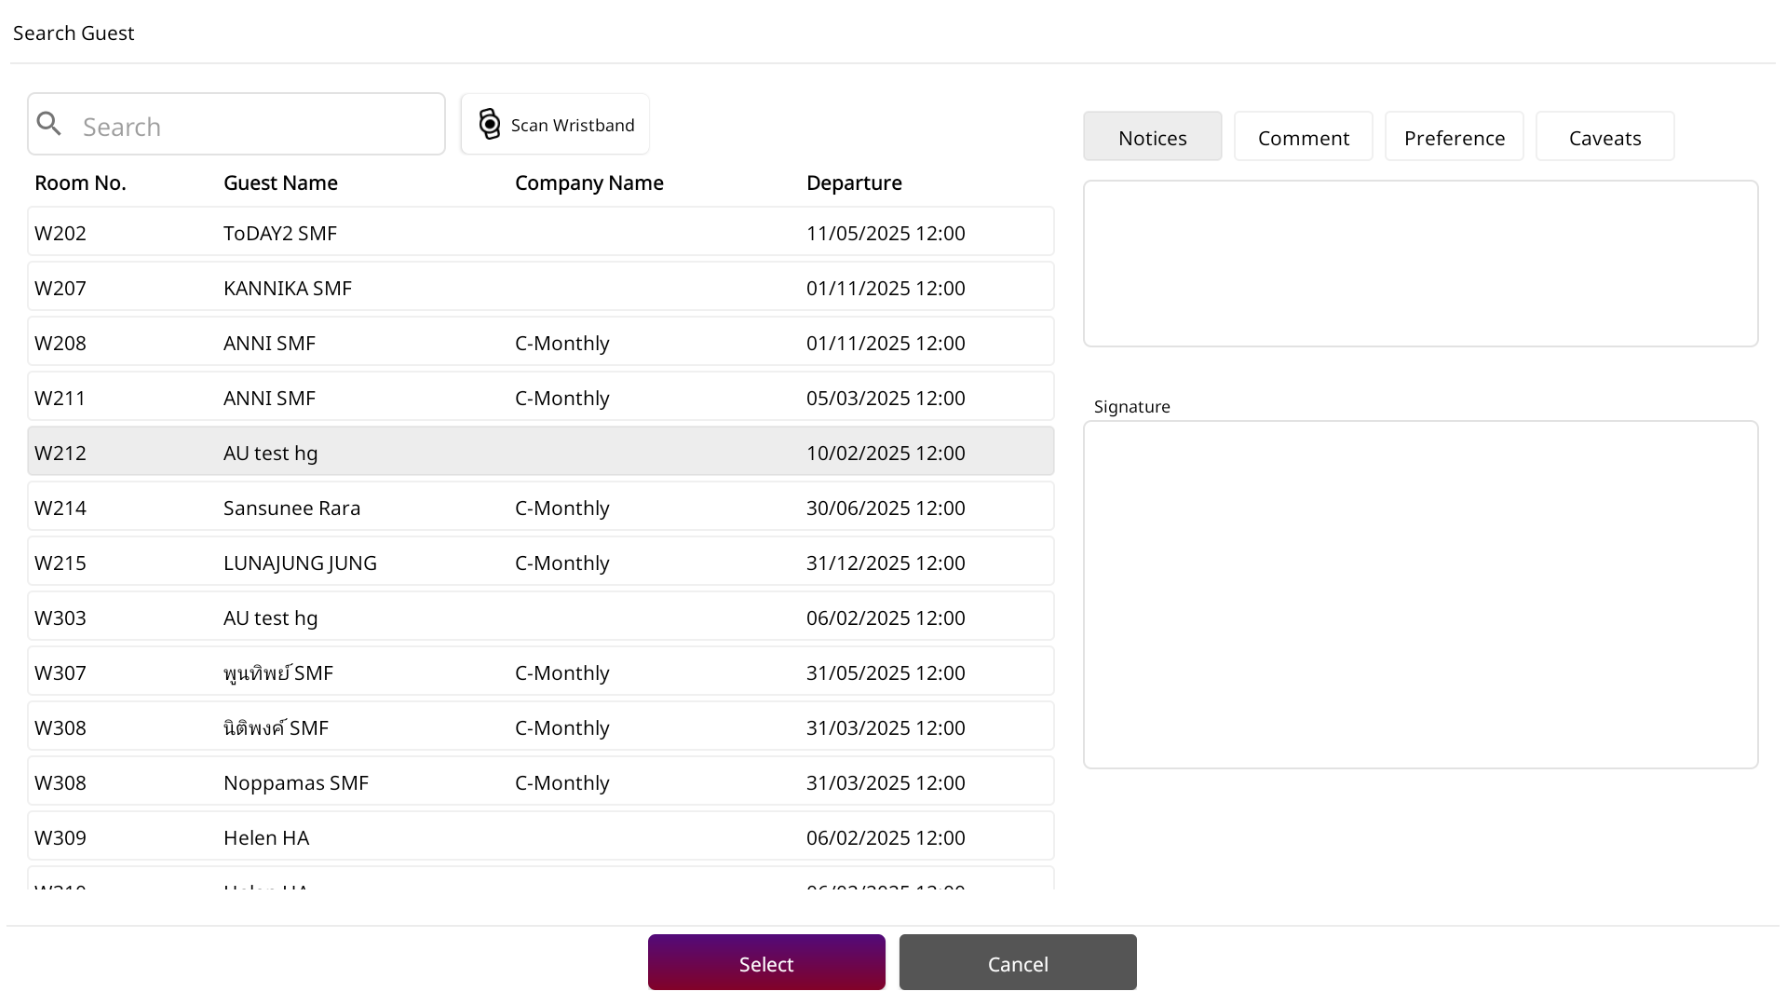
12. Check information of Guest in House
The Guest In-House function allows staff to view all guests currently staying in the hotel, along with key details such as room number, guest name, company name, and departure date/time. This helps staff quickly identify and manage in-house guests for service or operational purposes.
To perform the task:
- From the main menu, tap Guest In-House.

-
A list of all current guests will be displayed, showing:
- Room No. – The guest’s assigned room.
- Guest Name – The full name of the guest.
- Company Name – The company or group the guest is associated with (if any).
- Departure – Scheduled check-out date and time.

- Use the Search bar to quickly find guests by name, room number, or company.
Note: Clicking on a guest’s name will allow you to view additional notes, comments, preferences, or caveats for more personalized service.
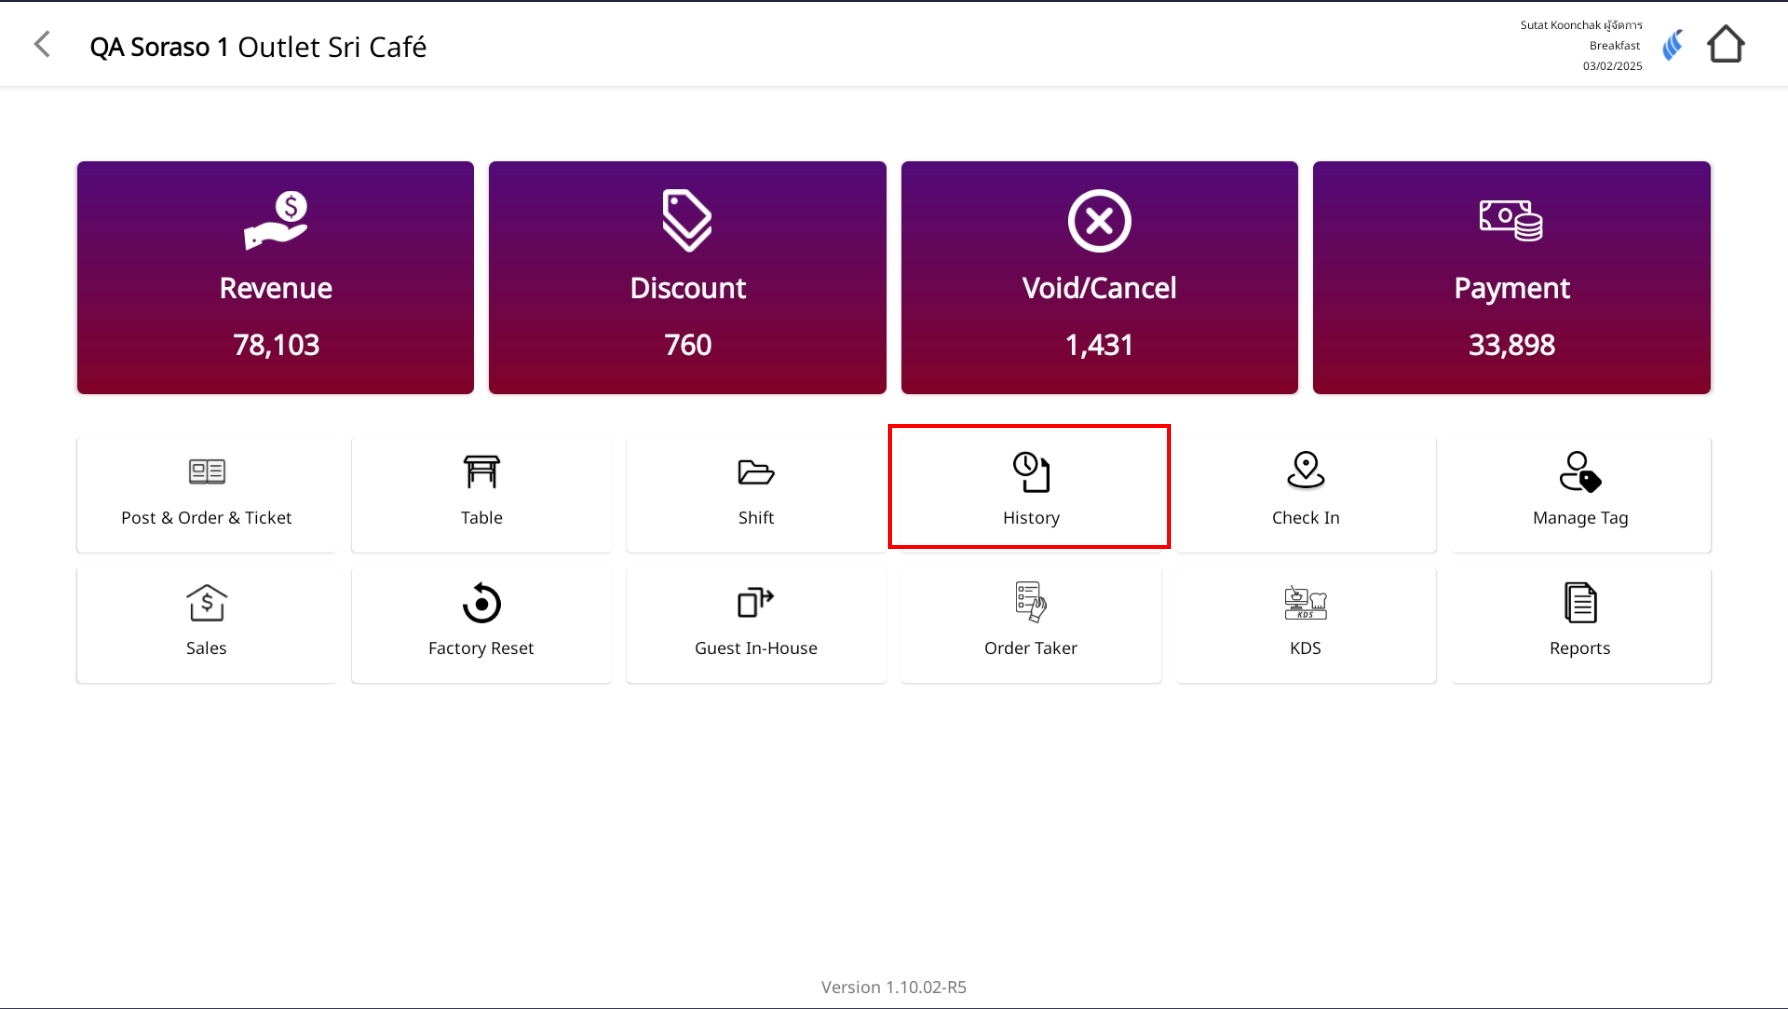
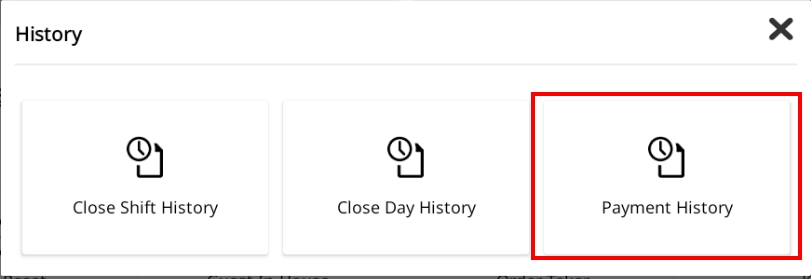
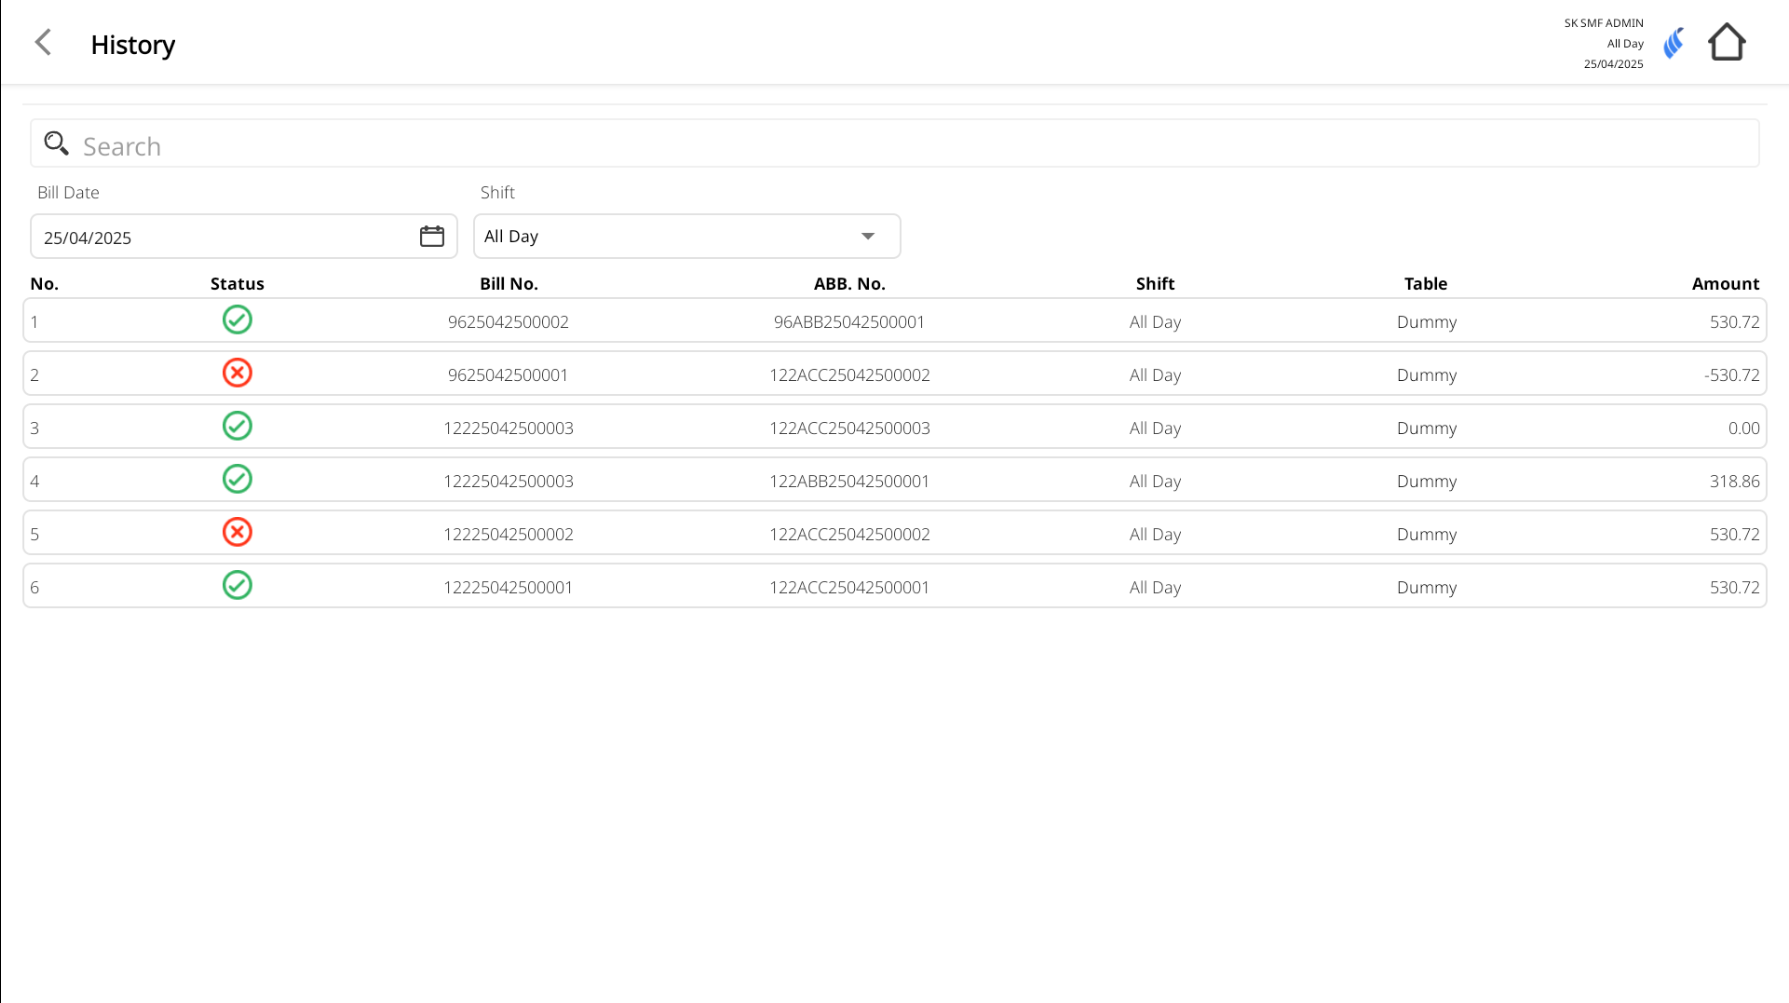
13. Cancel(Receipt)
Available under: History > Payment History This function allows staff to cancel a finalized receipt that has already been issued.
To perform the task:
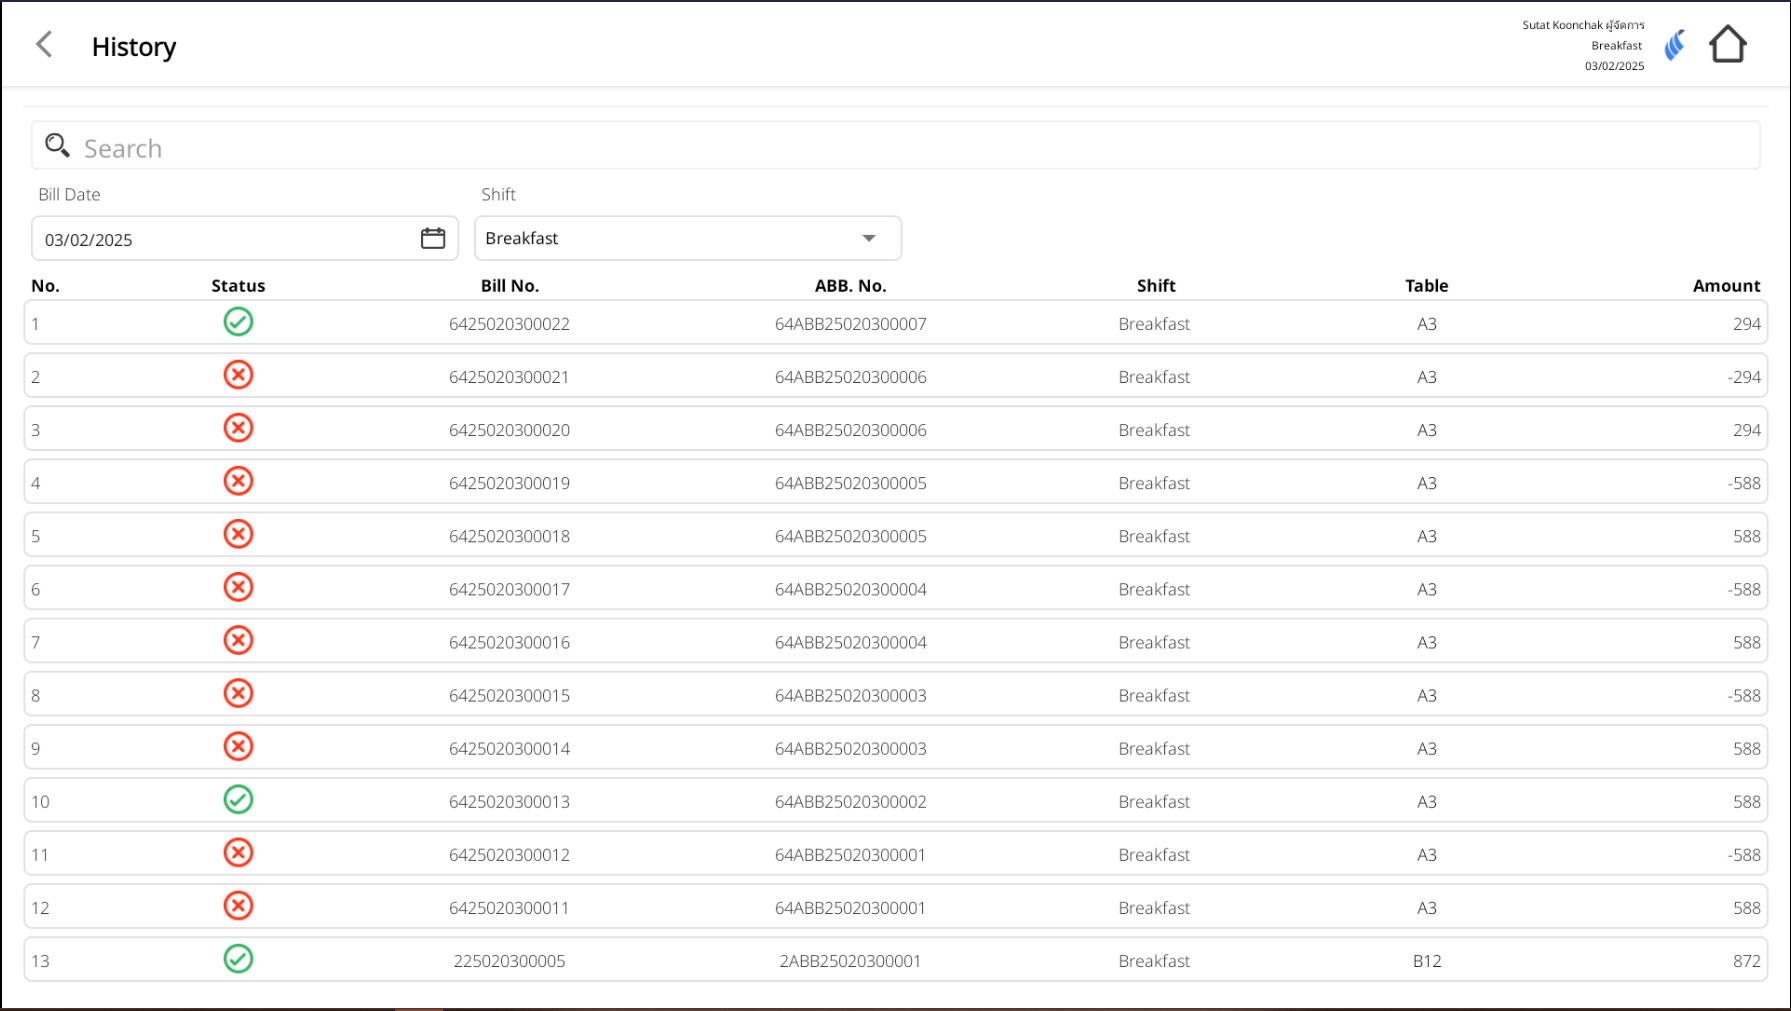
- Navigate to the History > Payment History screen.
- Select the specific transaction from the list (based on Bill No., ABB No., Table, or Amount).

Note: When a receipt is canceled, the system will automatically update its status and display a red X icon
- Review the transaction details on the Receipt screen.
- Click the Cancel (Receipt) button located at the bottom-left corner.
Once canceled, the receipt status will be shown as "Canceled (X) in the history list, and the related financial records will be voided or adjusted as appropriate.
Note: Only authorized users can perform this action. Canceled receipts are logged for auditing purposes.
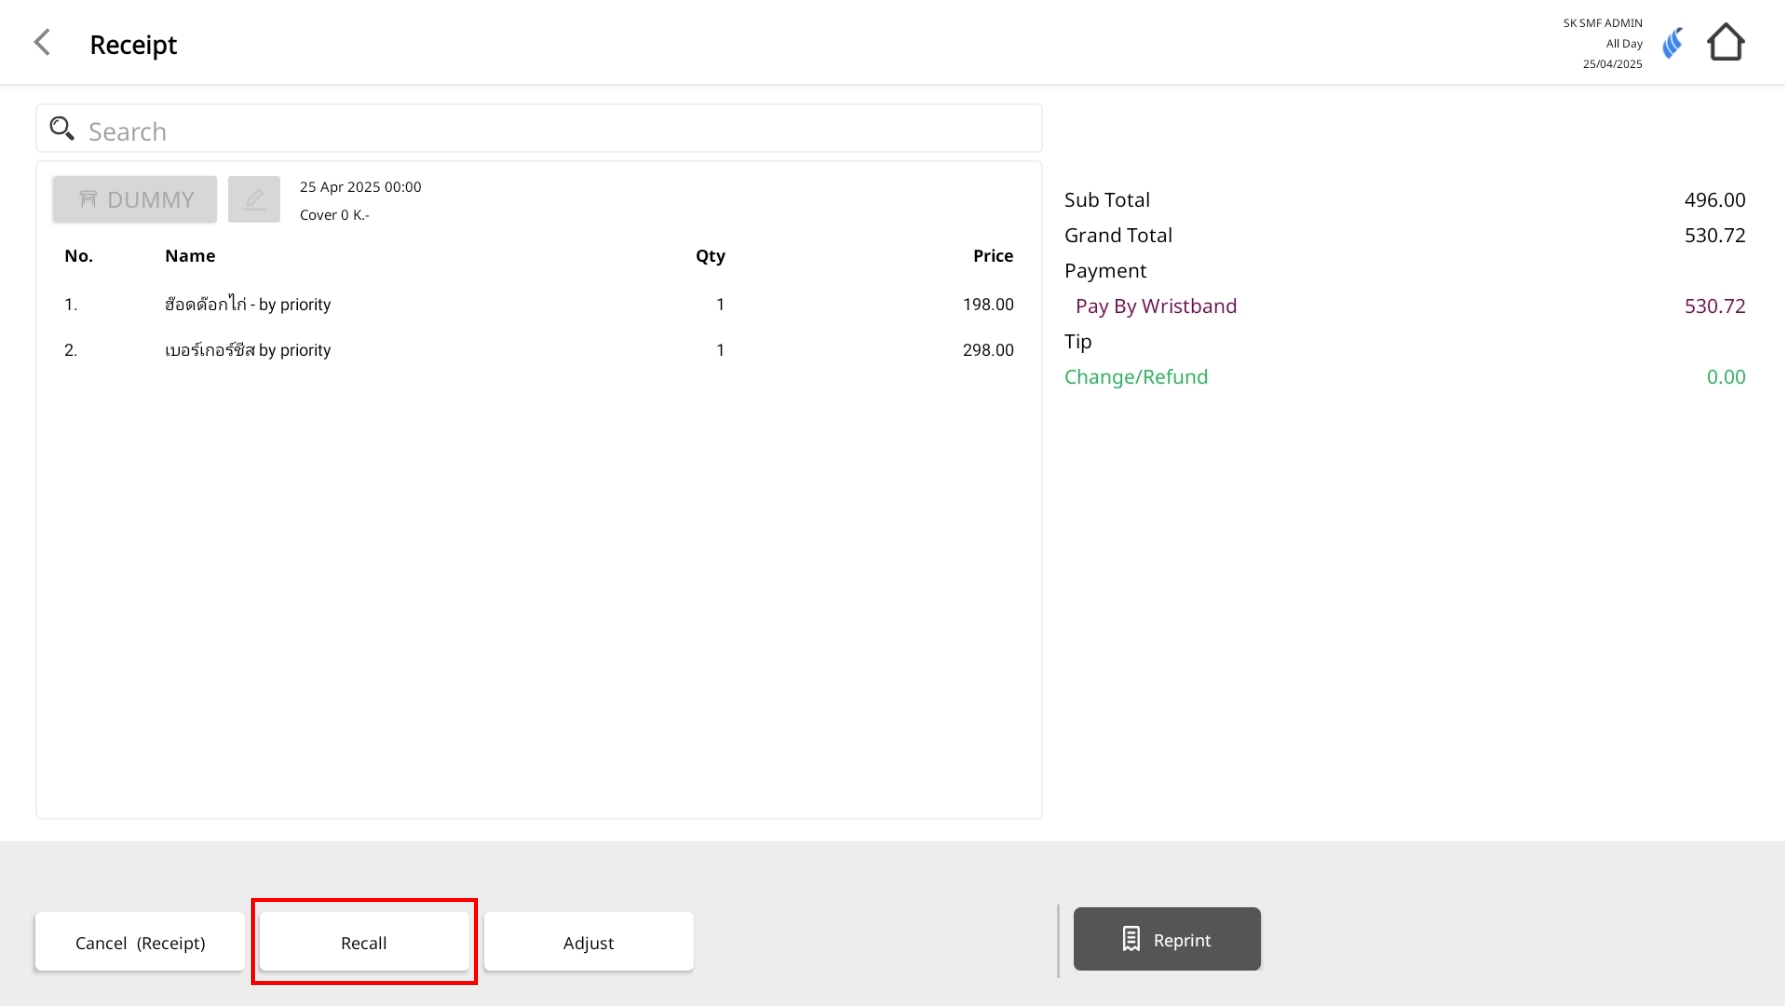
14. Recall
Available under: History > Payment History The Recall function allows staff to retrieve a finalized receipt and return the table and items to the active ordering screen.
To perform the task:
- Go to History > Payment History.


- Select the desired bill you wish to recall.
- Press the Recall button at the bottom of the Receipt screen.
-
Once recalled:
- The original bill will be marked as canceled.
- The associated table will be released and become available again.
- All previously ordered menu items will be restored to the order screen.
You can now:
- Add or remove food items.
- Apply discounts.
- Proceed to payment or add a tip.
Note: Only authorized users can perform this action.
Note: When the Recall button is pressed, the system will automatically reopen the associated table from the recalled bill.
All item details from that bill will be restored to the ordering screen, allowing staff to make further changes or reprocess the payment.
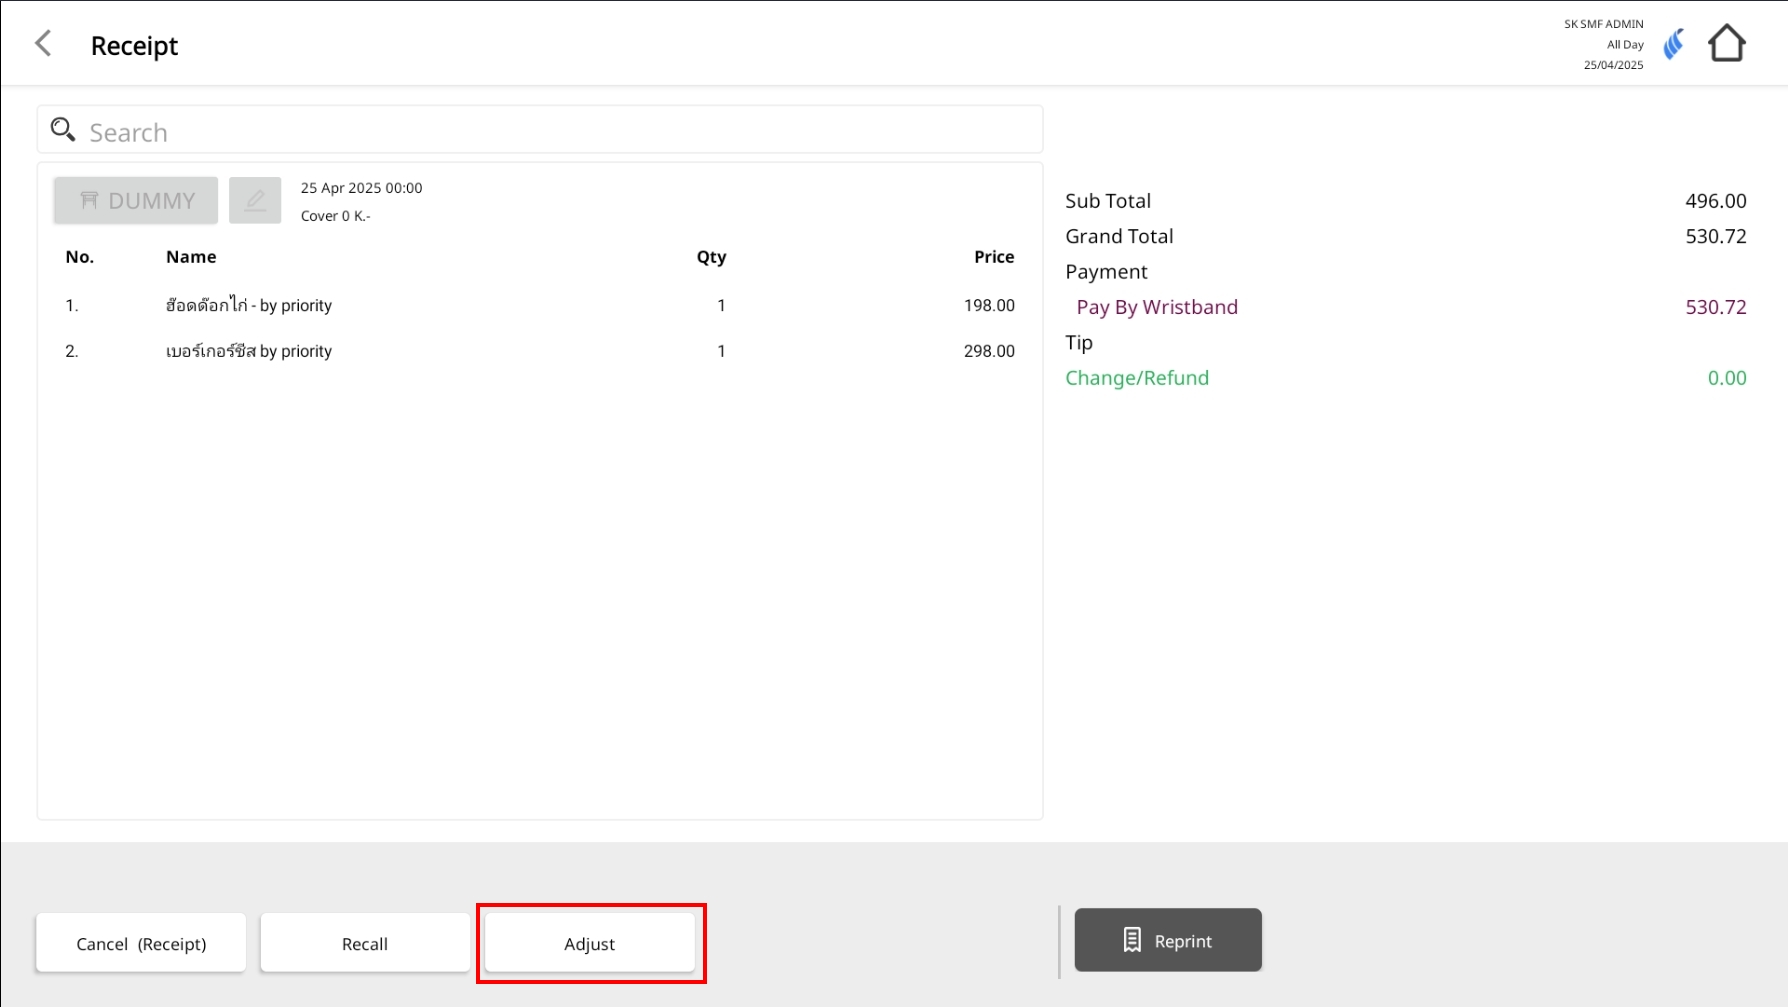
15. Adjust
Available under: History > Payment History > Receipt The Adjust function allows staff to revise only the payment method for a completed bill. It is used when the original receipt has been finalized, but the payment type needs to be corrected (e.g., from Cash to Credit Card).
To perform the task:
- Go to History > Payment History.


- Select the bill you want to reprint from the list.

- The Receipt screen will appear.
- From the Receipt screen, press the Adjust button.
- The system will redirect to the Payment screen.
- Staff can select a new payment method (Single or Multiple Payment).
- The system will not allow any of the following changes:
- Menu item edits (add/remove/modify)
- Quantity or price adjustments
- Discounts or service charge updates
Note: Adjust is strictly for changing the payment method only. No other modifications are allowed.
16. Reprint Bill
Available under: History > Payment History > Receipt The Reprint function allows staff to reprint a completed receipt in case the original copy was lost, damaged, or needs to be given to the guest again.
To perform the task:
- Go to History > Payment History.


- Select the bill you want to reprint from the list.
- The Receipt screen will appear.
- Click the Reprint button at the bottom-right corner.
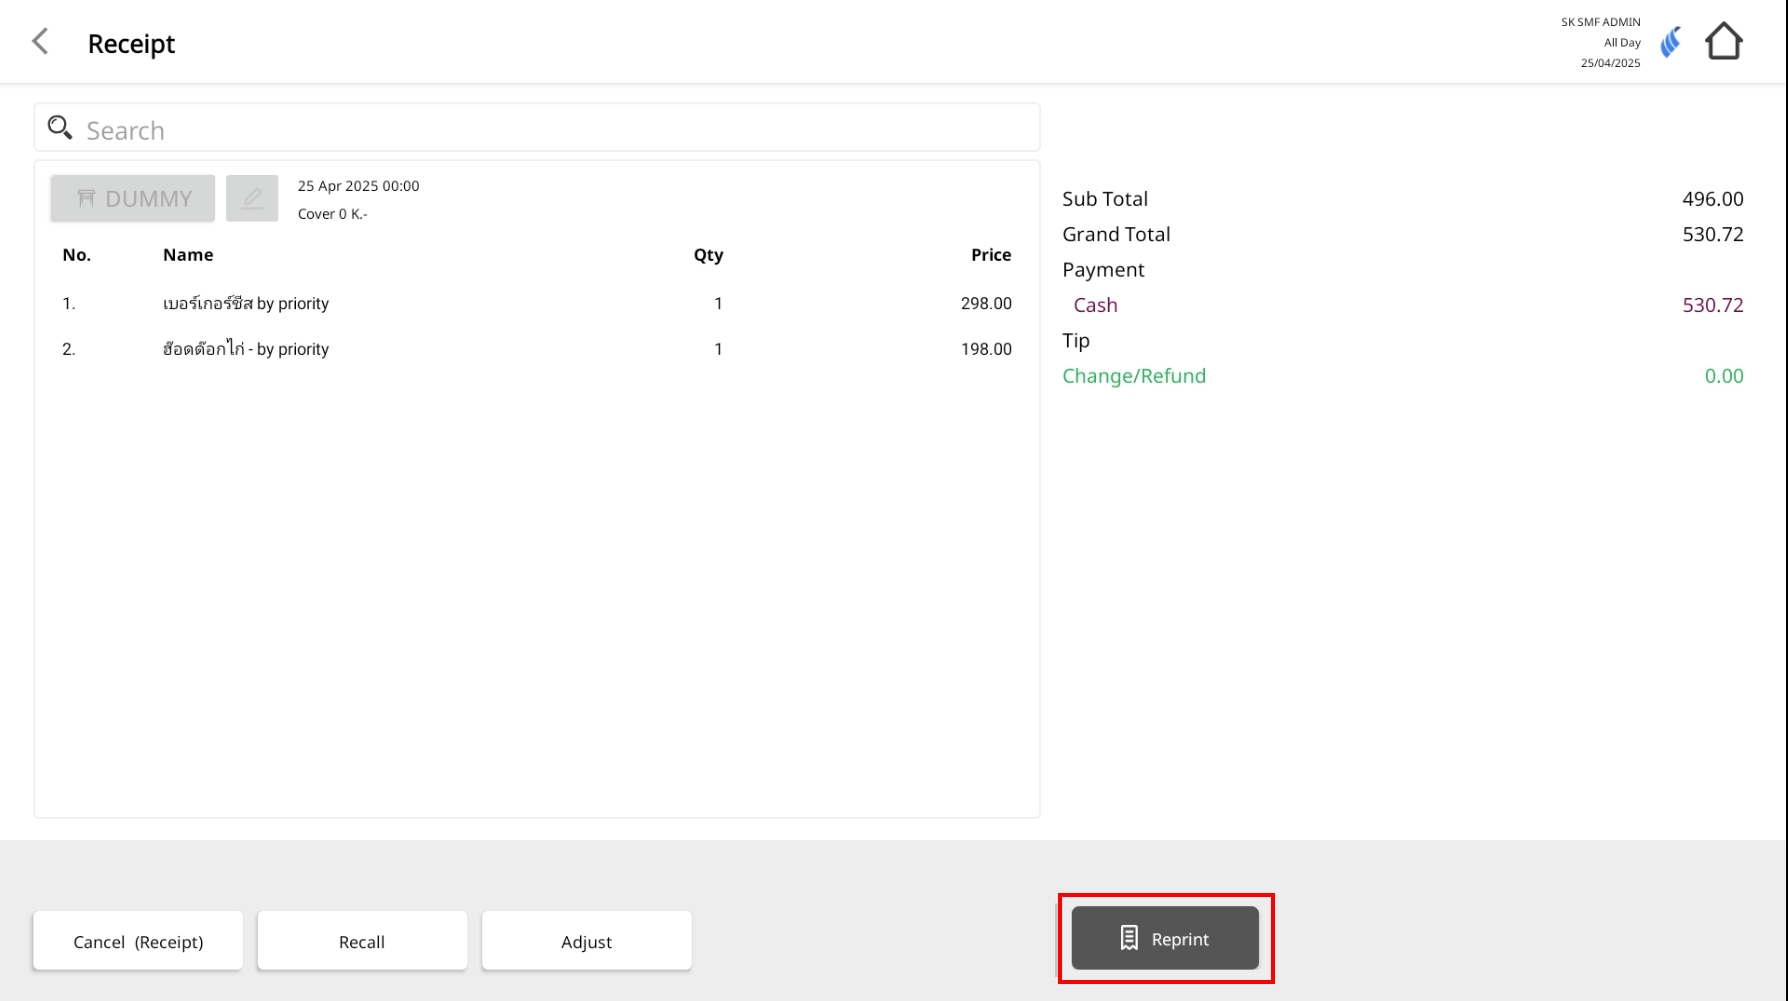
- The system will send the receipt to the connected printer.
Note: If the preview configuration is enabled, a bill preview popup will appear before printing, allowing staff to review the details before confirming the reprint.