PMS – Report Set User Guide
1. Overview
The Report Set module in PMS allows staff to configure email reporting after daily closing. This includes setting up email content, managing mail groups, assigning reports to specific groups, and re-sending reports as needed. It helps automate the report distribution process for operational efficiency.
2. Config Mail Information
Available under PMS Manager > Mail Group & Report > Mail Information , this function allows users to set up report mailing information, including report type, subject, and message content for sending reports after closing.
- Select PMS Manager function
- Select Mail Group & Report menu
- Select Mail Information tab
- Select type of report
- Enter mail subject details
- Enter message for the report
- Click Save to confirm
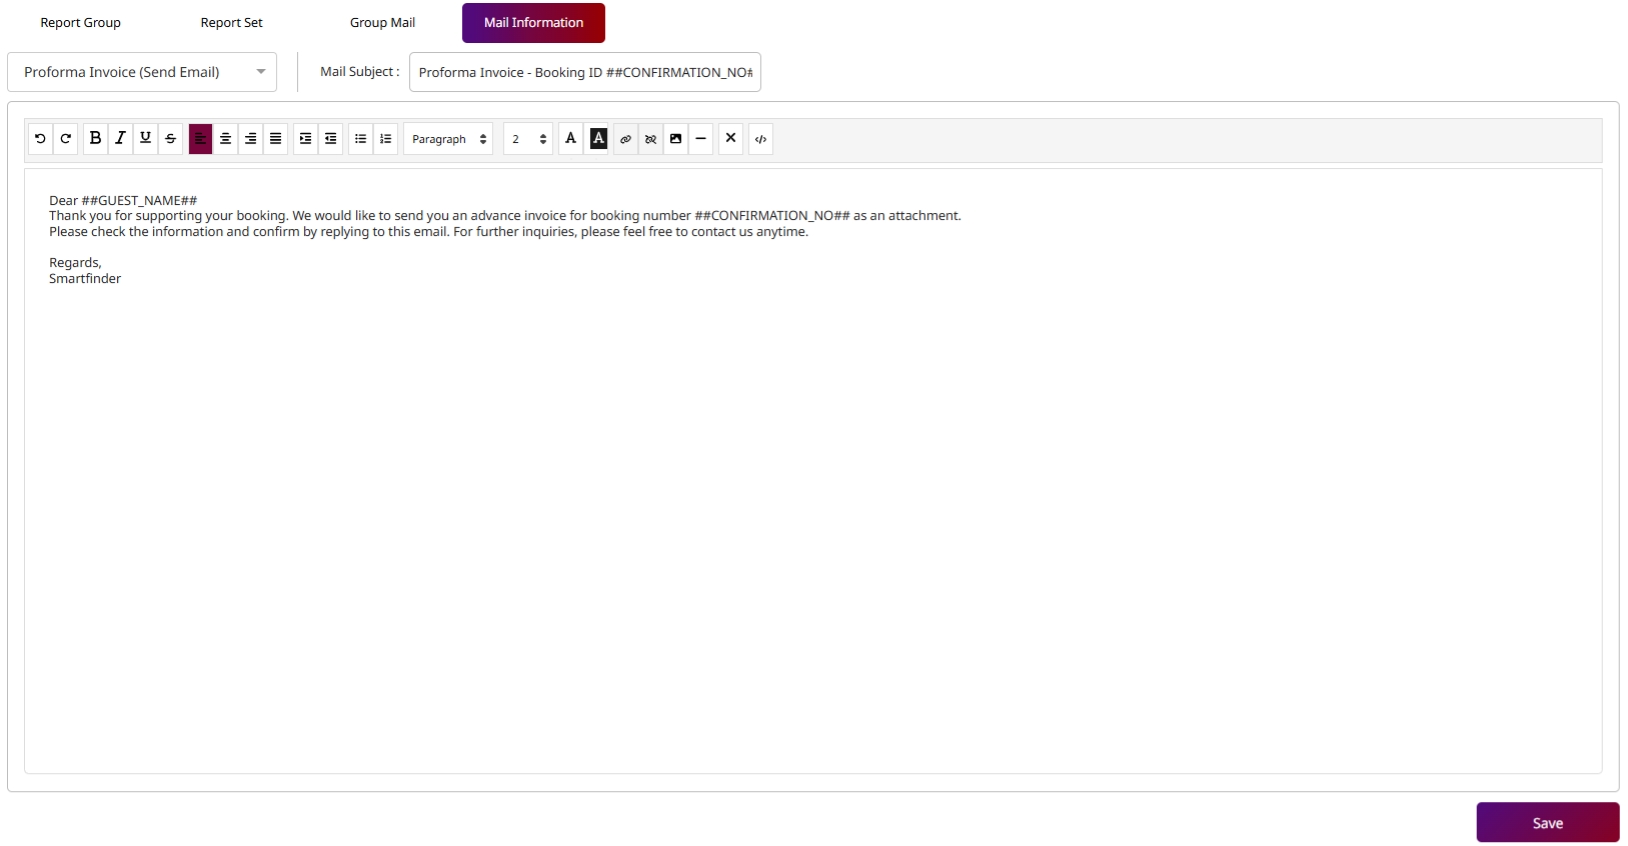
Note: Ensure the mail subject and message are clear and relevant, as these will appear in the recipient’s inbox and affect email readability.
3. Config Group Mail
Available under PMS Manager > Mail Group & Report > Group Mail , this function allows users to configure mail groups used to receive scheduled reports. Users can define group code, name, type, assign staff and add reports to group.
To perform the task:
- Select PMS Manager function
- Select Mail Group & Report menu
- Select Group Mail tab
- Click New to add mail group
- Enter **Group Code and Group Name
- Select Group Type
- Click New to select staff or manually add name and email
- Click New to select report
- Click Save to confirm
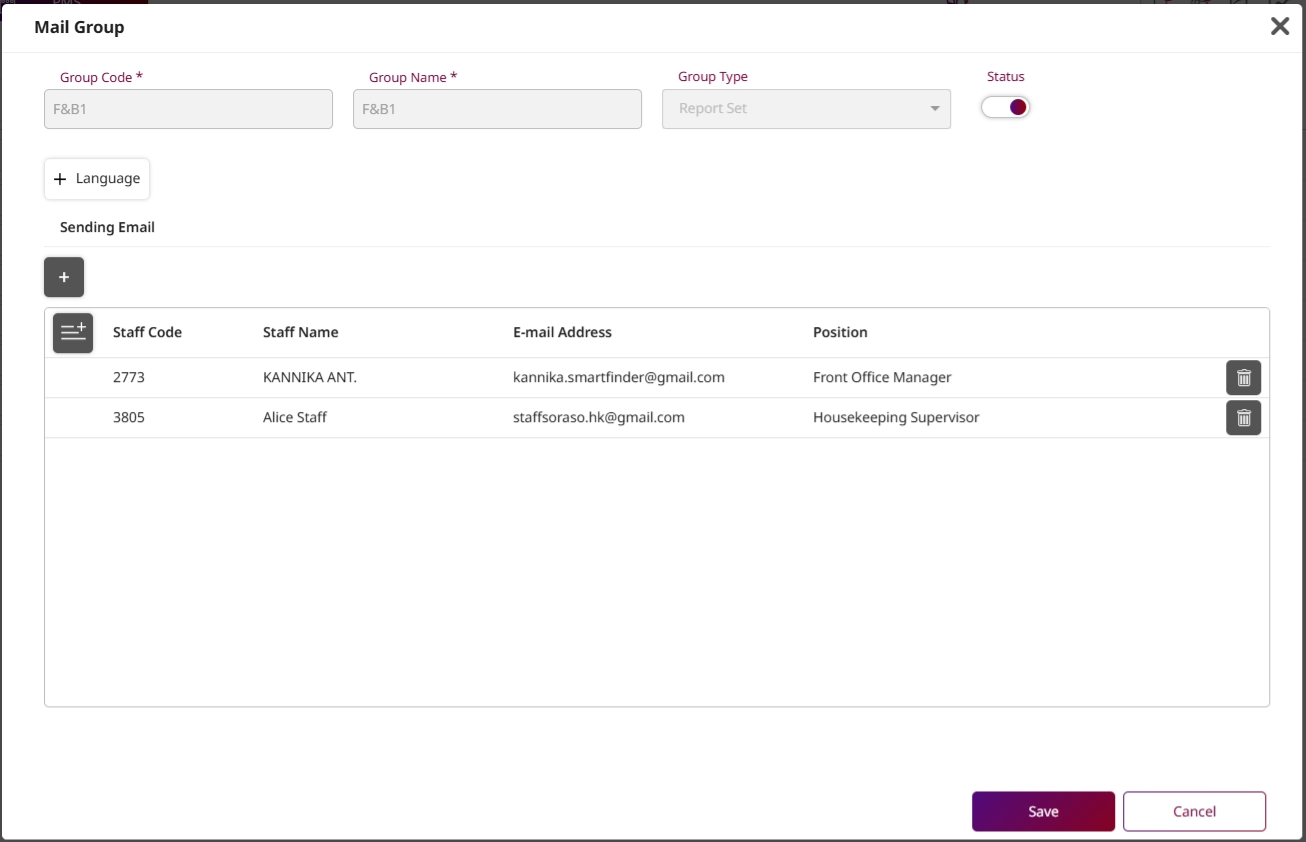
Note: Double-check email addresses and assigned staff to avoid missed reports or failed deliveries.
4. Config Report Set
Available under PMS Manager > Mail Group & Report > Report Set , this function allows users to define groups of reports to be sent to email groups after close day, including selection of file types, parameters, and recipients.
To perform the task:
- Select PMS Manager function
- Select Mail Group & Report menu
- Select Report Se t tab
- Click New to add report set
- Enter Report Set Code and Name
- Select file type to send after close day
- Click New to select group mail and confirm selection
- Click New to select reports to include in the set
- Select business name as PMS
- Select report and click Select
- Optionally enter a new report name
- Click Parameter Set to configure report parameters
- Set the parameters as needed
- Click Save to confirm
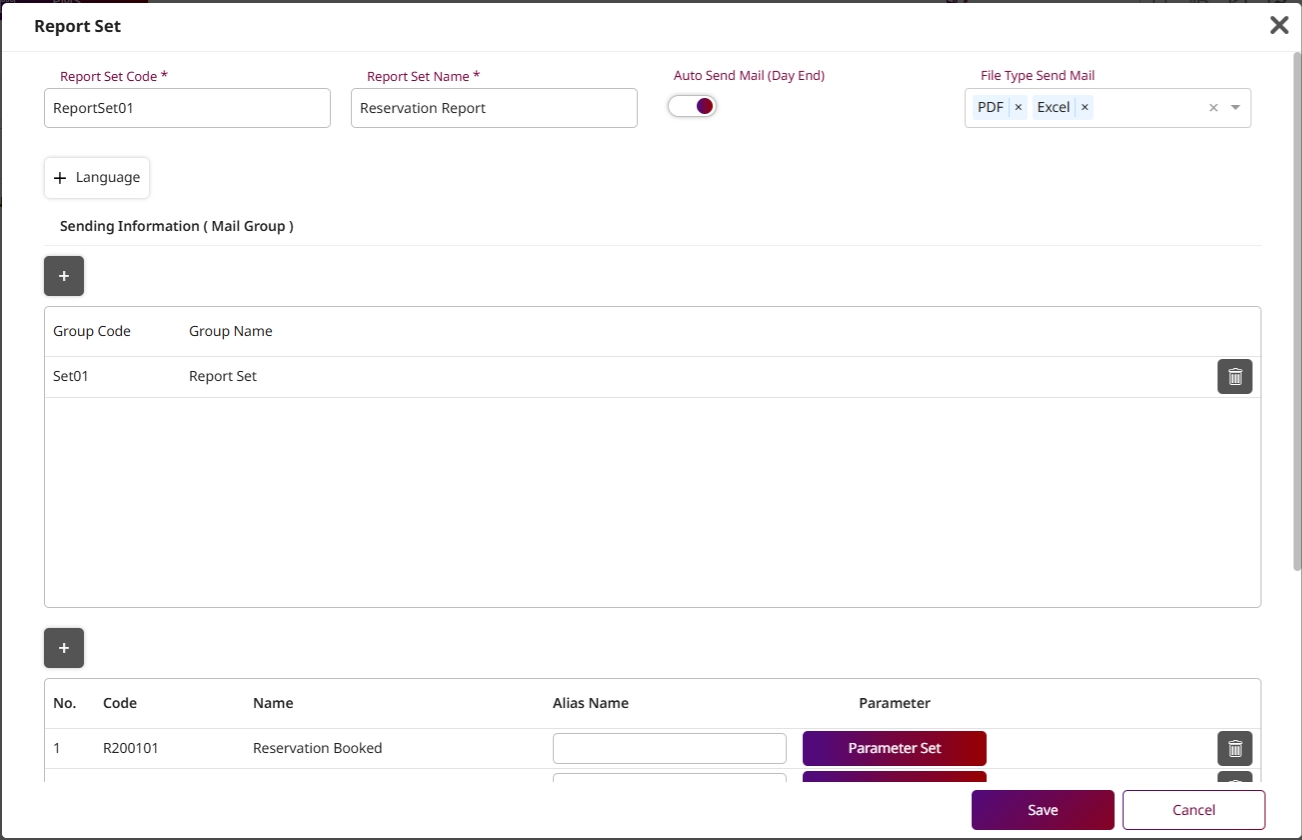
Note: Make sure the selected file type and parameters match the needs of the recipient group. Incorrect parameters may lead to incomplete or inaccurate reports.