PMS - E-Register User Guide
1. Overview
This Soraso PMS – E-Register (Electronic Registration) User Guide provides staff with detailed instructions for the contactless guest registration workflow. E-Register lets front desk staff send a guest’s reservation to an E-Register device (tablet / iPad); the guest then verifies their ID, confirms stay details, gives consent (PDPA and TM30 reporting of foreign nationals), and signs to complete pre-check-in.
The guide follows the order in which E-Register is set up and used: configuring devices and the controller under Clients Control, connecting devices, QR-code pairing, sending registration from the check-in screen, and the guest-side registration flow.
2. Set UI E-Register
This task prepares the web UI that runs on the E-Register device.
To perform the task:
-
Create a subdomain for the E-Register UI.
-
Deploy the UI on an IIS server.
3. Set Device & Controller
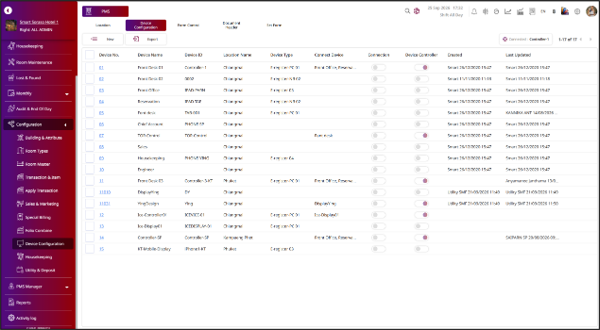
Available under PMS > Clients Control, this page lists all registered devices and lets staff review and set up the machine that will act as the Controller for E-Register.
To perform the task:
-
Go to PMS > Clients Control.
-
Open the Client Control tab to view all devices.
-
Review the Device No., Device Name, Device ID, Location, Device Type, Connection and Device Controller columns.
-
Press New to add a device, or Export to export the device list.
4. Create Device Controller
Available under Clients Control > New (Device Configuration), this function creates the device that acts as the E-Register Controller. The Device Controller status must be turned on.
To perform the task:
-
Press New to open Device Configuration.
-
Enter Device Name and Device ID.
-
Select Location and the Connect Device list (e.g. Front Office, Reservation).
-
Enter Working Location, MAC Address, Building Name and the Floor range.
-
Turn on the Device Controller status.
-
Press Save.
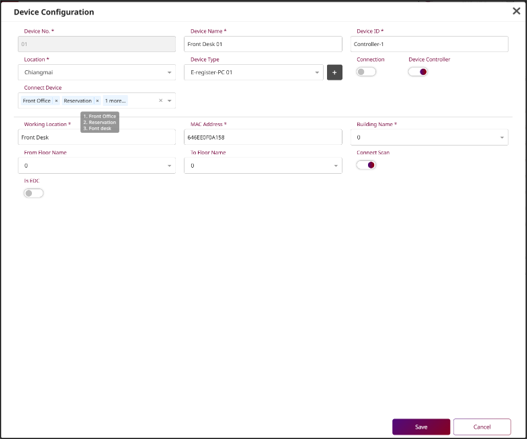
Note: The Device Controller toggle must be enabled, otherwise the device cannot serve as an E-Register controller.
5. Connect Controller
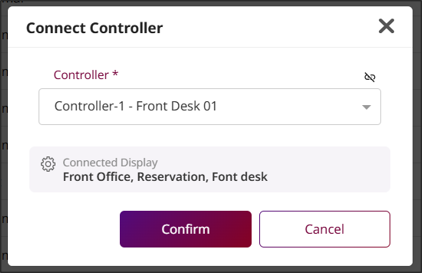
Available under Clients Control > Device Configuration, this function connects a device to the Controller that was created.
To perform the task:
-
Open Device Configuration.
-
Select the device to connect.
-
In the Connect Controller dialog, choose the Controller (e.g. Controller-SP).
-
Review the Connected Display (e.g. Front Office, Reservation, AR, Housekeeping).
-
Press Confirm.
6. Connect Device via QR Code
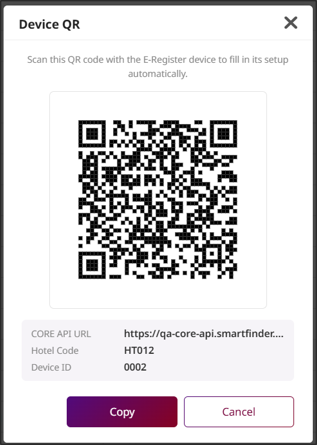
Available under Clients Control, a device can be paired by scanning a QR code, which auto-fills the setup on the E-Register device.
To perform the task:
-
In Client Control, select the device.
-
Press Device QR.
-
On the E-Register device, scan the QR code to auto-fill the setup (CORE API URL, Hotel Code, Device ID).
-
Or press Copy to copy the connection details.
7. Send Guest Registration to E-Register Device
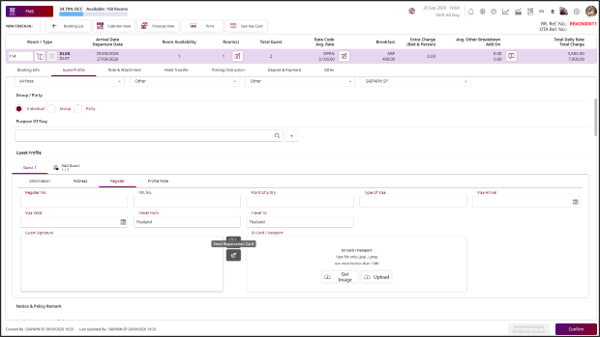
Available under Reservation > Check-in > Guest Profile, this function allows staff to send a guest’s registration to an E-Register device during check-in.
To perform the task:
-
Press Check In on the booking.
-
Go to Guest Profile > Register.
-
Press Send to push the registration to the E-Register device.
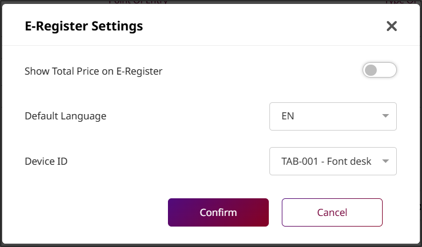
- In E-Register Settings, set Show Total Price, Default Language and Device ID, then press Confirm.
8. Guest Consent (Information Required for Your Stay)
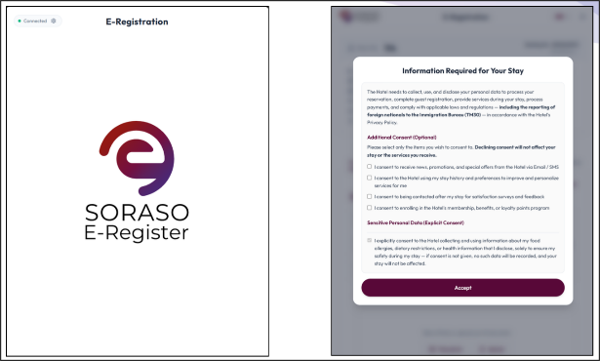
On the E-Register device, the guest reviews the required data-collection notice and consents before registering. The notice covers PDPA processing and TM30 reporting of foreign nationals, optional marketing consent, and explicit consent for sensitive personal data.
To perform the task:
-
The E-Register device shows Connected status on the SORASO E-Register screen.
-
The guest reviews “Information Required for Your Stay”.
-
The guest selects any optional Additional Consent items.
-
The guest gives explicit consent for Sensitive Personal Data if applicable.
-
The guest taps Accept.
9. Guest Registration & Pre-Check-in
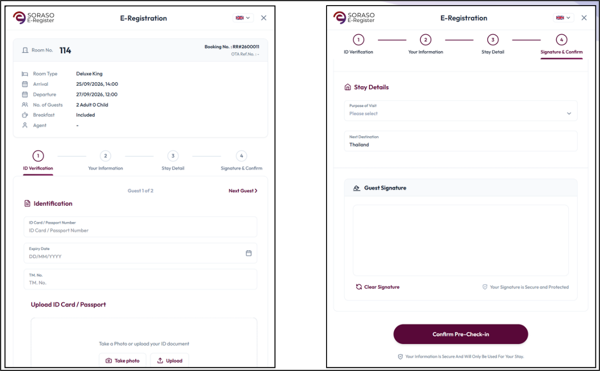
The guest completes the four-step registration on the E-Register device: ID Verification, Your Information, Stay Detail and Signature & Confirm.
To perform the task:
-
Step 1 – ID Verification: enter ID / Passport number, expiry date, TM No., and upload or take a photo of the ID.
-
Step 2 – Your Information: fill in the guest details.
-
Step 3 – Stay Detail: select Purpose of Visit and Next Destination.
-
Step 4 – Signature & Confirm: sign, then tap Confirm Pre-Check-in.